This post may contain affiliate links. Read my privacy policy.
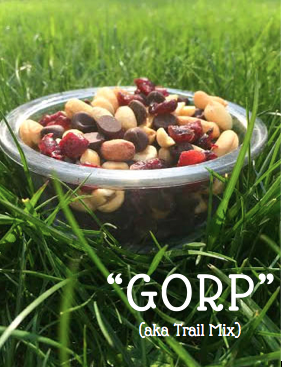
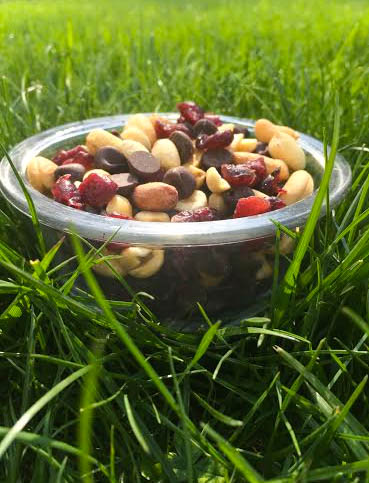
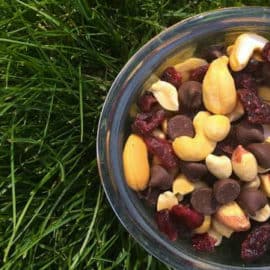
Skip the packaged trail mix where there are often a laundry list of ingredients and just make it yourself! Try this simple DIY trail mix which is perfect to bring on your next hike or as a grab and go snack!
This month has been quite hectic. Work has been busier than ever, Adrain (the bf) is moving, and now I am a day late for the Recipe ReDux monthly recipe. Ahh.. life!
Adrain is moving to south jersey to start Physical Therapy school, so this week has been packing and moving. I am currently sitting on the new couch (that I assembled), sipping on coffee, and writing this post in his new apartment.
Unfortunately, I am not moving here right now. I’m not going to lie, it sucks. From going to seeing each other every day, to only once a week, is going to be a big adjustment. Fortunately, I’m only in north jersey so it’s only about 2+ hours of a trip, which I will finagle getting here as much as I can.
A few weeks ago, we went hiking at the Delaware Water Gap on the Mount Tammany, Dunnfield Creek trail. Adrain is a hiking guru and did a bunch of big hiking trips in college. Also, the website linked is awesome. It has a detailed description and pictures of exactly what your hike will be like and where to go. The guy who writes this blog and his hiking pal (his pup!) have gone on hiking trails nationwide, so definitely check it out for your next hiking trip.
Trail mix is one of the most common hiking snacks to bring because it is calorically dense and nourishing for a hike without taking up much space in your pack. I learned some hiking terminology from Adrain. Apparently true hikers call trail mix, “gorp”. Fun fact!
I never buy trail mix from the store. 1) because I enjoy making my own flavor combinations. 2) because in a pre-packaged trail mix there are typically overly salted nuts, sweetened fruit, and other weird ingredients.
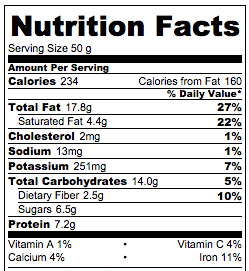
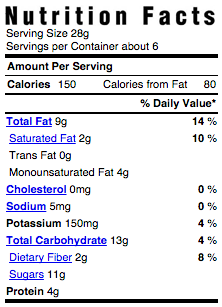
Let’s compare my trail mix with a store bought trail mix:
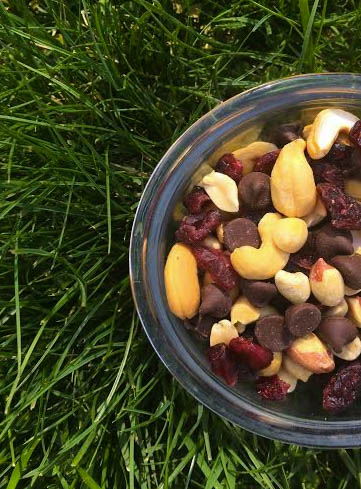
My DIY trail mix: 4 ingredients
Pre-packaged trail mix: laundry list of (and artificial) ingredients, more sugar, less protein
Ingredients: PEANUTS, CHOCOLATE CANDY PIECES [MILK CHOCOLATE (SUGAR, COCOA BUTTER, MILK, CHOCOLATE, LACTOSE, SOY LECITHIN–EMULSIFIER, VANILLIN–ARTIFICIAL FLAVOR), SUGAR, ARTIFICIAL COLOR (INCLUDES YELLOW 5 LAKE, YELLOW 6, BLUE 1 LAKE, RED 40 LAKE), GUM ARABIC, CORN SYRUP, CARNAUBA WAX, BEESWAX, CONFECTIONER’S GLAZE], RAISINS, ALMONDS, COTTONSEED OIL.
This post may contain affiliate links. Read my privacy policy.
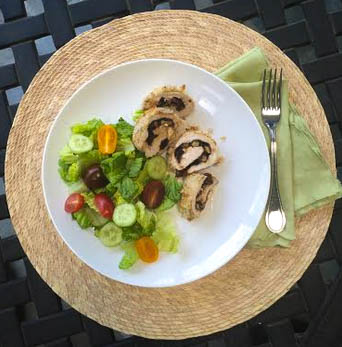
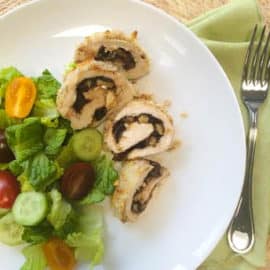
Balsamic stuffed chicken is an easy dinner idea that is ready in 45 minutes from start to finish that is bursting with flavor!
Disclosure: By posting this recipe I am entering a recipe contest sponsored by California Dried Plum Board and am eligible to win prizes associated with the contest. I was not compensated for my time.
Did you know May is National Osteoporosis Month? While you may automatically think of calcium, vitamin D, mainly found in dairy products for bone health, dried plums also have an array of health benefits.
Why We Are Using Prunes
Let’s be honest, dried plums, aka “prunes” get a bad reputation, but they are so versatile and great to add into your diet for its health benefits.
Emerging research suggests that dried plums support healthy bones, and may support heart health, digestive health, immunity and healthy aging. One serving (4-5 dried plums) is less than 100 calories. Plus, each serving provides 3 grams of fiber, 293 mg of potassium, 16 mg of magnesium, and more vitamin K than any other fresh or dried fruit.
I like dried plums as a snack, just as is, but they also can really up your game in the kitchen. Dried plums can serve as a substitute for fats or sugars to reduce calories in a baked good recipe. You can toss them on a salad or mix in to your yogurt for an extra nutritional boost.
The way I am using them today, is to add moisture to this chicken dish, while mixing it’s naturally sweet flavor with other savory ingredients.
Ingredients Needed
boneless, skinless chicken breasts – you will need 4 that are 4 ounces each.
salt and pepper – to taste
California Dried Plums – also known as prunes
balsamic vinegar – gives this easy chicken recipe a ton of flavor
walnuts – if desired, you can swap for pecans, almonds, or pistachios.
feta cheese – mozzarella cheese would also taste good!
dijon mustard
panko breadcrumbs
How to Make Stuffed Balsamic Chicken
Spray a baking dish with non-stick cooking spray and preheat the oven to 350 degrees.
Add the dried plums and balsamic vinegar to a small bowl and let them soak for at least 5 minutes.
Place the chicken in between 2 pieces of plastic wrap and flatten using a rolling pin or meat mallet. Season both sides with salt and pepper.
Blend the balsamic mixer in a food process until it’s turns to a paste. If needed, add a couple of drops of water.
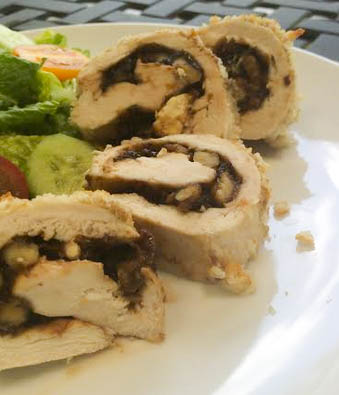
Spread the plum mixture over one side of each chicken breast. Sprinkle the feta and crushed walnuts on top.
Roll the chicken pieces and secure with toothpicks so the filling doesn’t fall out.
Brush the chicken roll ups with dijon mustard and coat with the panko breadcrumbs.
Bake for 25-30 minutes. Remove from the oven, take the toothpicks out and slice crosswise before serving.
Tips for Making
Try to pound the chicken so it’s even in thickness.
To make these ahead of time, follow the same instructions. Once they are rolled, cover in an airtight container. When ready, pop them in the oven and bake. We recommend only making these 24 hours in advance.
You can use this same method and stuff the chicken with your other favorite ingredients, such as spinach, cherry tomatoes, and mozzarella (caprese).
To make sure the chicken is fully cooked, use a meat thermometer. The internal temperature should be at least 165 degrees.
Can I Use Chicken Thighs Instead?
Sometimes you can swap breast for thighs, but since we are going to be rolling the chicken up, the breasts work better.
Do You Have to Roll the Chicken?
Some prefer to make “pockets” out of the chicken verus using a meat mallet. While they may be a little easier, pounding the chicken also helps to tenderize it. We also like the ratio of chicken to filling by using this method compared to the pocket.
Serving Suggestions
This meal goes great with just about any side dish, but here are a few of our favorites.
The key is marinating and using a liquid that is somewhat acidic to help tenderize the chicken.
How long does raw stuffed chicken last in the fridge?
We recommending only prepping stuffed chicken 24 hours in advanced. Depending on the filling, it can get soggy. Also, we do not want the chicken to spoil before it’s time to cook.
Liven up your weeknight chicken dinner with dried plums to add a boost of flavor with a boost of nutritional benefits.
Ingredients
Scale
4 (4 ounce) pieces skinless chicken breasts
salt and pepper
3/4 cup California Dried Plums
1/4 cup balsamic vinegar
1/3 cup walnuts, finely chopped
1/4 cup feta cheese
2 tbsp dijon mustard
1/2 cup panko breadcrumbs
Instructions
Preheat oven to 350 degrees F. Coat a baking dish with cooking spray.
In a small bowl add the California Dried Plums and balsamic vinegar and set aside to soak for at least 5 minutes.
Place chicken breasts between 2 sheets of plastic wrap, and flatten out, using a meat mallet, or rolling pin. Season each side with salt and pepper.
In a blender or food processor, blend the dried plums and balsamic vinegar, until it turns into a paste like consistency. (Add a few drops of water, if needed)
Evenly spread the plum mixture over one side of each chicken breasts. Sprinkle walnuts and feta cheese on top.
Roll chicken (in a jelly roll fashion) gently without letting the filling spill out. Secure chicken with wooden toothpicks.
Brush each chicken roll up with dijon mustard and and coat with panko breadcrumbs.
Bake in the oven for 25-30 minutes. Remove from oven and remove wooden toothpicks. Slice chicken breasts crosswise and serve.
This post may contain affiliate links. Read my privacy policy.
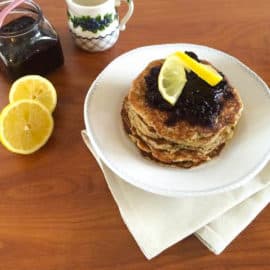
I get excited for every first of the month when I get to check in with Recipe ReDux to see the month’s recipe challenge. Each month Recipe ReDux-ers get challenged to create something new in the kitchen based on the monthly theme. I like that it gives me a little boost to think outside of the box.I am all about weekend brunches lately. When I have a weekend day off, I treasure the mornings that I get to sleep in and leisurely make breakfast as I catch up on my shows.
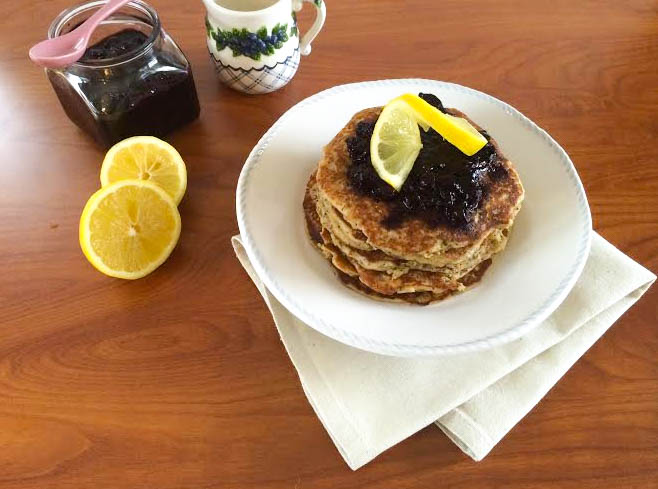
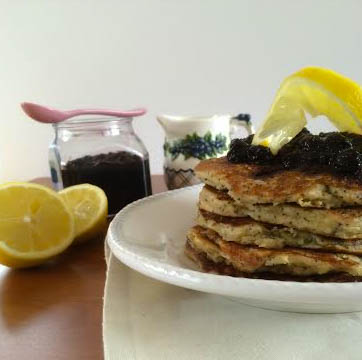
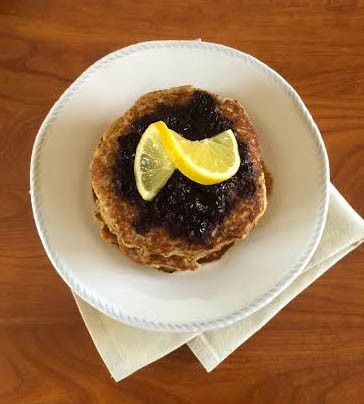
I don’t know about you, but making pancakes during the week will never happen. I rely on my overnight oats or smoothie recipes to get me out the door on time. Brunch on the weekend is a treat! Believe it or not, I used to not like pancakes. Weird, right? My bf went through a pancake phase and he would make them a couple times a week. He makes his pancakes with chocolate chips, so naturally I had to steal a few bites. He must be the pancake master, because I was hooked. This past Sunday morning, was the perfect time to incorporate this month’s Recipe ReDux theme to “spring clean” and go through your pantry, cupboards, freezer, or fridge to see what ‘treasures’ you can find to give it a little extra attention. There has been this little jar of poppy seeds sitting in my pantry for awhile now. I think I bought them with the intent to make lemon poppy seed muffins. Instead of muffins, we spruced up our Sunday pancakes, to make lemon poppy seed pancakes. Topped with a blueberry chia sauce, these pancakes will definitely made again in the near future.
In a large bowl, whisk together oat flour, coconut sugar, baking powder, baking soda, salt and poppy seeds. Set aside.
In a blender, combine the cottage cheese, egg whites, lemon juice, lemon zest, and oil. Blend until smooth.
Fold wet ingredients into dry ingredients. Batter will be thick.
Spray a nonstick skillet with cooking oil and heat over medium. Drop ⅓ cup of the batter onto the well-heated pan and cook until set on one side (about 3-4 minutes) and then flip to cook on the other side (about 2-3 more minutes).
Respray the pan and reduce heat to medium-low to cook the remaining pancakes.
Top pancakes with blueberry sauce.
For the Sauce:
In a small pot over low-medium heat, add the frozen blueberries, lemon juice, lemon zest, and water.
Let simmer for about 5 minutes. Mash blueberries with the back of a fork.
Remove from heat and stir in chia seeds. Sauce will thicken as it cools.
This post may contain affiliate links. Read my privacy policy.
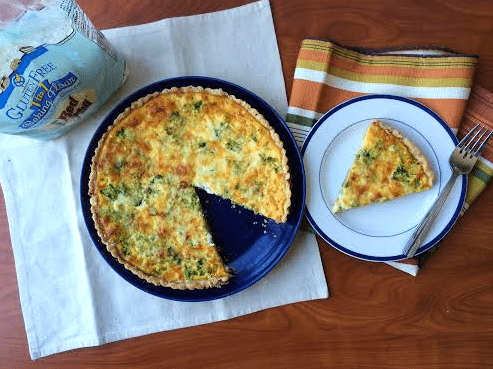
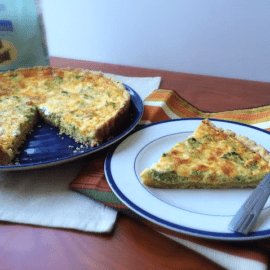
Use leftover vegetables to create a beautiful gluten free quiche, using a non-traditional pie crust recipe for a buttery and flaky crust.
It’s that time of the month again.. Recipe ReDux time!
This month, Recipe ReDux-ers were challenged to “cook once, eat twice”.
Two for One
We’re all about cooking once and eating twice. In short, double dinners are better. Show us how you take a favorite recipe already on your blog – and ReDux the leftovers into a new dish. Or, whip up a new healthy recipe and give suggestions on how to make it a second meal. For example, slow cooker pot roast could become shredded beef tacos; or grilled chicken breasts might morph into chicken salad.
I am a huge fan of leftovers and using them to create a new dish. This recipe theme came at the right time, because I had some leftover vegetables in my fridge.
Dinner at my house you will most likely see vegetables on my plate. I always like to make a big batch and use the leftovers as part as my lunch for the next day. In my fridge, I had some leftover steamed broccoli and sautéed peppers & onions from this past week’s dinners.
During the week, I tend to rely on my overnight oats or smoothies on-the-go, but on the weekend I take more time in the morning to prepare more of a brunch-style breakfast.
Of course, you can create this quiche with your favorite vegetable and cheese combination.
1 cups cooked vegetables (any variety that you like), chopped
For the crust
1/2 cup unsalted butter
1/4 cup + 1 tbsp water
1 tbsp brown sugar
1 tsp salt
1½ tbsp canola oil
1½ cups Bob’s Red Mill Gluten Free 1 to 1 baking flour
Instructions
Preheat oven to 400 degrees F.
Place butter, water, brown sugar, salt, and canola oil in a microwave safe bowl. Microwave for 1-2 minutes until butter mixture has fully melted.
Stir in the gluten free flour. Press into the bottom of a shallow pie shell. (the crust dough will still be wet.) With a fork poke a few holes at the bottom of the crust. Bake in the oven for 15 minutes.
While the crust is cooking, chop up cooked vegetables* and grate cheese*. In a medium size bowl, whisk together the eggs and milk.
When the crust is ready, add the vegetables in an even layer. Pour the eggs over the vegetables and sprinkle cheese on top.
Bake in the oven for about 30 minutes, until eggs are cooked through and cheese is golden brown on top.
Let cool for about 10 minutes before slicing. Enjoy!
* = See notes
Notes
For this recipe the cooked vegetables I used were broccoli, onion, and yellow bell pepper. The cheddar cheese used was Cabot Artisan Reserve cheddar cheese.
This post may contain affiliate links. Read my privacy policy.
I’ve mentioned time and time again here on RDelicious Kitchen about my love for chocolate. Hi my name is Julie, and I’m a chocoholic. I was overly excited for this months Recipe ReDux theme.
Favorite Chocolate Matches – Does your chocolate need a friend? This month’s posting will be after Valentine’s Day, so you may have a bit of extra chocolate around. What’s your favorite chocolate match? Be it traditional peanut butter or something more exotic like cayenne + chocolate. Show us your favorite healthy chocolate combo recipe.
You can’t go wrong with pairing chocolate with peanut butter. You can find me in the kitchen at night with a spoonful of peanut butter with chocolate chips on top. (Robin & Kylie do the same! Great minds think alike 🙂 )
Each month for for the recipe redux challenge, I make a list of recipe ideas and narrow it down, closer and closer to the due date. Yesterday, I was still figuring out what I was going to make. [#procrastination at it’s finest] I wanted to try and think outside the box, but it always came back to my favorite: chocolate + peanut butter.
I actually made a rendition of this recipe with just chocolate for a valentine’s day event at work, so I know it’s a crowd pleaser. The one thing that shocked people the most is one of the ingredients .. TOFU! It mades the mousse light and airy, plus packs in protein for a dessert recipe!
This post may contain affiliate links. Read my privacy policy.
Looking for a healthy snack to power you through the afternoon? You’ve come to the right place. These full of flavor homemade PB & J Bites are similar to the store bought Larabars. Careful, they are addicting
When I was younger a peanut butter & jelly sandwich was frequently found in my lunch box for school. Now, I am a working gal in my 20’s and I still pack a peanut butter & jelly sandwich for lunch sometimes. I must say though, I am much more selective of the type of bread, peanut butter, and jelly I use.
Homemade larabars turned into little bites. Perfect for on the go and healthy snacking.
Ingredients
Scale
1/3 cup roasted peanuts (unsalted)
1/3 cup dried cherries (unsweetened)
2 cups pitted dates
1 tbsp cinnamon
Instructions
Place nuts in food processor and pulse until finely ground.
Add in dates, cherries and cinnamon. Pulse until a clump forms in the processor.
Take out the mixture and either wrap in plastic wrap and refrigerate for 30 min to harden, or you can start making your bites right out of the food processor.
Form into 30 small balls. Wrap them with plastic wrap and put in fridge for later snacking.
Recipe Card powered by
I determined a theory in college if snacks were good on-the-go kind of snacks. It was called the “backpack test”. If my snack managed to be still okay by the afternoon getting jostled around my backpack all morning and getting smushed between books then it passed. I’ve made these plenty of times in college because these PB&J Bites passed the “backpack test” with flying colors. Now it’s not so much the “backpack test” but more of a “giant professional bag turned into everyday bag turned into everything I ever need” kind of bag! haha 🙂
In Good Health,
Enjoy the rest of the bites and bars recipes other Recipe ReDuxers have made 🙂
This post may contain affiliate links. Read my privacy policy.
I am the first to admit… I am a chocoholic. Every single night I need just a little bit of chocolate or I am just not satisfied. Sometimes it’s a square of Dove chocolate, a few chocolate chips, a glass of chocolate almond milk, or a chocolate chip cookie. I can’t remember the last day where I didn’t a little chocolate.
The first thing I thought of when I saw this month’s theme for Recipe ReDux, I was going to make something with chocolate! This month the Recipe ReDux theme was a “Spirited ReDux” – Show us how you like to cook, bake, or mix-it-up with spirits, extracts, and other alcohols. Booze & chocolate.. I’m in.
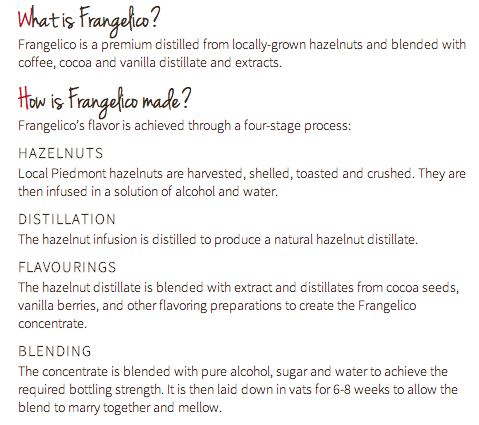
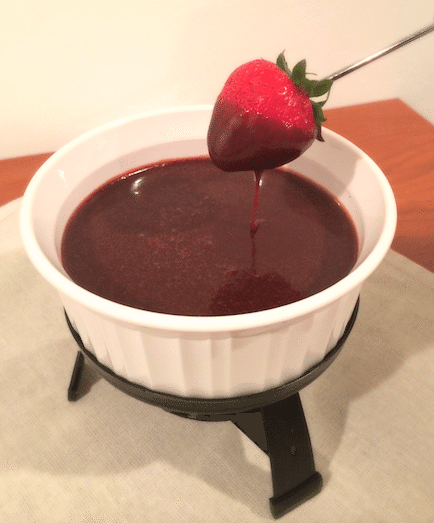
The star of the show is Frangelico. I knew Frangelico was a hazelnut liqueur, but I had to do a little research to find out more.
Since the Frangelico is so sweet I went with a dark chocolate to balance the flavors. Plus, dark chocolate has health benefits. Consuming a little dark chocolate daily has been shown to reduce risk of heart disease. So my chocolate addiction every night is not so bad after all! The key is moderation.
My absolute favorite thing to dip in chocolate fondue are strawberries! Go crazy and try all sorts of fruits with this recipe.
So the key to my chocoholic tendencies is moderation and balance. This is a perfect recipe for a little fondue to share, plus adding fruit to dessert is a nice balance.
Add a little kick to your chocolate fondue with a little Frangelico! This recipe is perfect for a little indulgence for date night.
Ingredients
Scale
4 ounces dark chocolate
2 tbsp heavy cream
1 tbsp Frangelico
Strawberries + other fruit for dipping
Instructions
Combine chocolate and cream in a medium bowl. Bring a small pot of water to a simmer over medium-low heat, then reduce heat to low. Set the bowl of chocolate over the pot, to create a double boiler, making sure the water does not touch the bowl. Stir frequently until all the chocolate is melted. Remove from heat and stir in liqueur.
Transfer the chocolate to a fondue pot and keep warm over low heat or a low flame. Alternately, transfer to a small serving bowl. Serve immediately with strawberries and other fruits for dipping.
It’s that time of month for the Recipe ReDux theme recipe! What were all the Recipe Redux-ers up to this month? A Play on Patties: While St. Patty’s Day will be over by the time The Recipe ReDux rolls around this month,we’re celebrating the ‘patty’ all month long. We’ve seen images of stacked patties go crazy on food photo sharing sites like HealthyAperture.com; so stack ‘em up! Think healthy tuna burgers, potato patties, or veggie stacks.
Honestly, right now I have been so busy, I just remembered tonight about Recipe ReDux. It’s quite alright because I has just the ingredients I needed to whip up a tasty “patty”.
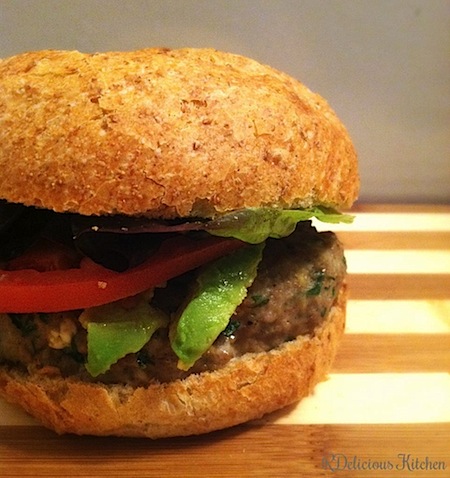
Spinach & Feta Turkey Burger
Makes 4 patties
Ingredients: 1 pound ground turkey breast 2 cups spinach, chopped 1/3 cup feta cheese 1/3 cup panko 1 egg salt & pepper
Directions:
1. Preheat the oven to 350 degrees F.
2. In a large bowl, combine the turkey, spinach, feta cheese, panko, egg, salt, & pepper until all ingredients aredistributed throughout the turkey.
3. Form turkey into 6 patties.
4. Spray a large pan with cooking spray and put over medium-high heat. Add the turkey burgers to the pan to sear both sides. Transfer the burgers to a baking sheet and cook in the oven for another 5-10 minutes until cooked through.
5. Assemble you burger on a whole wheat bun and healthy toppings.
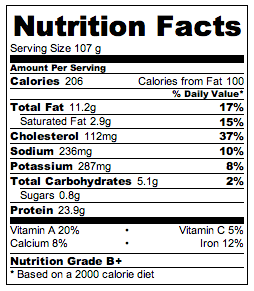
(nutrition facts based on calorie count)
Enjoy!
Look what the other Recipe ReDux members made this month:
Growing up, every Friday night was pizza night. I kept that tradition going even when I went off to college. My roommates and I would make pizza together with all different topping combos. My favorite is topping pizza with a variety of veggies! I was excited for this month’s Recipe ReDux theme of Pizza Party! I made this pizza Friday night with my boyfriend. It’s safe to say that is pizza is awesome considering it was devoured.
Try this simple recipe for a healthy whole wheat pizza crust! Top your pizza with this healthy combo or create a new version with your favorite pizza toppings.
Whole Wheat Pizza with Veggies and Feta
Makes 1 medium pizza, 8 slices
Ingredients:
Whole Wheat Pizza Crust:
2 1/2 cups whole wheat flour
1 packet yeast
3/4 tsp salt
1 cup warm water
1 tbsp olive oil
1 tbsp sugar
Pizza Toppings:
1 tbsp olive oil
1 tbsp garlic, minced
1 cup part skim mozzarella cheese
2 cups spinach, roughly chopped
1 cup mushrooms, sliced
1/2 cup red onion. sliced
3/4 cup sliced plum tomatoes
1/2 cup feta cheese
Directions:
1. Combine yeast, water, and 1 tsp sugar. Set aside and let sit for 5 minutes
2. In a stand mixer combine, 2 cups flour, salt, the rest of the sugar. Make a well in center and add the olive oil and yeast mixture.
3. Using the paddle on the stand mixer, mix ingredients until just combined. Then, switch to the dough hook and work for the dough for another 4-5 minutes. Add the remaining flour slowly until combined and until the dough starts to pull away from the side of the bowl.
4. Transfer the dough to a bowl lightly greased with cooking spray. Cover lightly with plastic wrap. Let the dough rise for about 45 minutes to 1 hour (dough should double in size).
5. Once the dough has risen, punch down the center of the dough. Lightly flour the pizza stone. Roll out the dough evenly. Let it rest for 10 minutes. Preheat the oven to 500 degrees F.
6. Brush the dough with olive oil and garlic. Start assembling the toppings with half the mozzarella cheese, spinach, mushrooms, onion, remaining mozzarella cheese, feta cheese, and tomato.
7. Put the pizza in the oven and lower the temperature to 425 degrees F. Bake for about 15 minutes or until crust is golden brown and cheese has melted.
Look at those layers of toppings!
(nutrition facts based on calorie count – per slice)
Enjoy!
Check out the other Recipe ReDux Pizza Party posts:
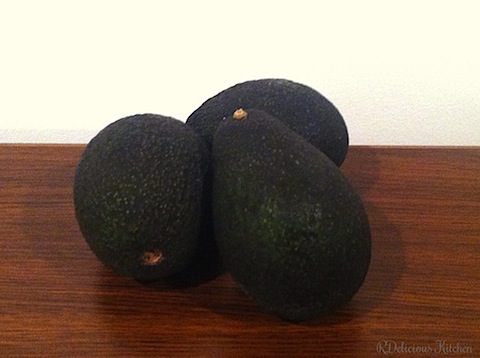
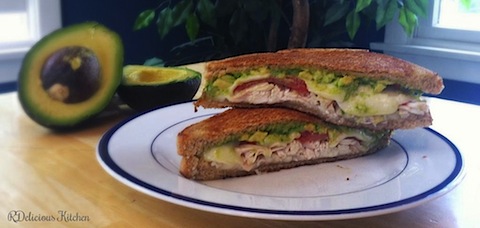
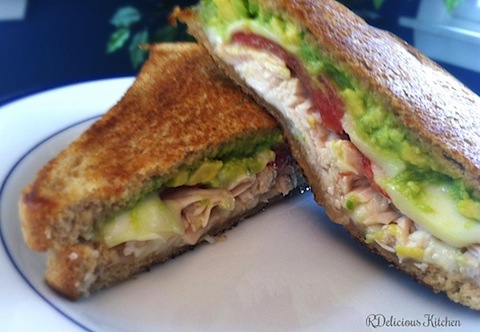
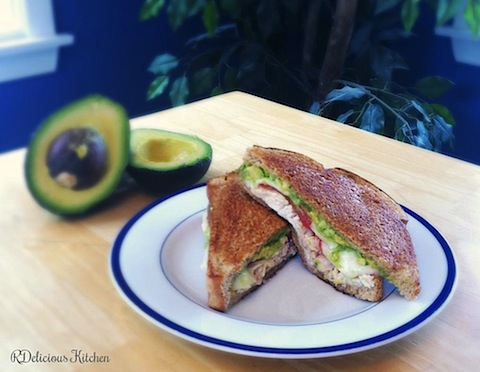
Disclosure: By posting this recipe I am entering a recipe contest sponsored by the California Avocado Commission and am eligible to win prizes associated with the contest. I was not compensated for my time.
Ultimate Chicken Avocado Grilled Cheese Makes 1 sandwich
Ingredients: 2 slices whole wheat bread
2 ounces cooked chicken breast, shredded 1 oz part skim mozzarella cheese, shredded 2 slices of tomato 1/4 avocado 1 tbsp light ranch dressing Directions: 1. Lightly toast the bread. (This is my secret for a perfectly crisp grilled cheese without using butter on the bread. Helps cut back on saturated fat.) 2. Mash the avocado with the ranch dressing. 3. Put a pan over medium heat. Layer the avocado and ranch mixture, tomato, chicken, and cheese between the bread. 4. Place the grilled cheese in the pan and push down on one side with a spatula. 5. Cook until each side is golden brown and the cheese has melted.
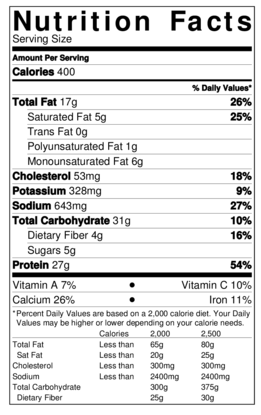
(nutrition facts based on using myfitnesspal)
Enjoy!
Check out all the other Recipe Reduxers recipe contest submissions on the link below.
FREE Ebook
Get on the list and download my free Knife Basics & Skills Ebook!
This website uses cookies to improve your experience. We'll assume you're ok with this, but you can opt-out if you wish.AcceptRejectRead More
Privacy & Cookies Policy
Privacy Overview
This website uses cookies to improve your experience while you navigate through the website. Out of these, the cookies that are categorized as necessary are stored on your browser as they are essential for the working of basic functionalities of the website. We also use third-party cookies that help us analyze and understand how you use this website. These cookies will be stored in your browser only with your consent. You also have the option to opt-out of these cookies. But opting out of some of these cookies may affect your browsing experience.
Necessary cookies are absolutely essential for the website to function properly. This category only includes cookies that ensures basic functionalities and security features of the website. These cookies do not store any personal information.
Any cookies that may not be particularly necessary for the website to function and is used specifically to collect user personal data via analytics, ads, other embedded contents are termed as non-necessary cookies. It is mandatory to procure user consent prior to running these cookies on your website.