This post may contain affiliate links. Read my privacy policy.
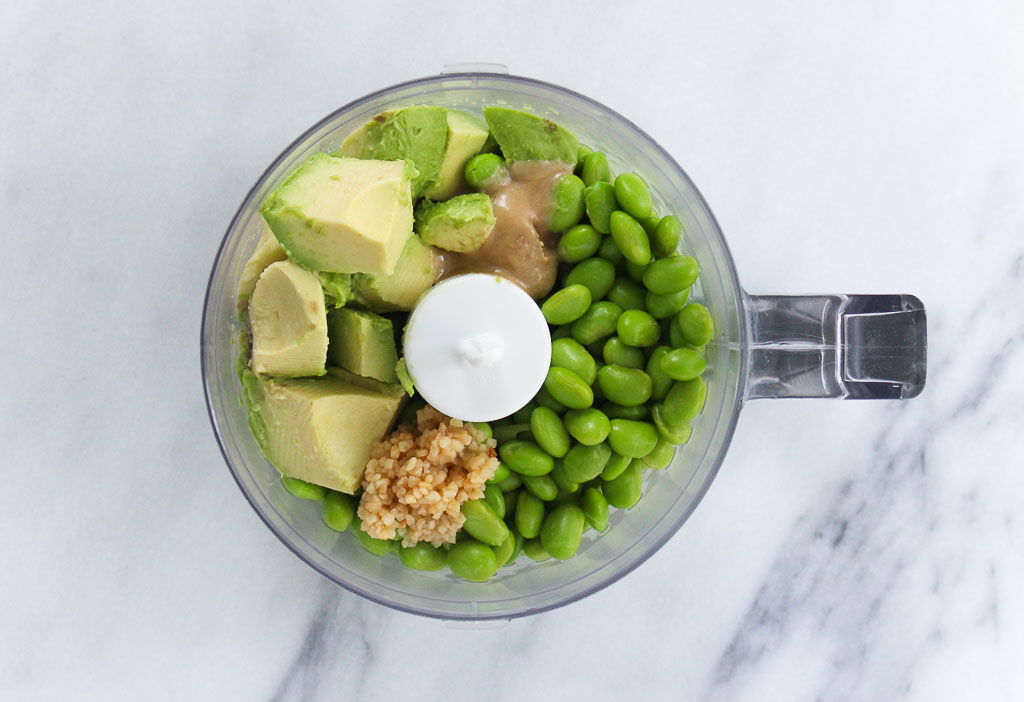
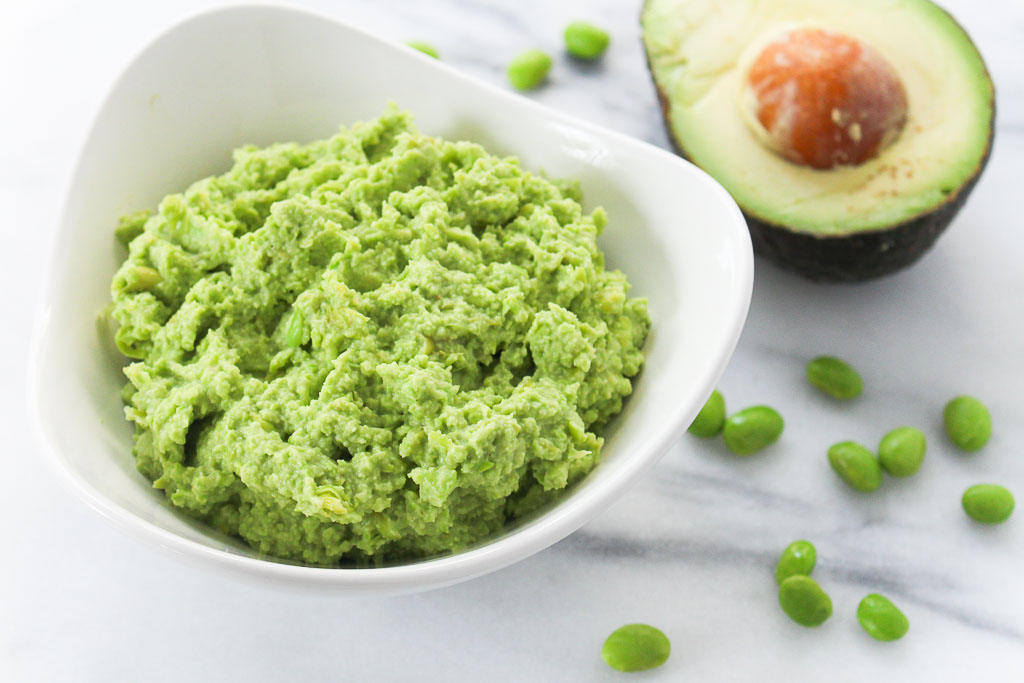
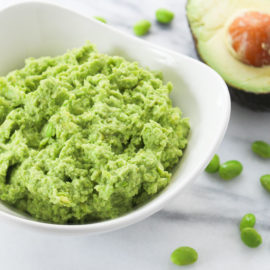
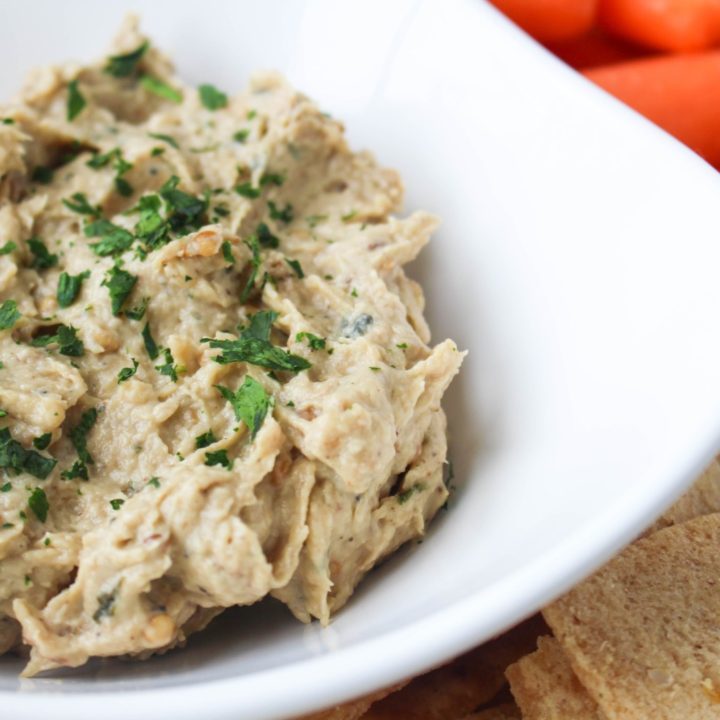
Move over chickpea hummus. There’s a new hummus in town – Edamame Avocado Hummus.
I recently did a presentation about smart snacking. One thing I like to mention about smart snacking is to opt for real food first. Snacking is an opportunity for nourishment.
Yes, grabbing a bar is quick (some bars do pack in great nutritional value), but really think about your snacks throughout the day. How many of them are real food vs. processed foods?
I’ve been challenging myself to include more veggies into my snacks. I go through snacking phases, and raw veggies have fallen out of my routine a little bit.
Snacking is more fun when you are dunking. I love dunking my veggies into hummus, but I decided to switch it up a bit and use edamame as the base instead of chickpeas. Edamame, a plant-based protein is a young soybean that has been harvested before the beans have had a chance to harden.
Adding avocado to the edamame helps make this dip creamy. Avocados can act as a booster to help your body absorb fat-soluble nutrients from the foods eaten with them, like vitamin A. Vitamin A foods, like carrots, contain carotenoids, which not only promote healthy skin but benefit the heart and immune system as well. This vitamin is a potent antioxidant that protects the skin from free radicals. So, pair carrot sticks with this delicious dip!
This post may contain affiliate links. Read my privacy policy.
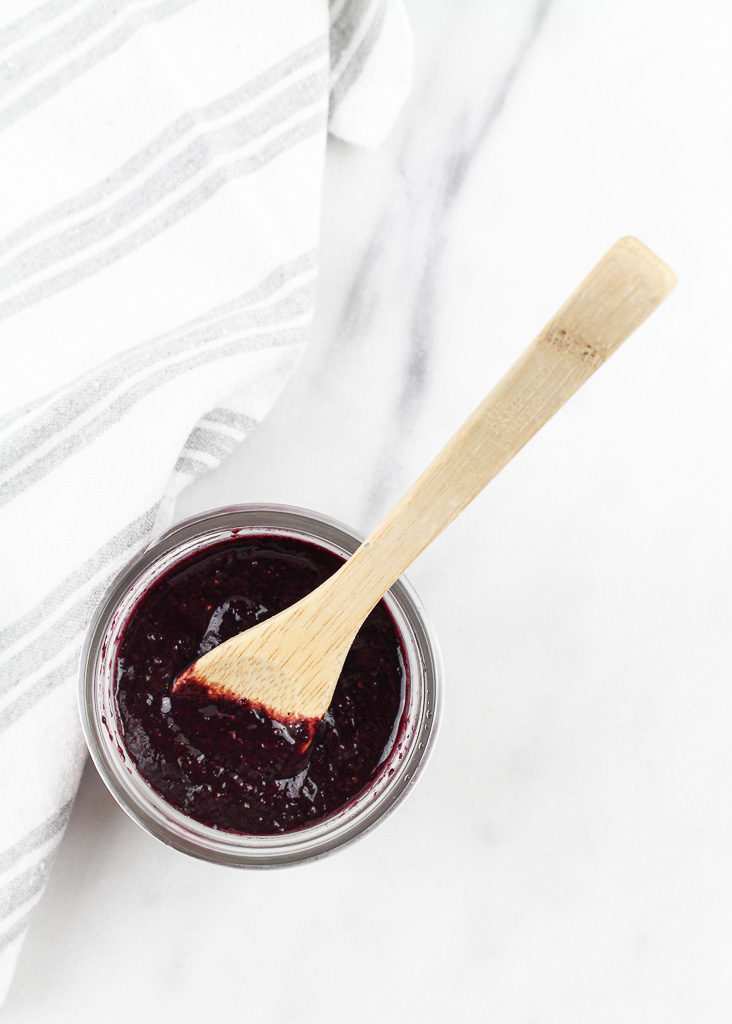
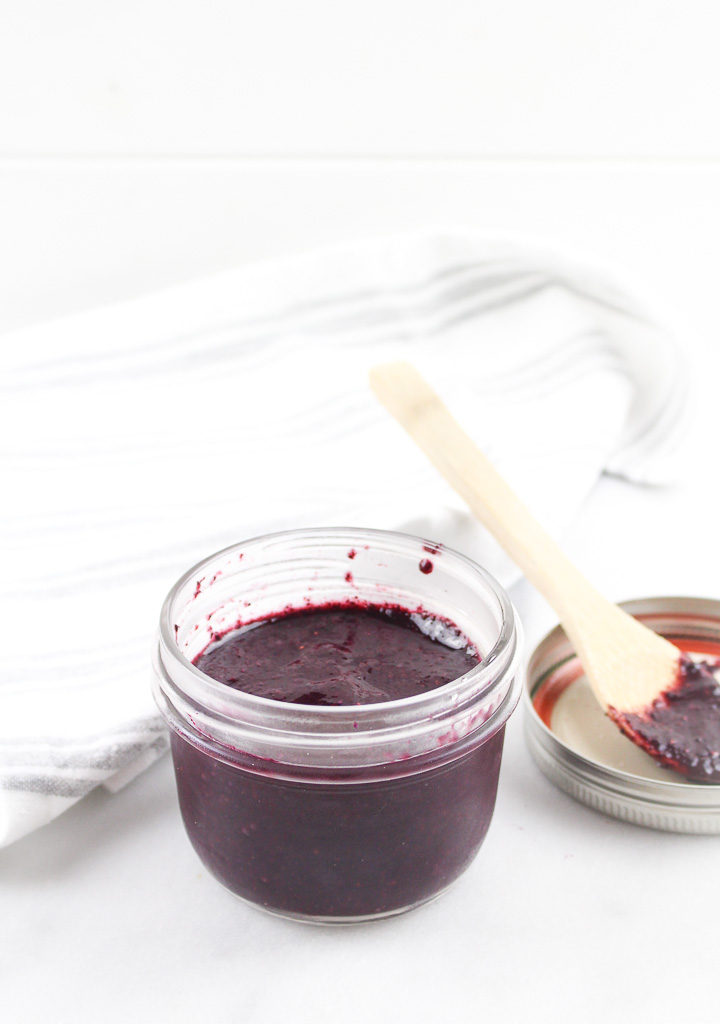
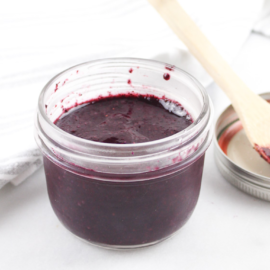
This Blueberry Chia Jam has now become a staple in my refrigerator. With just four simple ingredients you have a delicious and flavorful jam without excess sugar. Mix and match or combine different berries for a variety of flavor combinations.
HOW TO MAKE CHIA JAM
You might see a few variations of chia jam recipes floating around the internet, but after testing this recipe a few times, here are some tips I’ve gathered.
STOVETOP METHOD
Simply heat frozen berries and water over low-medium heat and gently simmer for the berries to defrost and their natural sugars begin to breakdown. Avoid using high heat as the berries will not defrost evenly and the natural sugars of the berries will scorch the bottom of your pan.
Using a potato masher or the back of a fork, mash the blueberries so they burst. The jam may look still very liquidy at this point. Remove from heat and stir in the vanilla extract, chia seeds, and sweetener, if using. The chia seeds thicken the jam as it rests and begins to cool.
MASHED VS. BLENDED
Simply leave the jam as is, mashed and chia seeds fully intact if you enjoy the texture and a chunkier jam. Or opt for a smoother consistency and pulse in a food processor or blender until you reach the desired consistency.
HEALTH BENEFITS OF WILD BLUEBERRIES
All blueberries are not alike! By nature, wild ones have a more intense flavor, deeper blue color, and 2x the antioxidants than their regular cultivated blueberries.
Ever wonder why you can only find wild blueberries in the frozen department? Wild Blueberries are frozen fresh within 24 hours of harvest when their flavor and antioxidant goodness are at their peak. In fact, tiny, potent wild ones contain less water than regular blueberries, so they freeze better than ordinary, larger blueberries.
FLAVOR VARIATIONS
Utilize this recipe as the base and mix and match with other berries or berry combinations. Try a mixed berry combination using blueberries, strawberries, and raspberries or go for a bold combination of a mixture of cherries and blackberries. Thinking about going tropical and using pineapple or mango? I would recommend using white chia seeds vs. black chia seeds.
ADJUST FOR SWEETNESS
This is a much lower sugar jam than those found on the grocery store shelves. Highlighting the fruits natural sugars is the star of this recipe, but an optional sweetener can be added in if desired.
HOW TO USE CHIA JAM
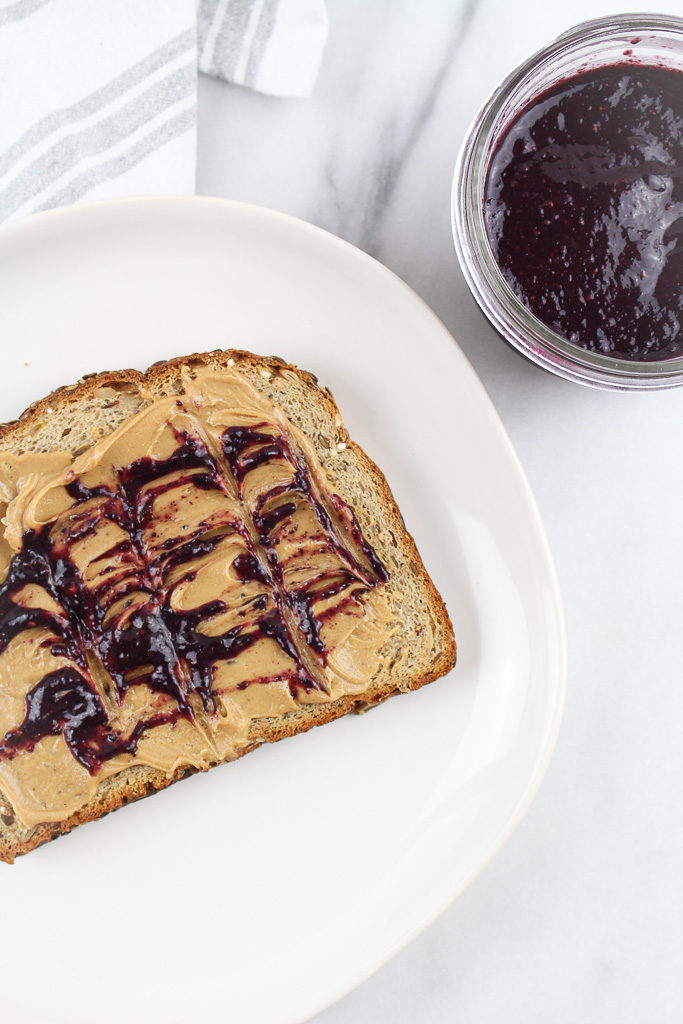
Use this jam anywhere you would typically use any jam or jelly. Spread on toast, top on oatmeal, or swirl into yogurt.
A few simple ingredients and you can whip up this jam in no time. Mix and match with different berries for a variety of flavors.
Ingredients
Scale
1 cup frozen wild blueberries 1/2 cup water 1/4 teaspoon vanilla extract 1 1/2 tablespoons chia seeds optional sweetener: 1 tablespoon maple syrup or sugar
Instructions
Add frozen blueberries to a small saucepan and heat over low-medium heat, stirring occasionally. Once the berries have thawed and started to break down, use a fork or potato masher to break them down further.
Stir in vanilla extract, chia seeds, and sweetener of choice, if using. Remove from heat and allow jam to cool and thicken for about 5-10 minutes.
Spoon into a mason jar as is and store in the refrigerator. (Alternative method: Add jam to a food processor or blender and puree until desired consistency is reached. Spoon into a mason jar and store in the refrigerator.
This post may contain affiliate links. Read my privacy policy.
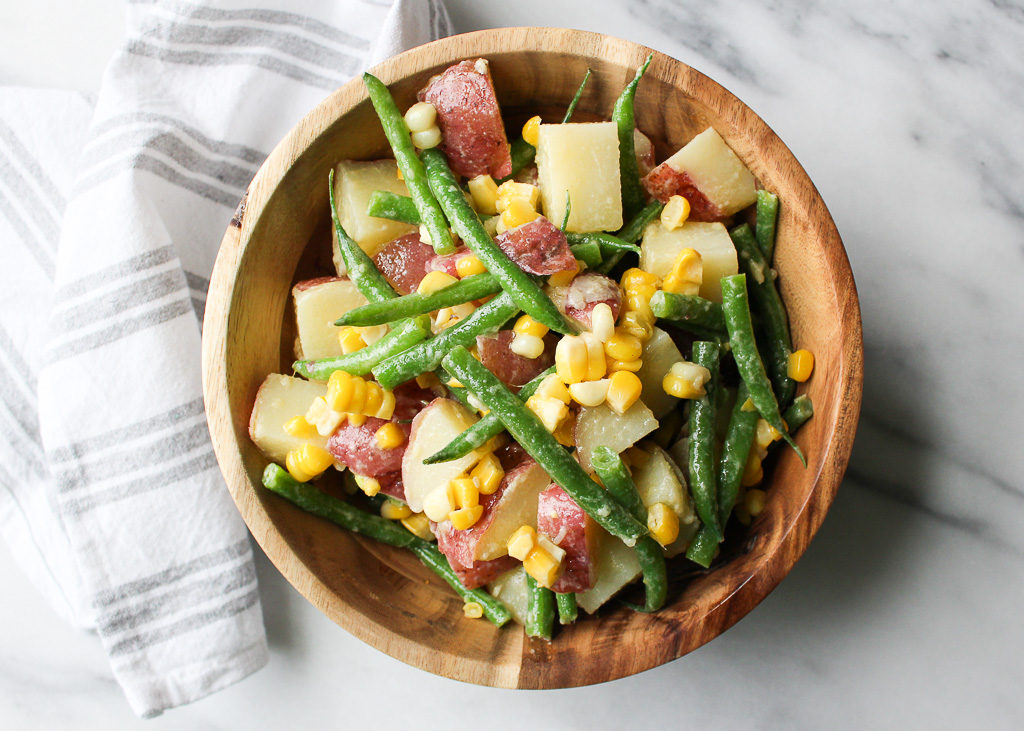
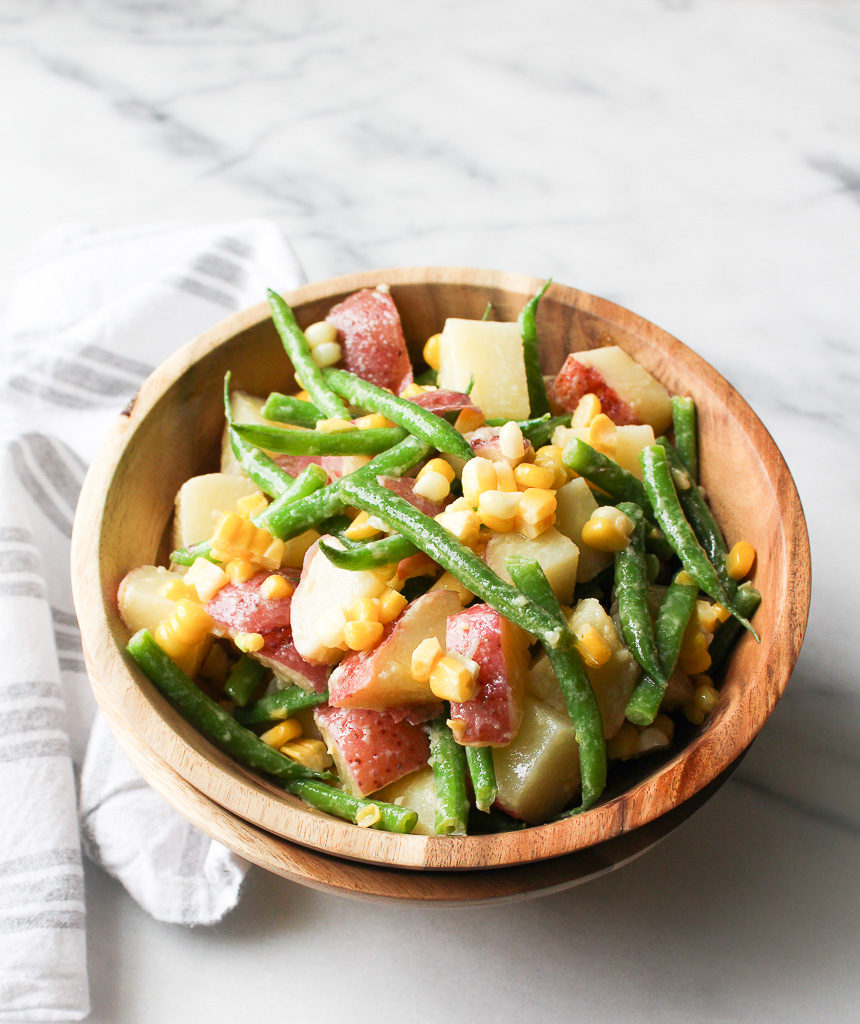
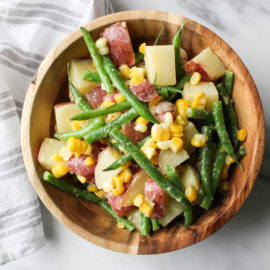
Gearing up for picnics and barbecues this summer? Add this Green Bean Potato Salad to the menu.
One of my jobs during summers at college, I was working at this outdoor catering company, where we prepared food on-site at graduation parties, barbecues, picnics, etc. When working in catering, you have to prepare recipes in large quantities to feed the masses. One of my least favorite things to prepare is the potato salad.
Traditional potato salad is dressed with mayonnaise. That is one condiment that I just never enjoyed. Now, just imagine preparing potato salad for 100+ people at one time. The amount of mayo I had to scoop daily was unreal.
Since I don’t personally enjoy mayonnaise, I wanted to create a non-mayo based dressing for potato salad with an added twist by adding green beans and corn. Don’t be afraid to switch up a classic and bring something new to the table, like this Green Bean Potato Salad.
Why use red bliss potatoes for this Green Bean Potato Salad
Red potatoes have smooth thin skin. Its skin is edible, so it’s not necessary to peel or remove it after cooking. Like many waxy varieties, red potatoes are low in starch and won’t produce a light, fluffy texture. They are best used for boiling and roasting and work well in dishes that would benefit from a potato that holds its shape, even when sliced and diced, like for this Green Bean Potato Salad.
Health benefits of potatoes
Poor potatoes have a bad reputation in some people’s eyes. “Oh, I can’t eat potatoes because they are too starchy” Yes, potatoes are starchy because they are carbohydrates and carbohydrates give us energy. Also, there are many nutritional benefits that potatoes provide our bodies. They are high in potassium, vitamin B6, and vitamin C. When enjoyed in moderation and prepared in a healthy way, potatoes can be a nutritious addition to your diet.
Culinary term: blanching & shocking
The word blanch refers to a cooking technique in which food is briefly immersed in steam or boiling water, usually followed by shocking, which is rapidly cooling the food in an ice bath or with cold air.
When you blanch food for the right amount of time it helps maintain flavor, color, texture, and nutritional value. No one wants limp and soggy green beans.
1 pound red bliss potatoes 2 ears of corn, shucked 1 pound French green beans, cut in half 1 lemon, juiced (or 2 tablespoons lemon juice) 2 tablespoons Dijon mustard 1/4 cup olive oil salt and pepper, to taste
Instructions
In a large pot add potatoes. Fill with water and bring to a boil and season with salt. Cook potatoes until fork tender, about 20 minutes (depending on the size of your potatoes).
Using tongs, carefully remove the potatoes and let cool. Add corn to the boiling water. Cook for 10 minutes, or until corn is tender.
Using tongs, carefully remove the corn and let cool. Add the string beans to the boiling water. Cook for about 3-5 minutes, or until green beans are tender. Drain green beans and immediately put them in an ice bath to stop the cooking process. When cooled drain green beans and let dry.
When potatoes are cooled, dice into cubes. Cut corn off the cob. (see notes below for a tip to do this easily)
In a large bowl, whisk together lemon juice, Dijon mustard, and olive oil. Add potatoes, corn, and green beans. Toss to coat.
Season with salt and pepper, to taste.
Let the potato salad sit in the refrigerator for at least 30 minutes to let all the flavors marinate.
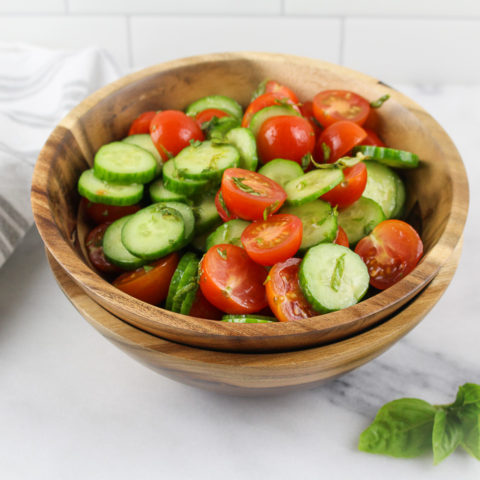
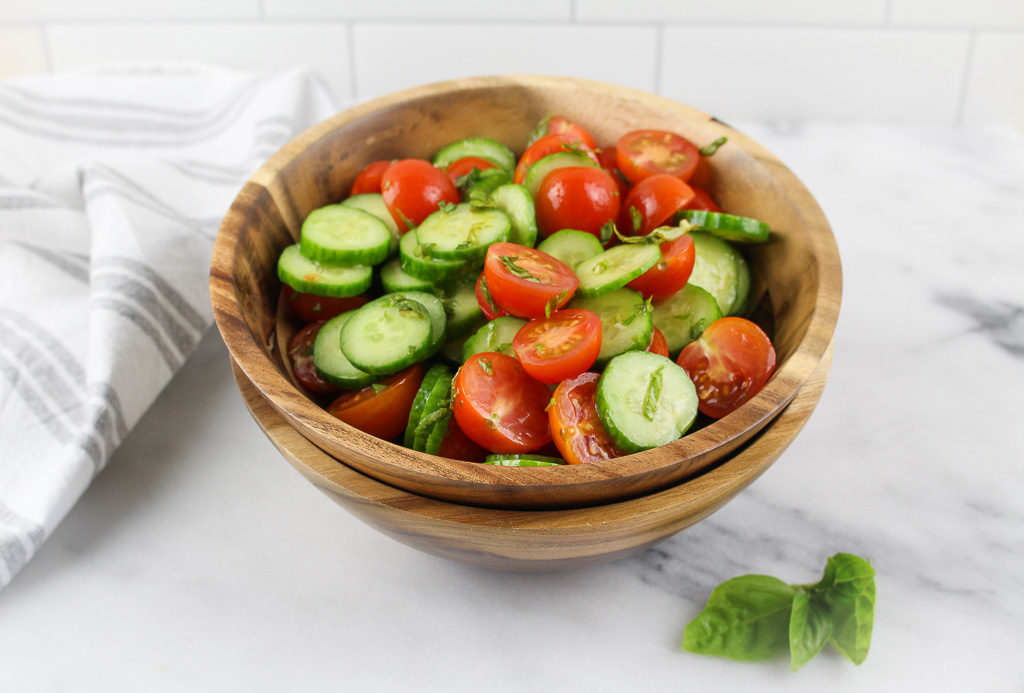
This post may contain affiliate links. Read my privacy policy.
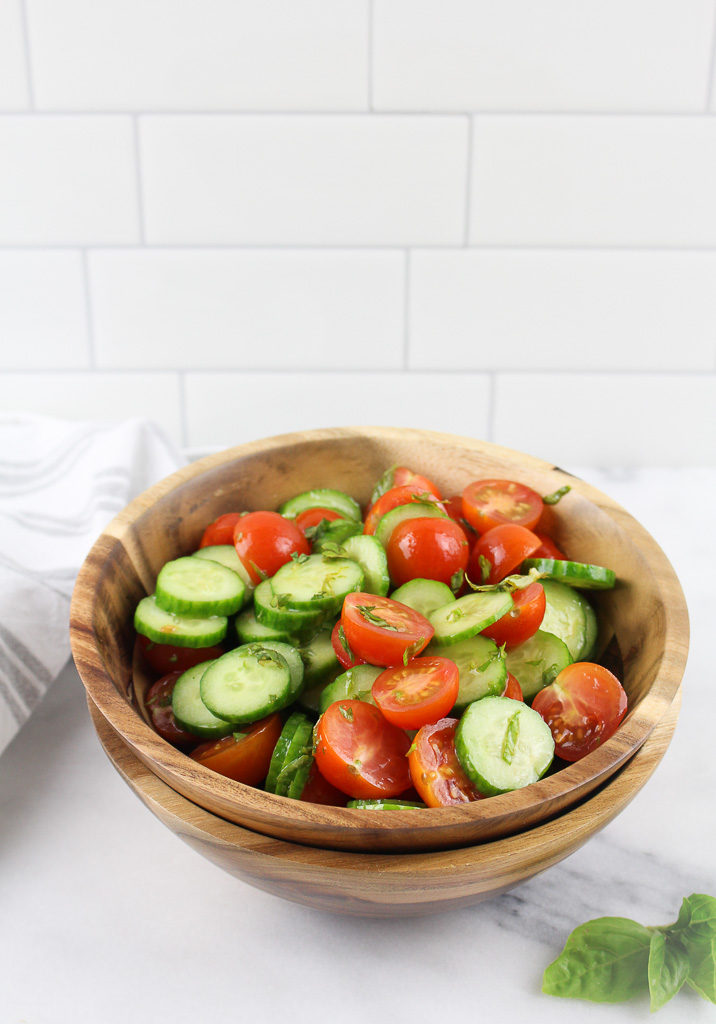
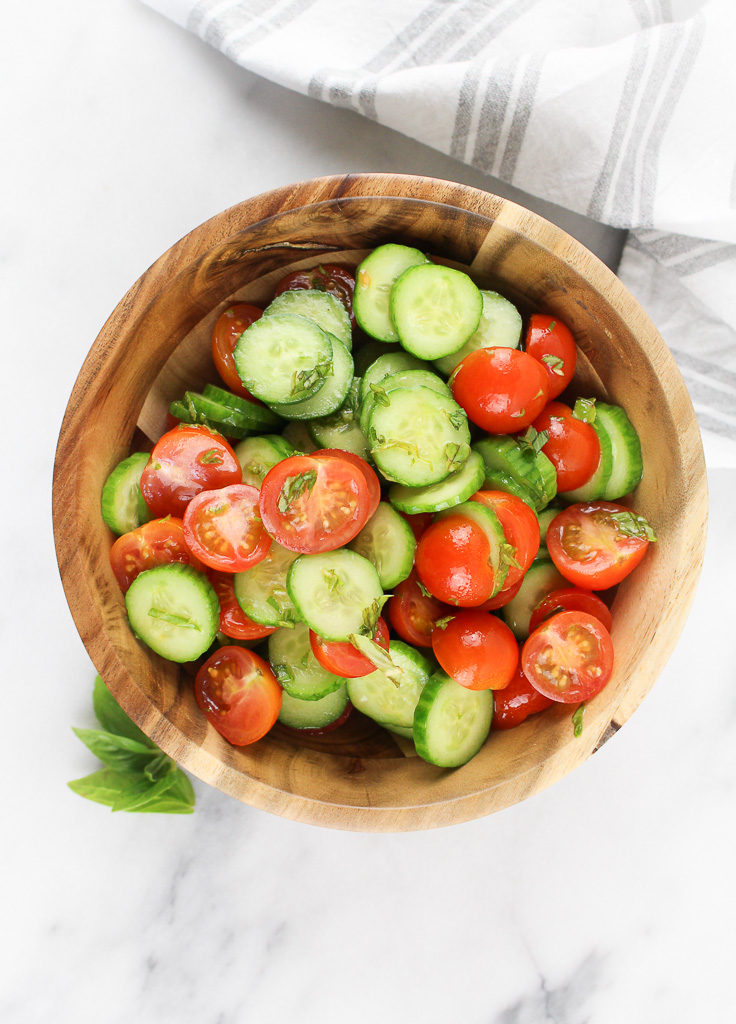
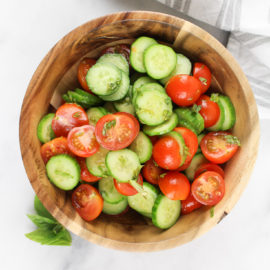
With just five simple ingredients, this Tomato Cucumber Salad will become a regular side dish to serve up with any spring or summer recipe.
Why I love this Tomato Cucumber Salad recipe
Who says salads have to start with a bed of lettuce? We’ve chatted before about how salads don’t have to be boring! What I love the most about this recipe is simple its ingredients, taking less than 10 minutes to put together, and can turn into so many new variations. (see below)
Using mini cucumbers is key
While any kind of cucumber can work in this recipe, I urge you to seek our mini cucumbers, because I think it really makes the recipe. No need to peel the skin. The skin of mini cucumbers is tender and delicate. Just simply slice into coins and they are ready to go.
When I develop a recipe, I always think about the perfect bite. When slicing mini cucumbers into a coin, it takes the same shape and size of the cherry tomatoes so you are able to get everything all in one bite. Plus, it’s more time consuming to peel, seed, and quarter a regular cucumber.
Recipe Tip
If you are using a conventional cucumber, I recommend removing the seeds. Why? Because they are bitter and don’t want any bitterness added to the dish. For a conventional cucumber, peel, scoop out the seeds, slice and cut in quarters for this recipe. For other cooking tips, go here.
How to make this Tomato Cucumber Salad
Chop vegetables.
Whisk together dressing.
Toss together.
Season with salt and pepper. It doesn’t get much easier than that!
Storage Tip
Keep this Tomato Cucumber Salad in an airtight container in the fridge for up to 5 days.
Variations
Additions
Chickpeas: Drain and rinse a can or two of chickpeas and add to the mixture. This will add different textures, plus a good source of plant-based proteins
Feta cheese: I love feta cheese. Hold off on seasoning with salt and pepper at the end after tasting with the feta cheese. Feta cheese will add salt to the dish, so maybe a little sprinkle of pepper will be fine. Also, if making this dish in advance, add feta just before serving.
Red onions: The key is to thinly slice red onions, so they don’t overpower the whole dish. If you are looking for something a little sweeter or more tang, try adding my Quick Pickled Onions.
Light and refreshing salad to compliment any spring or summer dish.
Ingredients
Scale
3 cups cherry tomatoes, halved 8 mini cucumbers, sliced into coins 2 tablespoons olive oil 1 tablespoon red wine vinegar 1/4 cup fresh basil leaves, chopped salt and ground black pepper, to taste
Instructions
Add cherry tomatoes and cucumbers to a large bowl.
In a small bowl, whisk together the olive oil and red wine vinegar. Drizzle over cucumber and tomatoes. Add basil.
Toss everything to coat. Season with salt and pepper, to taste.
Notes
Variations: – Add chickpeas – Add feta cheese
Keywords: cucumber, tomato, salad, no cook, vegetables, low carb, recipe
This post may contain affiliate links. Read my privacy policy.
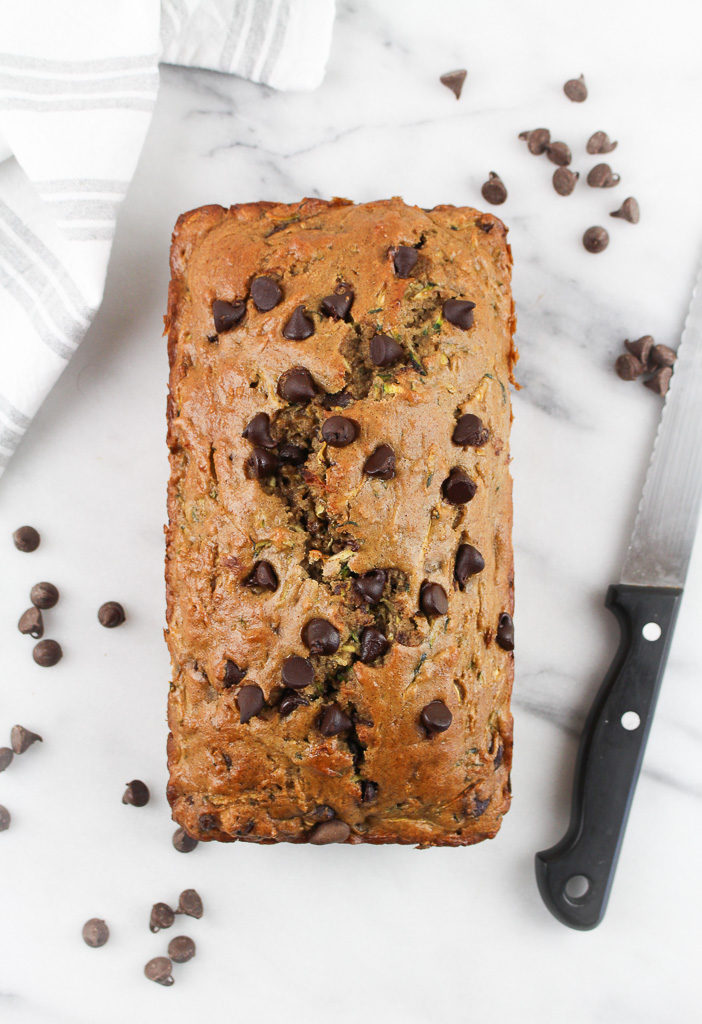
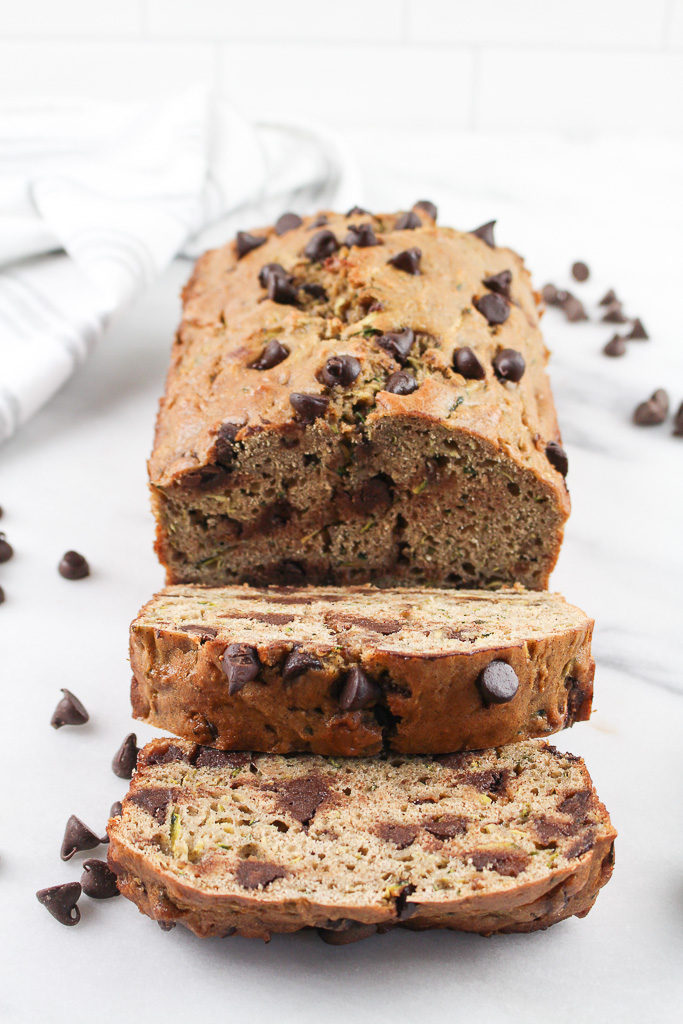
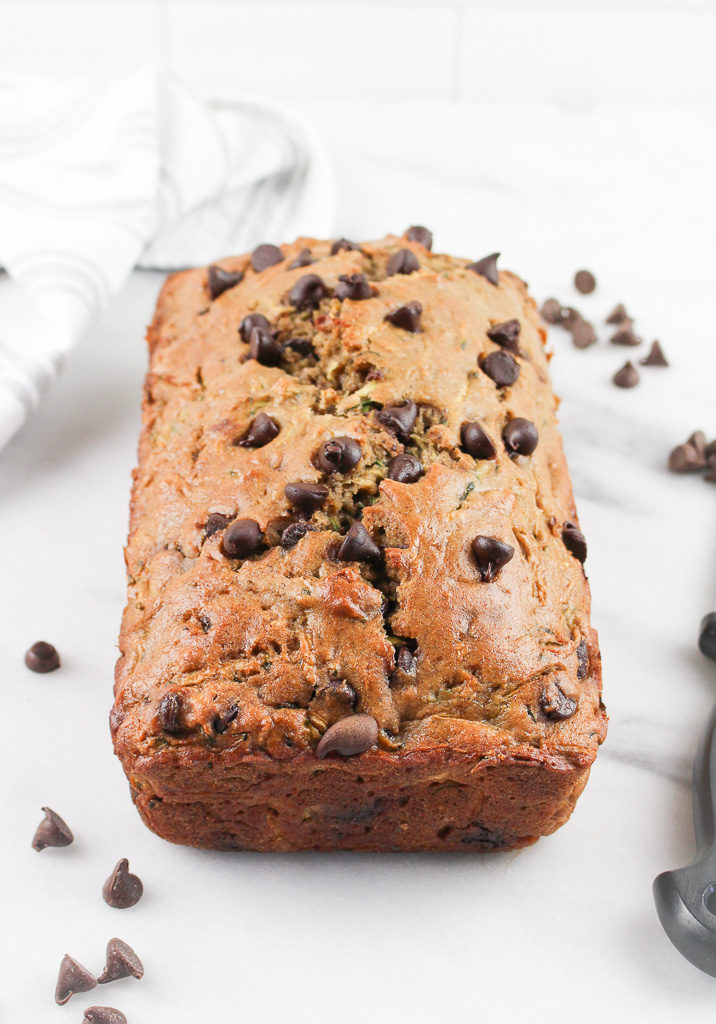
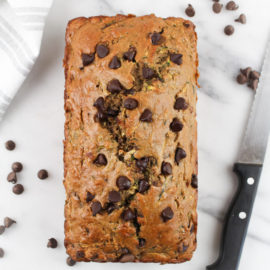
Do you have an overabundance of zucchini from your garden or the farmer’s market? Turn it into this delicious Chocolate Chip Zucchini Bread. With only a hint of sweetness, this can be enjoyed with any meal or snack.
I tend to enjoy cooking more as you can adjust the taste as you go and have more control throughout the process of a dish during the cooking process. For me, baking (especially when developing a new recipe), is much more intimidating. Why? Because you measure, mix, pour into a pan… and then hope for the best! Once that timer goes off you find out if it’s a win or a flop.
This quickbread is a little denser than regular quick bread, as I used half whole wheat flour. When I bake I try to squeeze in whole grains where I can. My favorite whole grain flours to bake with are whole wheat flour and oat flour. I’ve also been experimenting with almond flour and coconut flour too, which totally throw you for a curveball because they have very different baking properties.
Why We Love Zucchini
Just like most green vegetables, zucchini is a great source of vitamins and minerals including Vitamin C.
It can be cooked in so many ways, including baking. You can eat it raw or cooked.
If you have little ones, because of its mild taste you can sneak these veggies into baking recipes and they won’t even know it’s there but still get added nutrition!
When is Zucchini in Season and the Freshest?
Zucchini is primarily considered a summer veggie with its peak season being June through late August. However, most local markets and stores have zucchini available year-round, which is great because zucchini bread is popular around the fall, winter, and other holidays.
What You Need For Chocolate Chip Zucchini Bread
eggs
unsweetened applesauce
brown sugar
vanilla extract
whole wheat flour
all-purpose flour
salt
baking soda
baking powder
cinnamon
shredded zucchini
chocolate chips
How to Make Zucchini Bread with Chocolate Chips
Prep your loaf pan by spraying some non-stick spray. You can also use parchment paper if you choose.
Preheat the oven to 350 degrees.
Start by shredding the zucchini. Once you are finished try to get rid of as much moisture as possible by pressing firmly with paper towels.
Whisk together the eggs, sugar, applesauce, and vanilla in a large bowl until the mixture is smooth.
Grab another mixing bowl and sift together your flours, baking soda, baking powder, salt, and cinnamon.
Gently fold in the zucchini, being careful not to overmix. By folding the zucchini in you don’t have to worry about clumps, instead you will get a little bit in every bite.
Pour the dry ingredients into the bowl with the egg mixture slowly while constantly stirring. Add just a little at a time.
Toss in the chocolate chips and fold just until they are distributed evenly.
Pour the zucchini bread batter in the 9×5 loaf pan.
Bake for about 50 minutes. Check it with a toothpick to be sure that it is done. If it is, the toothpick will come out clean.
Take the bread from the oven and let it rest for at least 15 minutes before transferring it out of the loaf pan.
Cool completely before slicing so it doesn’t fall apart.
Variations of Zucchini Bread
Want to make banana zucchini bread? Simply swap the applesauce for mashed bananas!
Feel free to use any variety of chocolate (white, semi-sweet, dark, or milk).
Add in some nuts for a nice crunch! Walnuts are my favorite to add to quick bread recipes.
Tips for Baking with Zucchini
Do you have to peel zucchini before using it? Nope! Generally speaking, zucchini is not a veggie that needs peeling before eating.
Zucchini contains a lot of moisture, so always follow the recipe when it comes to knowing whether or not to leave it or to remove as much as possible.
To shred zucchini, you can use one of the sides of your cheese grater so no fancy equipment needed!
How to Store Zucchini Bread with Chocolate Chips
Wrap the zucchini loaf in plastic wrap and you can store it at room temperature for at least 4 days. You can also refrigerate it if you would rather do that.
To freeze, secure the cooled loaf in plastic wrap and place it in a freezer bag. Some also prefer to wrap it in another layer using aluminum foil. Freezing for later is a great idea when making multiple batches or if you want to make it ahead of time for special occasions.
3 eggs 1/2 cup unsweetened applesauce 1/2 cup brown sugar 1 teaspoon vanilla extract 1 1/2 cups whole wheat flour 1 1/2 cups all-purpose flour 1/2 teaspoon salt 1/2 teaspoon baking soda 1 teaspoon baking powder 1 tablespoon cinnamon 3 cups shredded zucchini (about 2 zucchinis) 1 cup chocolate chips
Instructions
Preheat the oven to 350 degrees F. Grease a 9×5 inch loaf pan with cooking spray.
Shred zucchini. Using paper towels press as much moisture you can from the zucchini.
In a large bowl, whisk together the eggs, applesauce, brown sugar, and vanilla until smooth.
In a separate bowl, sift together whole wheat flour, all-purpose flour, salt, baking soda, baking powder, and cinnamon. Fold zucchini into flour. This will help zucchini being dispersed throughout the bread vs. clumping together.
Add the dry ingredients to the wet ingredients, a little at a time, mixing until well combined.
Fold in the chocolate chips until they are evenly distributed throughout the batter.
Pour the batter into the prepared loaf pan. Bake for 50-55 minutes, until a toothpick inserted in the middle and comes out clean.
Remove the bread from the oven, and let it cool for 10-15 minutes before taking it out of the loaf pan. Cool completely before slicing.
This post may contain affiliate links. Read my privacy policy.
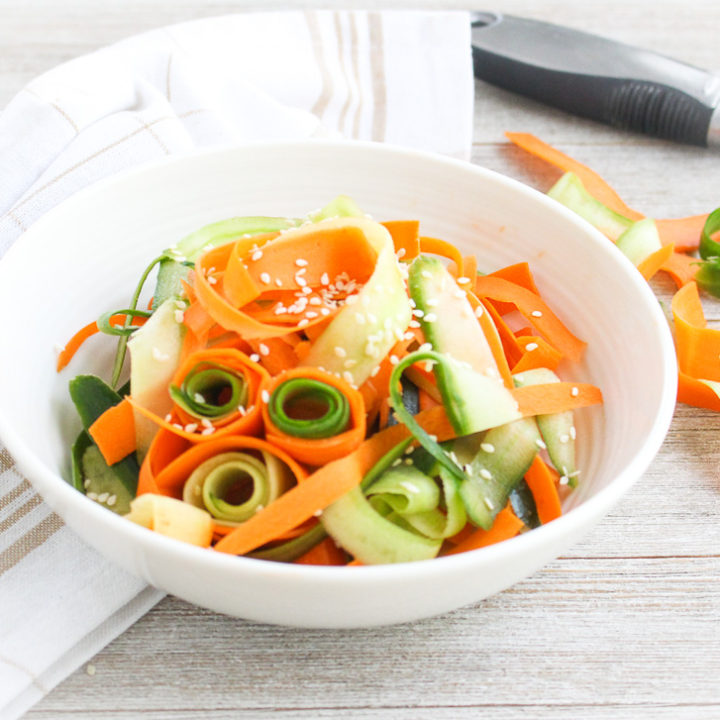
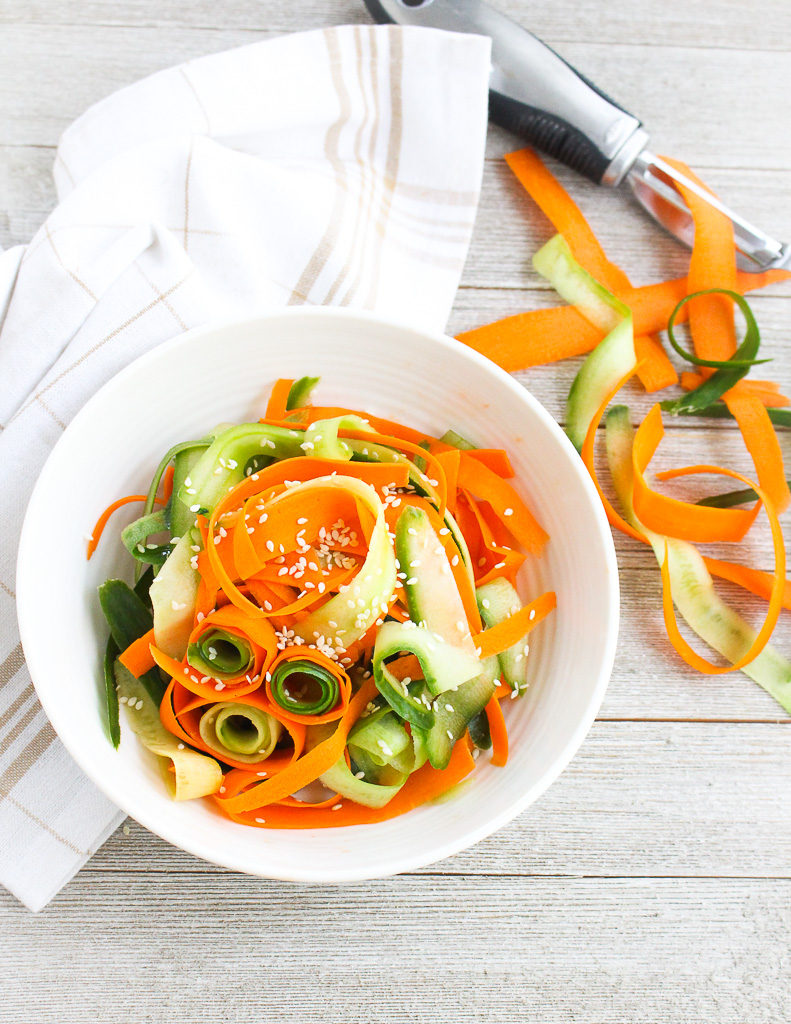
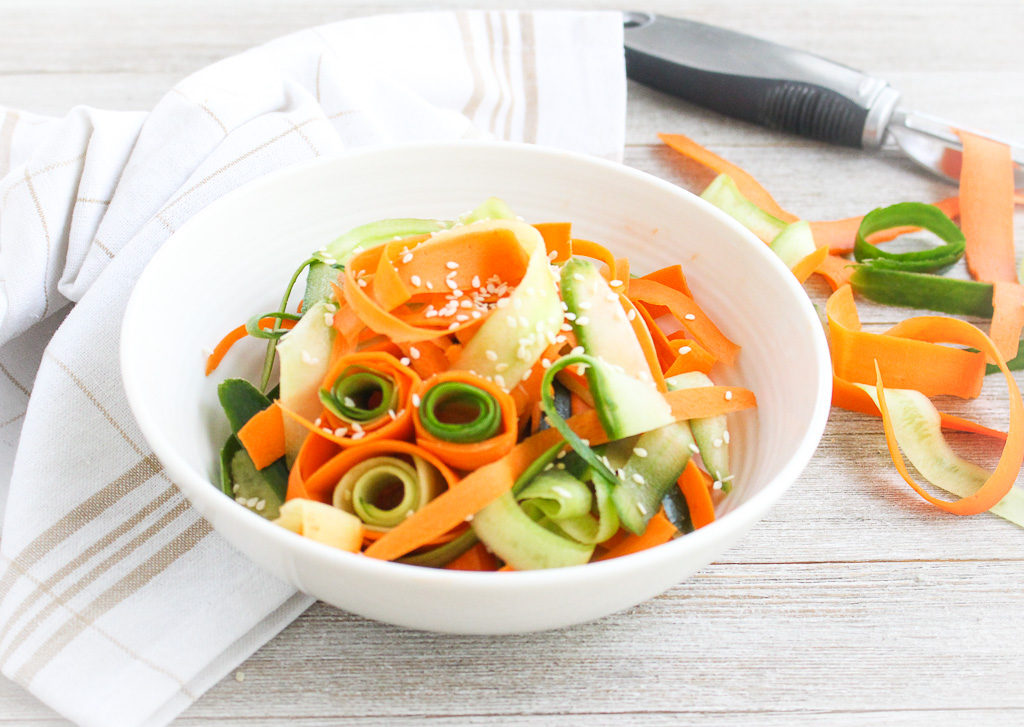
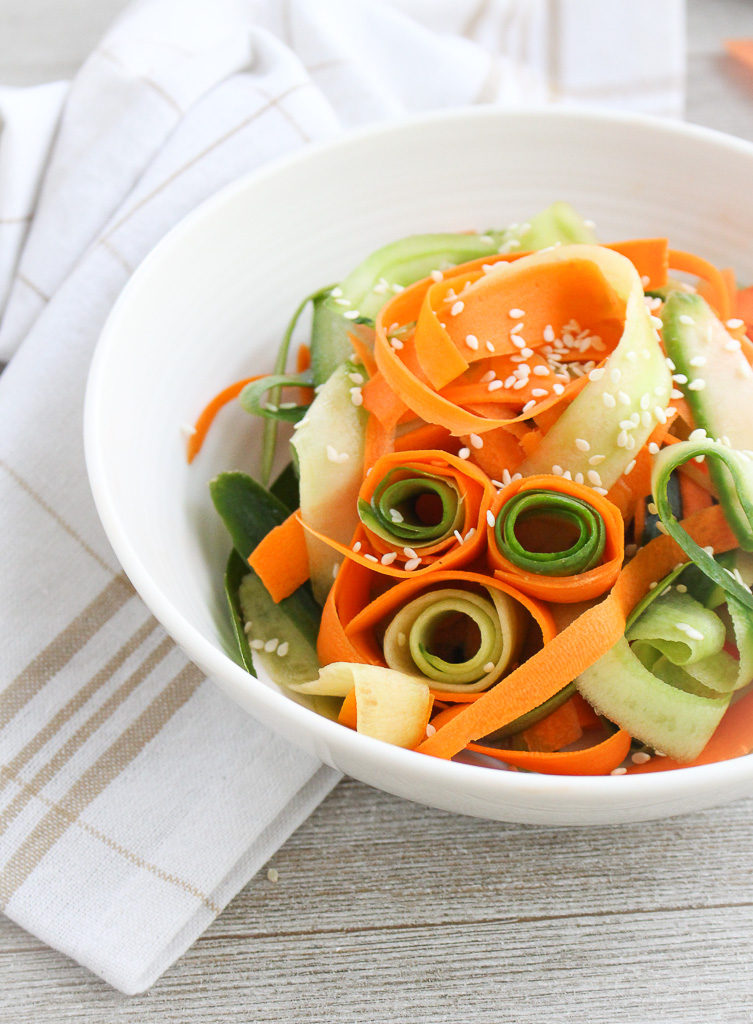
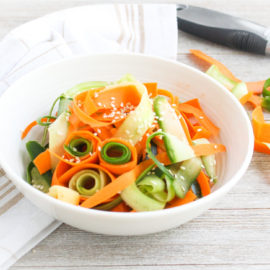
Ribbon sliced vegetables in an Asian dressing is light and refreshing. This Sesame, Carrot, & Cucumber Salad is perfect for warmer weather and also a delicious change from a traditional salad.
Utilize your vegetable peeler a little more than just removing the skin. No need for a fancy spiralizer. Simply continue to peel using your vegetable peeler to create delicate vegetable ribbons.
What are English Cucumbers?
I specifically used English cucumbers in this recipe. Why? Because English cucumbers (also known as burp-less, seedless, or hothouse cucumbers) taste is less bitter than conventional cucumbers, are milder and almost have a hint of sweetness. You can find them in the produce aisle wrapped in plastic. Conventional cucumbers are waxed protecting their skin, whereas English cucumbers are not and have a thinner more delicate skin that is protected by the wrapping.
Switch it up from your traditional lettuce-based salads and try something new! This quick and easy Sesame, Carrot, & Cucumber Salad is perfect to switch up your salad game in the warmer months.
Want to turn it more into a meal? Try adding shrimp on top.
This post may contain affiliate links. Read my privacy policy.
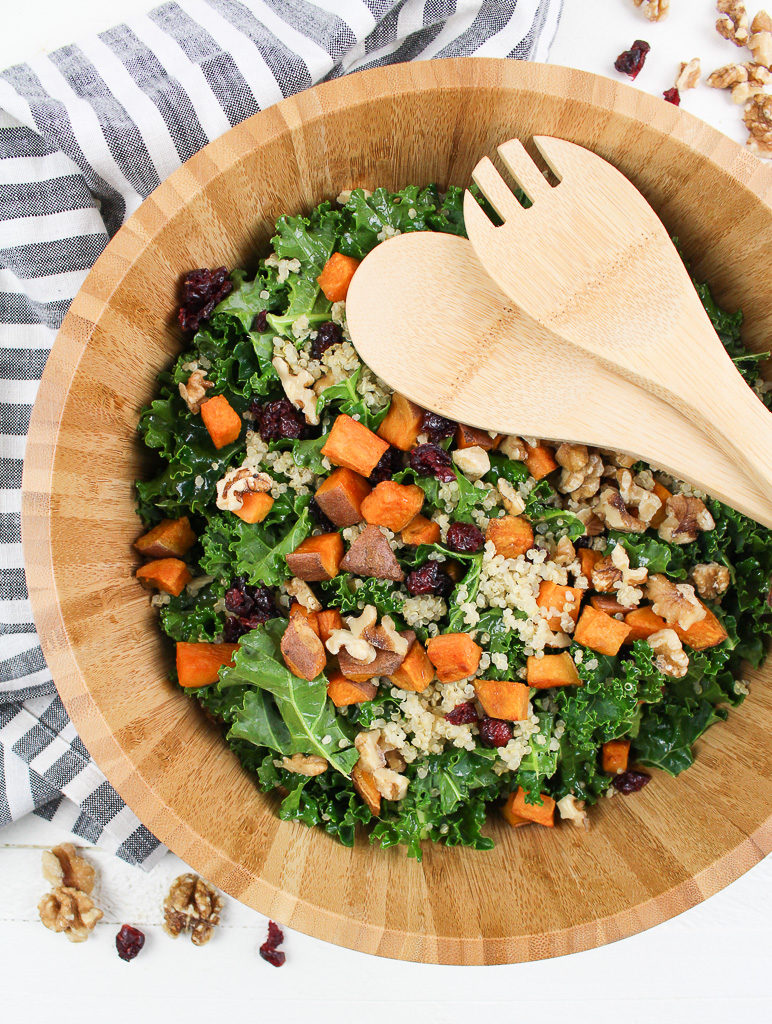
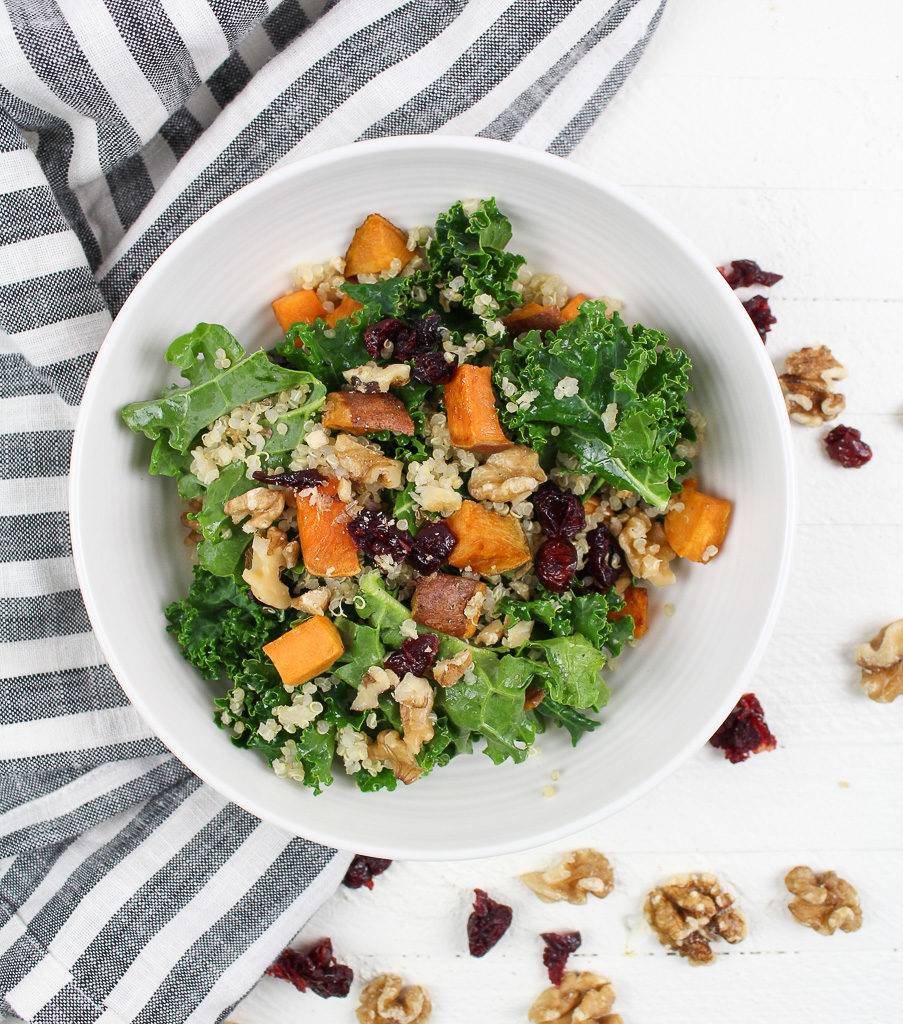
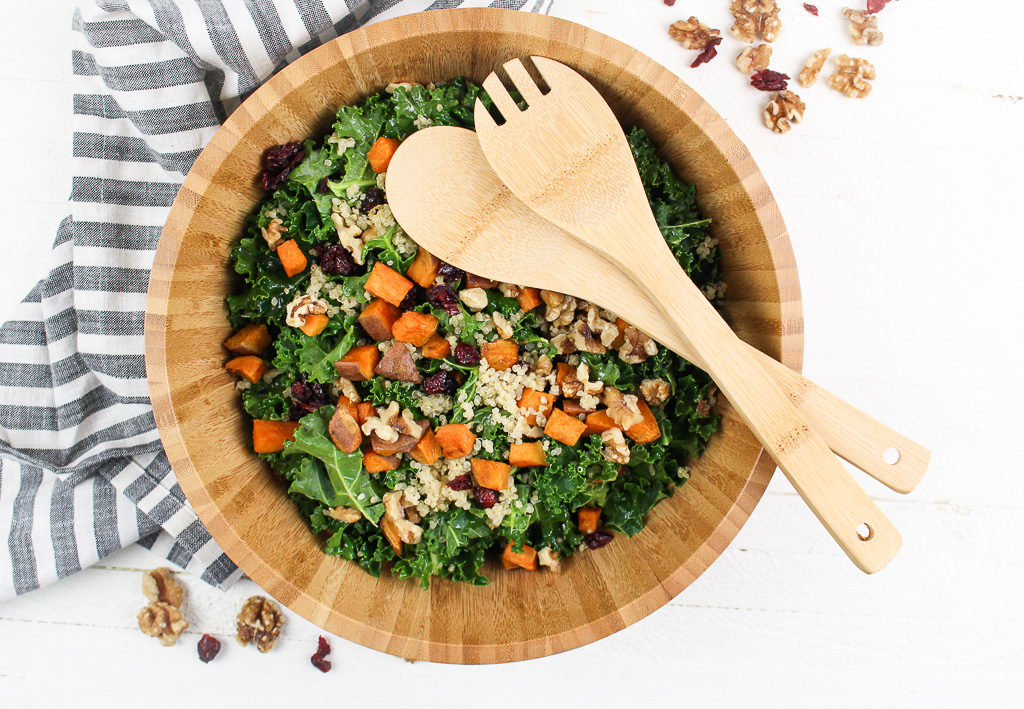
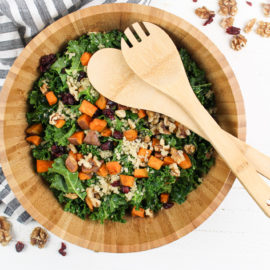
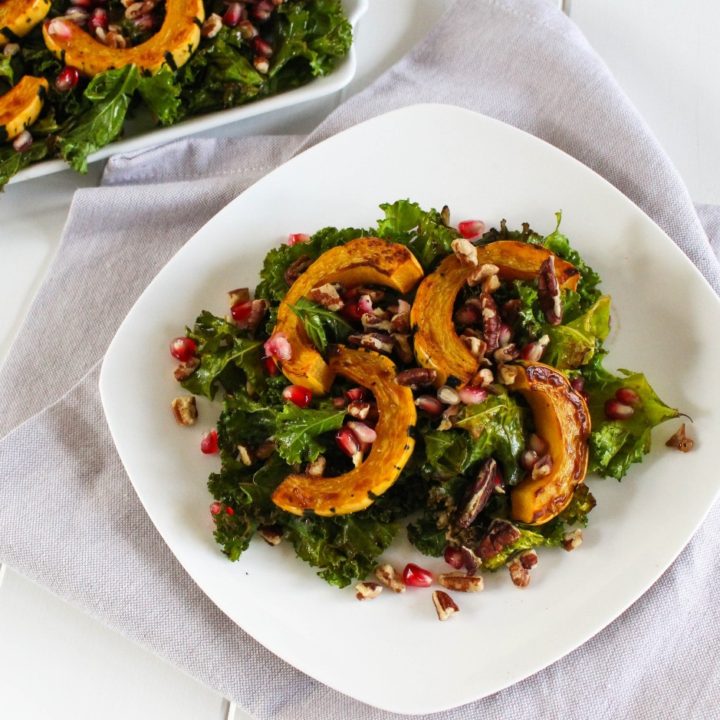
Salads don’t have to be boring! By adding cooked and raw elements like in this Roasted Sweet Potato Kale Salad can elevate any salad experience.
There is nothing worse when trying to enjoy a kale salad and your jaw becomes numb with all the chewing. It’s most likely that the kale wasn’t treated properly. Kale is very fibrous, but the simple technique of massaging kale can change your whole kale salad experience. I’ve talked all about this already here.
Salads don’t have to be boring! Mix and match with various
food groups, flavors, and textures. I like to add both raw and cooked elements
to add different depths of flavor.
Perfectly roasted sweet potatoes provide additional
sweetness from their caramelization.
Tips to perfectly roast vegetables:
Cut vegetables approximately the same size. This will prevent smaller pieces from overcooking and larger pieces not being cooked through.
Don’t overdo it on the oil. One tablespoon of olive oil is enough for a full tray of vegetables. Instead of drizzling the oil when the vegetables are already on the sheet pan, toss in a large bowl then place vegetables on the sheet pan. This will ensure all vegetables are evenly coated.
Don’t crowd the pan. Vegetables should be an even layer on the sheet pan. Overcrowding can result in the vegetables steaming rather than roasting.
Stop stirring. Simply flip vegetables halfway through the cooking process. Constant stirring won’t allow the vegetables to caramelize evenly on each side.
Looking for easy cleanup. Line your baking sheet with parchment paper.
With a little meal prep, this salad can come together in minutes. Roast sweet potatoes in advance, wash and chop kale, batch cook quinoa, and make the dressing. By getting the prep process started earlier on can help put meals together in minutes. With kale being very fibrous, it lasts longer in the refrigerator. I wash and chop kale for the week and store it in a breathable produce bag. Then, I can easily prepare a salad; add it to a smoothie, or sauté for a quick side dish.
Fun Fact:
Have you ever notices kale that has been sitting in the refrigerator for a longer period of time, the edges start to turn an orange/yellow color. Yes, the kale is aging, but it’s not going bad. As kale ages, the deep green chlorophyll color begins to fade and the vitamin A & C colors shine through. Kale is an excellent source of Vitamins A & C.
Salads don’t have to be boring! By adding cooked and raw elements like in this Roasted Sweet Potato Kale Salad can elevate any salad experience.
Ingredients
For the salad: 1 tablespoon olive oil 2 sweet potatoes, chopped, cut into cubes 8 cups kales, stems removed and chopped 1 cup quinoa, cooked ½ cup chopped walnuts ½ cup dried cranberries
For the dressing: 1/3 cup golden balsamic vinegar ¼ cup olive oil 2 cloves garlic, minced 1 tablespoon maple syrup salt, to taste
In a large bowl, toss sweet potatoes with olive oil and season with salt and pepper. Add to the baking sheet in an even layer. Roast for 30-40 minutes, flipping halfway through until sweet potatoes have caramelized and are fork tender. Remove from oven and let cool completely.
In a large bowl, add the kale and massage to become tender. Add the sweet potatoes, quinoa, walnuts, and dried cranberries. Toss to combine.
In a mason jar, combine the balsamic vinegar, olive oil, garlic, and maple syrup. Secure lid and shake to combine. Season with salt and pepper to taste.
Drizzle dressing over salad and toss to combine.
Notes
The addition of feta cheese to this salad is great if desired.
Play around with this salad combination. For a more filling meal add protein, like beans, grilled chicken, shrimp, etc. Switch up the dressing. Add fresh fruit, like pears, apples, or pomegranate seeds too.
This post may contain affiliate links. Read my privacy policy.
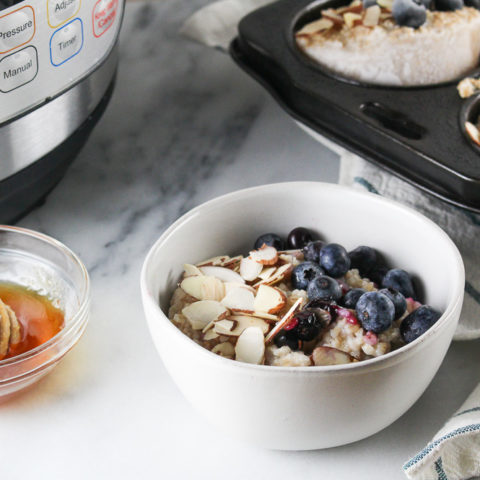
Make mornings easier by meal prepping a batch of Instant Pot Steel Cut Oats for the week and follow a simple freezer-friendly tip to enjoy steel cut oats in just minutes.
Who has time to make a fresh batch of steel-cut oats in the morning? If you do, more power to you, but like many, I prefer extra sleep vs. waking up earlier to make breakfast from scratch.
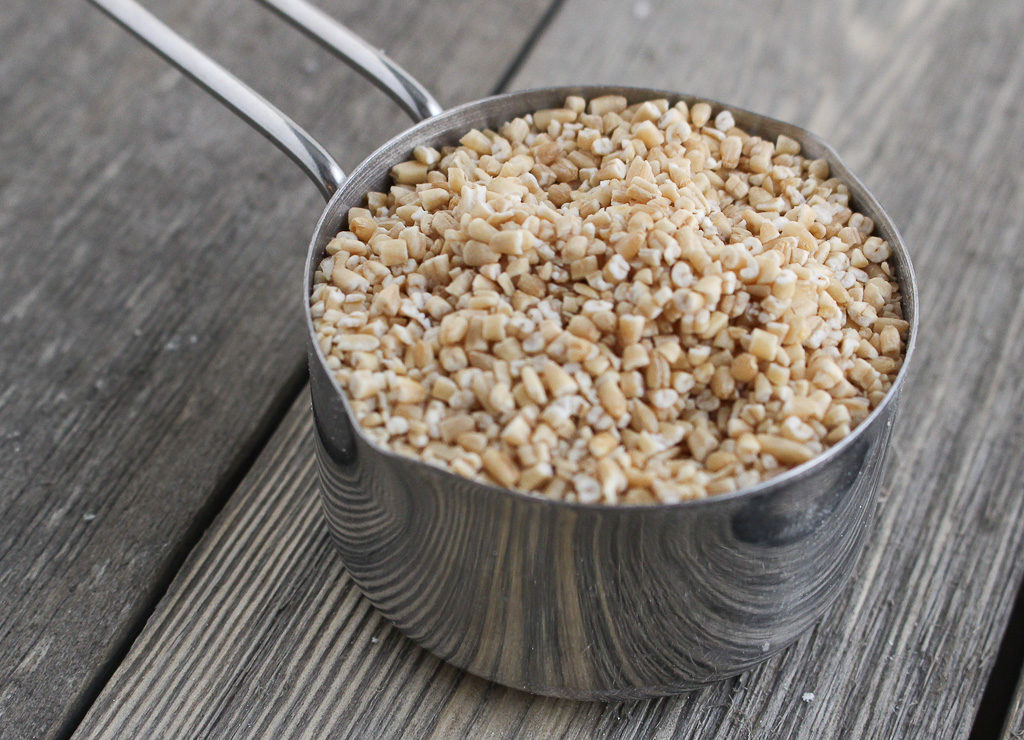
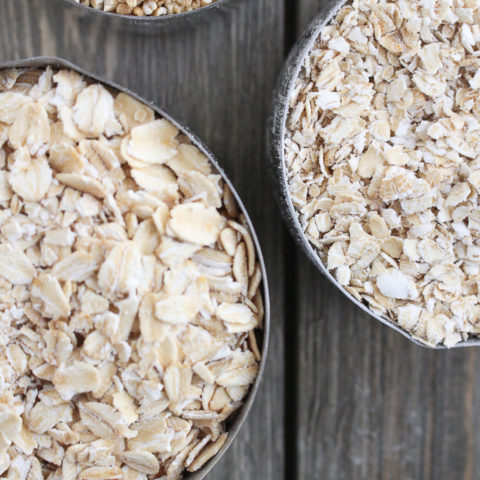
What Are Steel Cut Oats?
Steel cut oats are the least processed variety of oats, take the longest to cook, and maintain their texture better than others when it comes to a good bowl of oatmeal. It’s literally the whole oat, including the bran (the outermost layer). I previously talked about the differences between steel-cut, rolled, and quick oats.
Are Steel Cut Oats Healthy?
Yes! They are naturally gluten free for anyone with sensitivities and packed full of fiber. Most don’t know this, but one serving (without added toppings) has 7 grams of protein! Steel cut oats also have a lower glycemic index than others. Even if you don’t take the GI into consideration, know that this is a good concept for everyone, which means your body will digest it slower than other varieties and you will have less of a sugar spike.
Does Using the Instant Pot Save Time?
By the time the Instant Pot comes to pressure, the cooking time, and the pressure release time it’s about the same. BUT the greatest thing is that it’s hands-free cooking. So no stirring constantly, wondering if they are ready, and you can do other stuff while you wait on your breakfast!
Instead of spending time each morning making a serving of steel-cut oats meal prep a large batch for the week. Steel-cut oats can easily be made over the stovetop, but I love using the Instant Pot to make steel-cut oats because just add your ingredients, press a few buttons, and done!
Ingredients for Instant Pot Steel Cut Oats
steel cut oats water cinnamon sticks – if you don’t have these you can use ground cinnamon instead
How to Cook Steel Cut Oats in a Pressure Cooker
Pour the steel cut oats and water into the Instant Pot and stir. Add in the cinnamon sticks or ground cinnamon and stir once more.
Place the lid on the Instant Pot and turn the valve to the sealing position.
Cook for 6 minutes using manual pressure.
When the timer goes off, allow the pressure cooker to release naturally for 20 minutes, then turn the valve to the venting position.
Toss out the cinnamon sticks and give it a good stir.
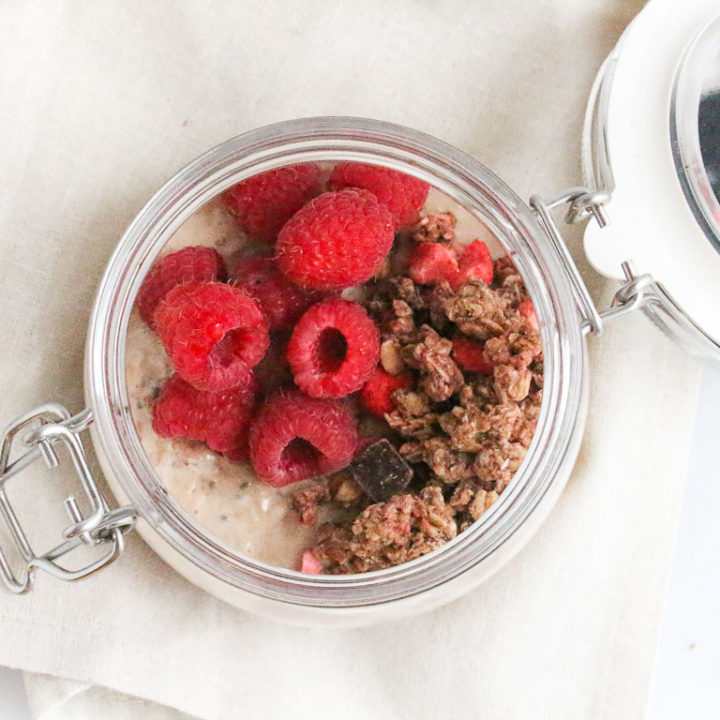
Serve with your favorite toppings!
Steel Cut Oatmeal Topping Ideas
I prefer to make the batch of steel-cut oats pretty plain because then there is the flexibility to add different toppings to create different flavor combinations. I do enjoy adding a cinnamon stick to the pot and the cinnamon flavor infuses into the oats. (This can easily be done with a few shakes of ground cinnamon too.) Here are some more ideas.
Bananas & Blueberries – a favorite combination! Add these on top just before serving
Syrup & Honey – Need just a touch of sweetness? Drizzle some maple syrup or honey over the oats once they come out of the Instant Pot
Pumpkin – you could add a couple of spoonfuls of pureed pumpkin before cooking, great for the fall!
Apples – because that just makes sense with cinnamon! Dice them into small pieces (as even as possible) and stir before you cook or after as a topping.
Other fresh fruit and berries
Nuts (almond, walnuts, pecans)
Splash of milk to thin it out if needed.
Nut or seed butter
Chia seeds or ground flax meal
How Long Do Steel Cut Oats Last After Being Cooked?
Once you have pressure cooked them, they stay fresh when kept in the refrigerator for up to a week.
If you want to batch, I recommend freezing them.
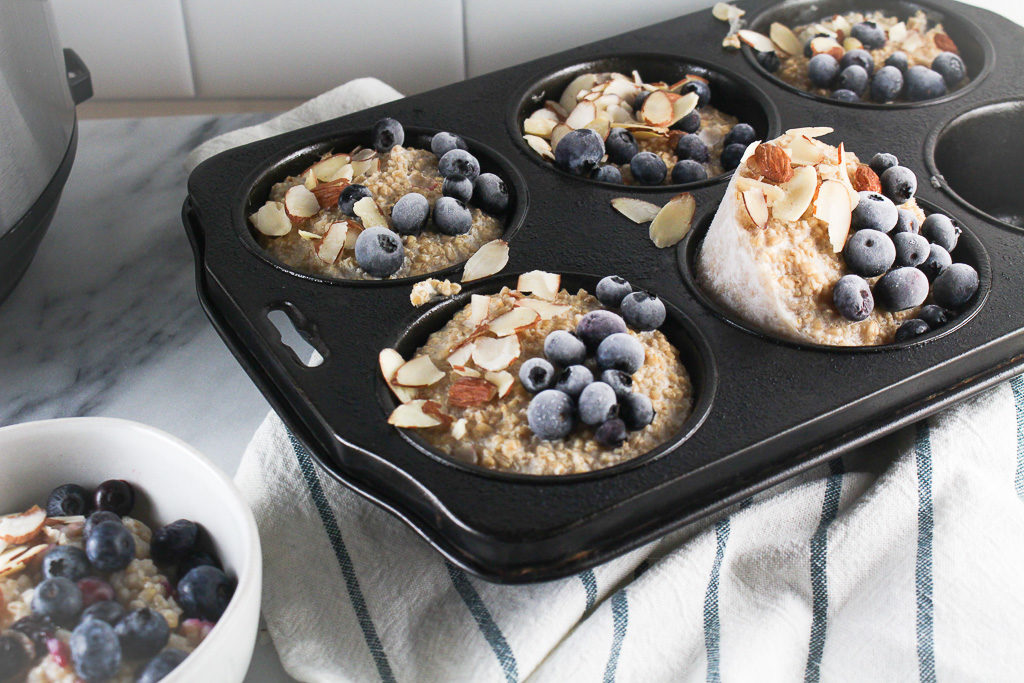
After making a batch of these Instant Pot Steel Cut Oats, spray a jumbo muffin tin with cooking spray and scoop about a cup of oats into each muffin tin well. Then add your favorite topping combinations.
Once hardened, dip the bottom of the muffin tin in warm water to help remove the single-serving steel cut oat portions and freeze in a container or bag for later use.
Then, simply add a single-serving portion of oats to a microwave-safe bowl with a few drops of water, and reheat in the microwave.
Add steel cut oats, water, and cinnamon sticks to the Instant Pot and stir to combine.
Secure Instant Pot lid and close the vent. Set Instant Pot on the manual setting for 6 minutes.
When Instant Pot beeps, allow the pressure to naturally release for 20 minutes.
Remove lid, discard cinnamon sticks, and stir oats to incorporate any water that has risen to the top.
Serve with your favorite toppings. (Combination recommendation: blueberries, sliced almonds, and honey)
Notes
Leftover oats can be stored in the fridge for up to a week or utilize the freezer-friendly method.
Freezer-Friendly Method: Spray a jumbo muffin tin with cooking spray and scoop about a cup of oats into each muffin tin well. Then add your favorite topping combinations. Once hardened, dip the bottom of the muffin tin in warm water to help remove the single-serving steel cut oat portions and freeze in a container or bag for later use.
This post may contain affiliate links. Read my privacy policy.
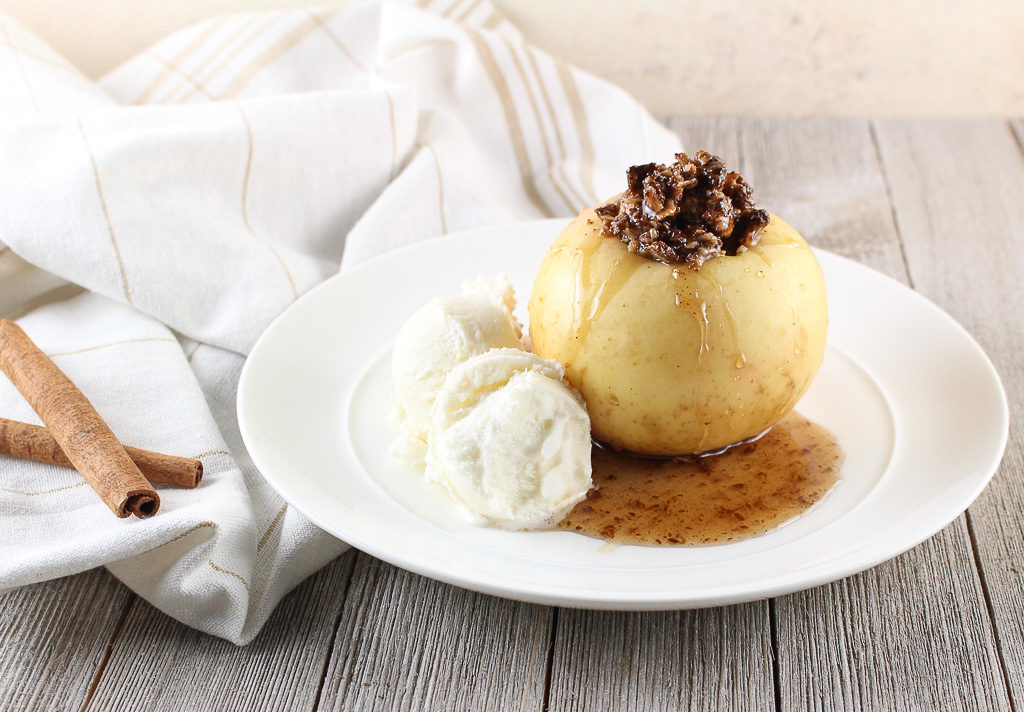
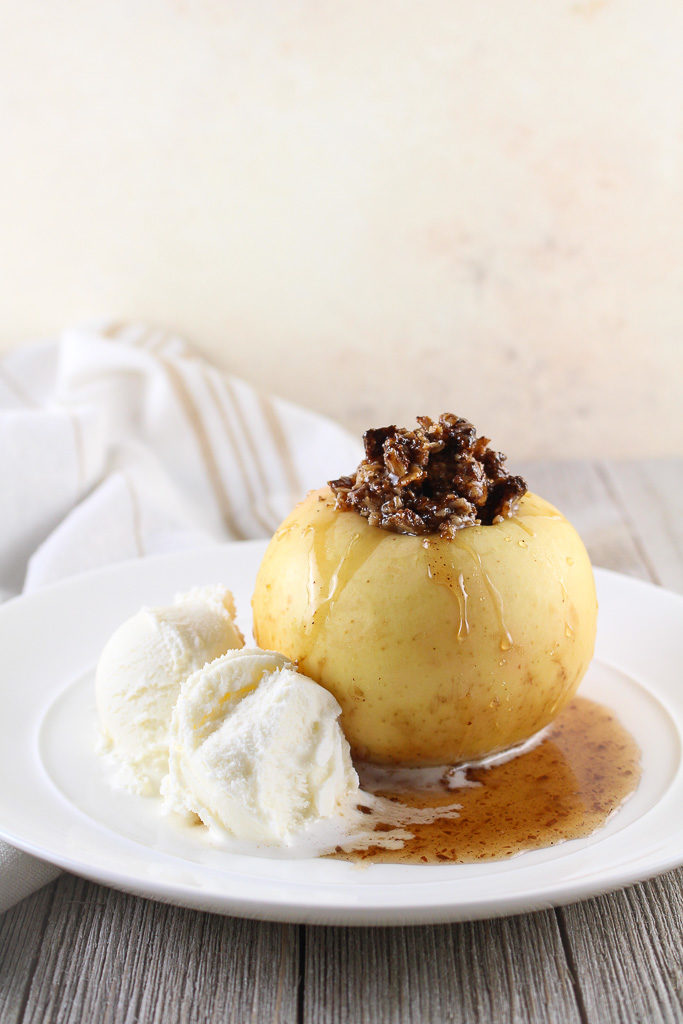
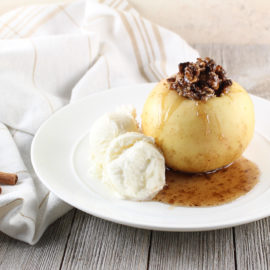
Craving something sweet, but don’t want to make a whole batch of a dessert recipe? Enter this delicious (and allergy-friendly) Baked Apple for One.
I received free samples from Kip’s for the development of this recipe and am eligible for prizes for their recipe contest.
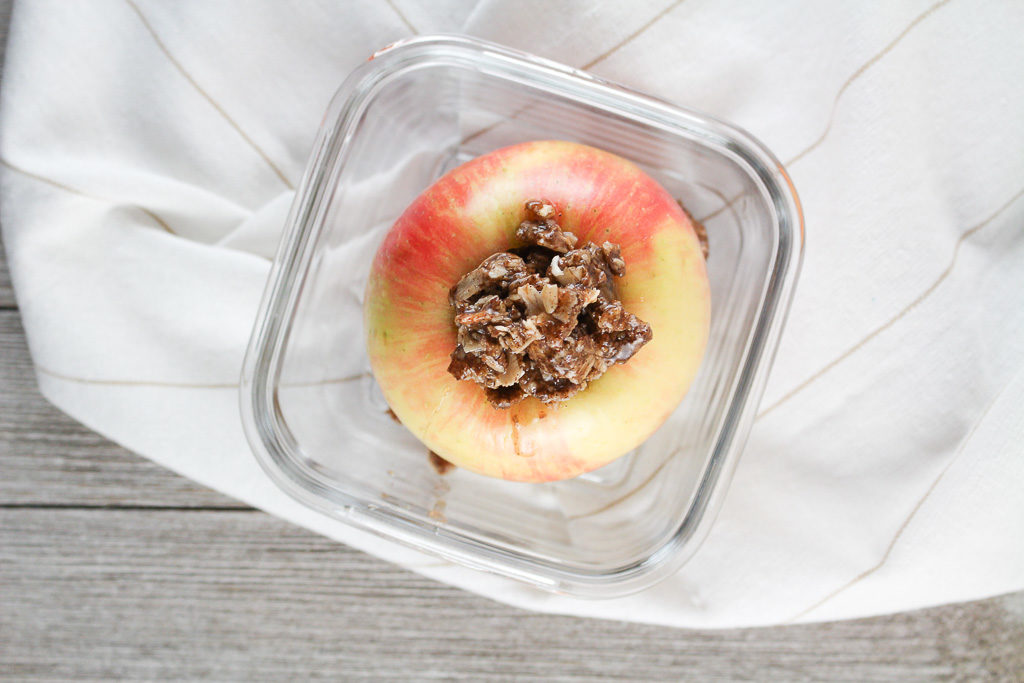
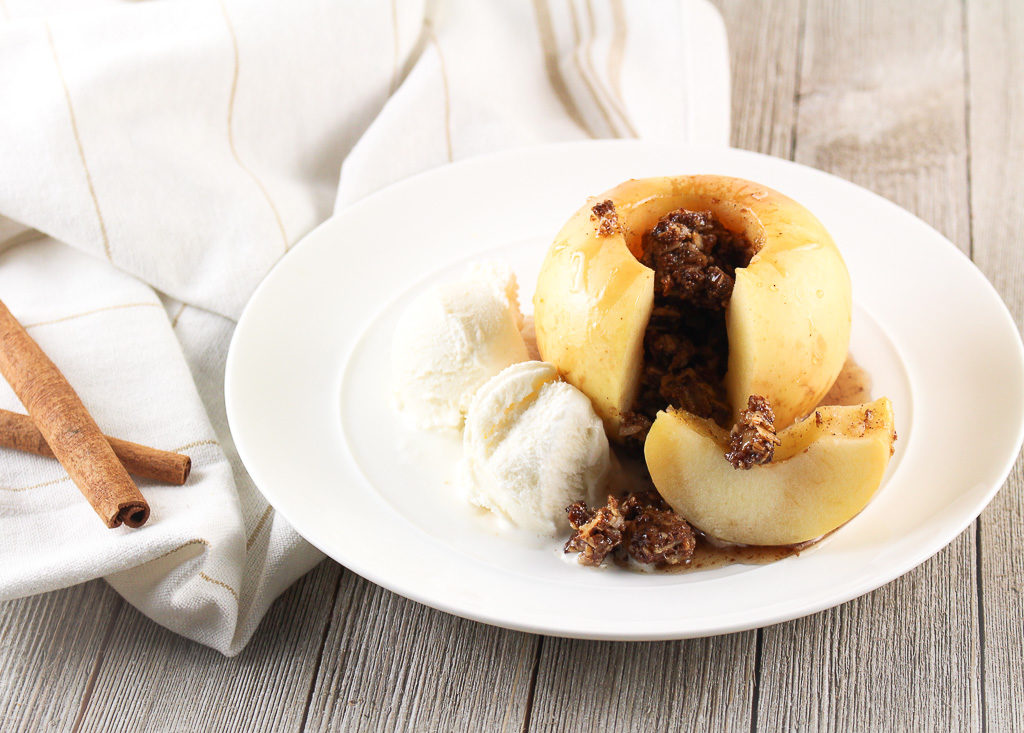
Baked fruit is often overlooked for dessert. Fruit is sweet as is, but when baked the natural sweetness intensifies. Baked apples are a delicious dessert. Simply remove the core, stuff with your favorite filling, and bake!
Using a dry-cook method, like baking, will break down the cell walls of the fruit and result in water loss from being exposed to heat. Be mindful of the cooking time. Too long, the fruit will become too mushy and mealy.
When creating a recipe for a single serving, there is no need to complicate the cooking technique with too many ingredients. If cooking for one, keep it simple!
These baked apples are stuffed with Kip’s Granola Bark. Kip’s is an allergy-friendly, gluten-free, and vegan granola bark is free from the eight main food allergens, including peanuts, tree nuts, wheat, dairy, eggs, and soy, and additionally free of sesame and sunflower seeds.
For those navigating food allergies, Kip’s Granola Bark is a wholesome snack that can be enjoyed as is or incorporated into a recipe.
Craving something sweet, but don’t want to make a whole batch of a dessert recipe? Enter these delicious (and allergy friendly) Baked Apple for One.
Ingredients
Scale
1 honeycrisp apple (or another variety like gala or granny smith) 2 tablespoons crumbled Kip’s Cinnamon Crunch Granola Bark 1/2 teaspoon butter, melted (or dairy-free, soy-free margarine) 1/2 teaspoon maple syrup 1/4 teaspoon ground cinnamon 1 tablespoon water
Instructions
Preheat the oven to 350ºF. Use a melon baller, carefully remove the stem and seeds from the apples, making a deep hole where the filling will go. In a small bowl, combine the crumbled Kip’s Cinnamon Crunch Granola Bark, butter, maple syrup, and ground cinnamon. Fill into the cavity of the apple. Add water to a small oven-safe baking dish and place the stuffed apple on top. Bake for 30 minutes, until apple, is fork tender. Remove from oven and allow to cool for a few minutes. Spoon the sauce drippings from the pan over the apples. Serve with ice cream, if desired.
This post may contain affiliate links. Read my privacy policy.
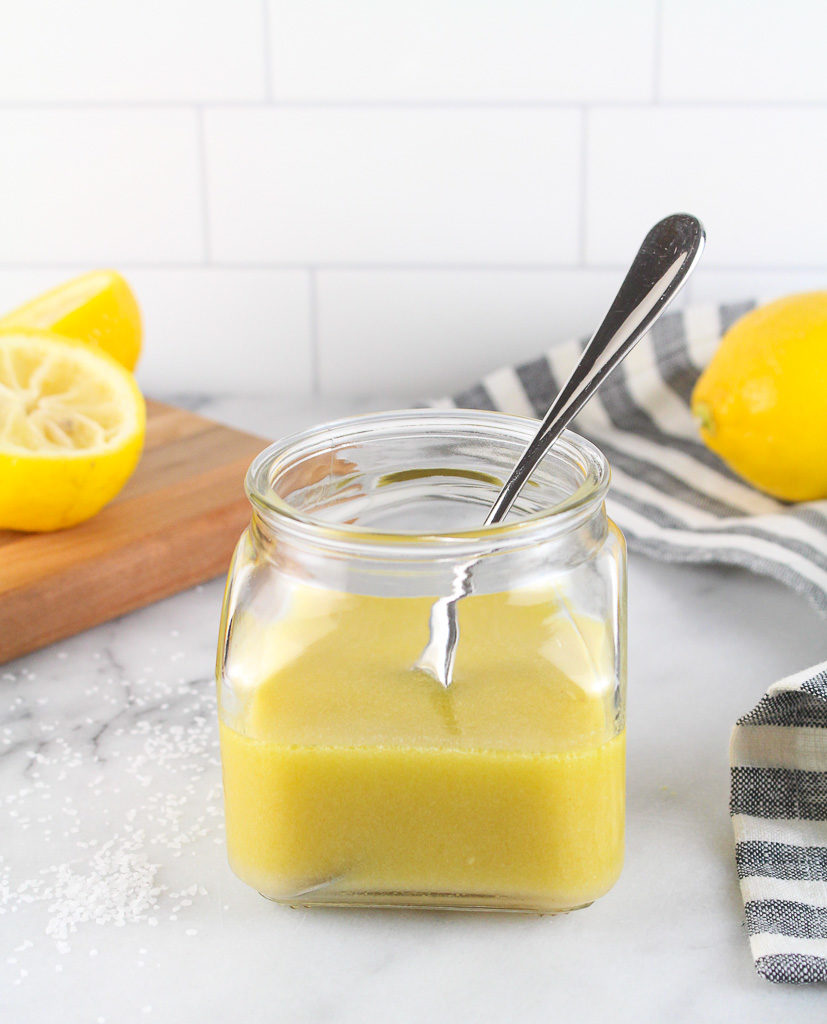
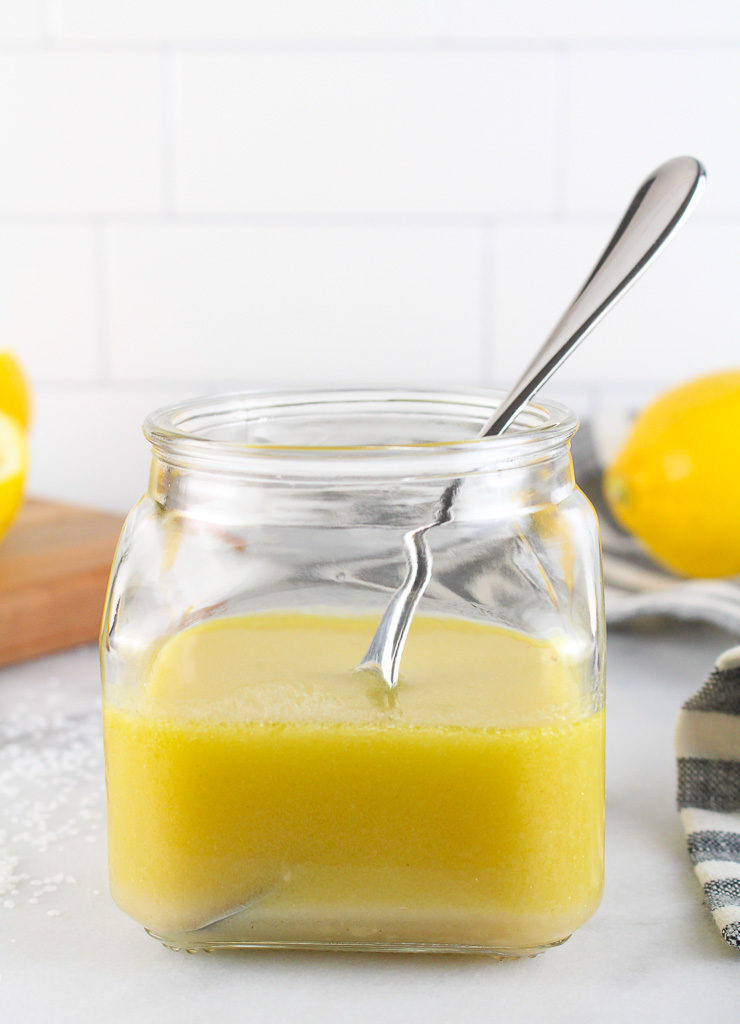
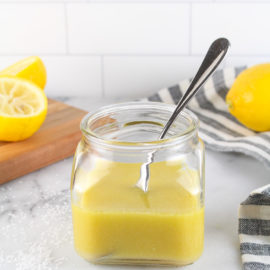
Brighten any salad, grain, or vegetable dish with this simple lemon vinaigrette. Made with ingredients you probably already have on hand, simply whip this up in a mason jar.
I don’t think people realize how EASY it is to make a homemade dressing. The most basic vinaigrette recipe is mixing an acid and a base. Then just add seasonings you enjoy. Simply pour ingredients into a mason jar and shake away. Your dressing is made! How easy was that? Plus, making it in a mason jar is ready to store any leftovers.
If you want to go beyond the basics, use this guide to build your own vinaigrette.
Create a homemade vinaigrette
Choose your acid:
This can be in the form of vinegar or citrus juice. Pick something that matches with your salad mix-ins. Opt for a sweet acid like white wine vinegar, white balsamic vinegar, or an orange juiced, for salads that have fruit.
Try acids like apple cider vinegar, balsamic vinegar, red wine vinegar, rice vinegar, lemon juice, lime juice, or other citrus juices.
Tip: Think about the components of your salad. If you have a salad with bright colors, avoid darker vinegar. Once the salad is dressed, those bright vibrant colors will look muddy. Remember – we eat with our eyes first!
Choose your base:
The base is oil. Use good quality oil. This can be a simple olive oil or fancy garlic and rosemary-infused walnut oil. Again think about the components of your salad. If there are avocados in your salad, why not try avocado oil?
Try oils like olive oil, avocado oil, walnut oil, pumpkin seed oil, hazelnut oil, or other flavor-infused oils.
Add seasonings:
If you are new to making dressings, simple olive oil and balsamic vinegar dressing with a pinch of salt and pepper will work just fine. Once you are comfortable making dressings, try amping it up with other seasonings.
Add a teaspoon of Dijon mustard to add a little tanginess and also to help create a creamier vinaigrette. Add a teaspoon of miso for an umami flavor. Try using fresh herbs for a pop of flavor. For a sweet vinaigrette, add a little maple syrup or honey.
Once you start playing around with different combinations, you’ll start to know what flavor combinations you like best!
This website uses cookies to improve your experience. We'll assume you're ok with this, but you can opt-out if you wish.AcceptRejectRead More
Privacy & Cookies Policy
Privacy Overview
This website uses cookies to improve your experience while you navigate through the website. Out of these, the cookies that are categorized as necessary are stored on your browser as they are essential for the working of basic functionalities of the website. We also use third-party cookies that help us analyze and understand how you use this website. These cookies will be stored in your browser only with your consent. You also have the option to opt-out of these cookies. But opting out of some of these cookies may affect your browsing experience.
Necessary cookies are absolutely essential for the website to function properly. This category only includes cookies that ensures basic functionalities and security features of the website. These cookies do not store any personal information.
Any cookies that may not be particularly necessary for the website to function and is used specifically to collect user personal data via analytics, ads, other embedded contents are termed as non-necessary cookies. It is mandatory to procure user consent prior to running these cookies on your website.