Zucchini Bread Smoothie

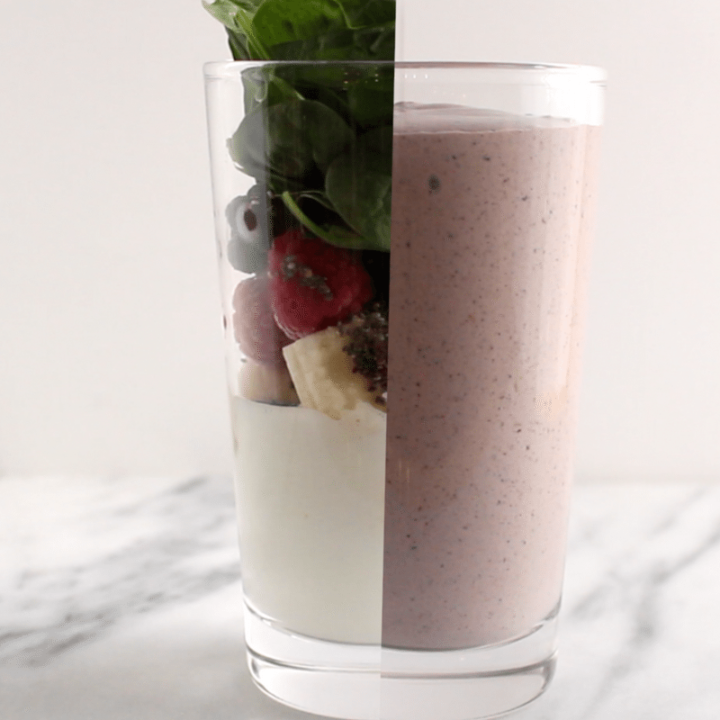
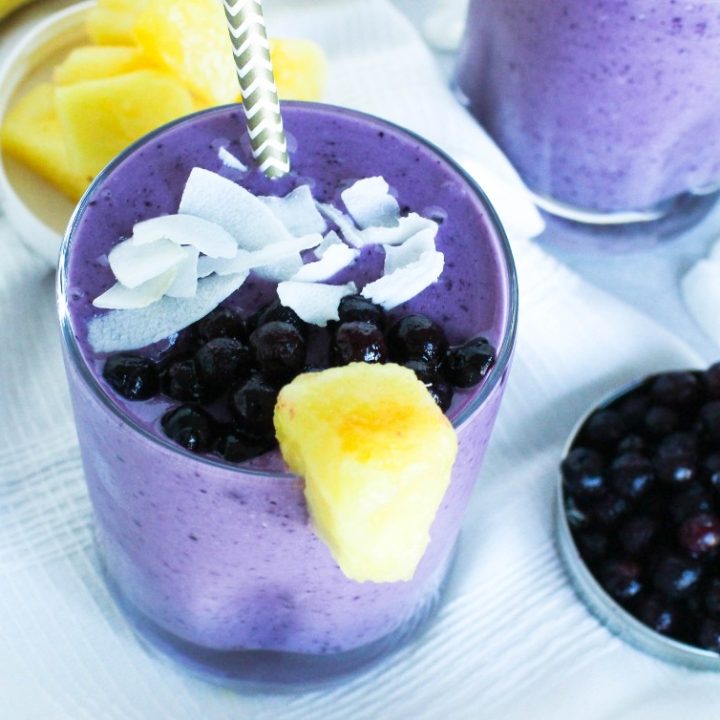
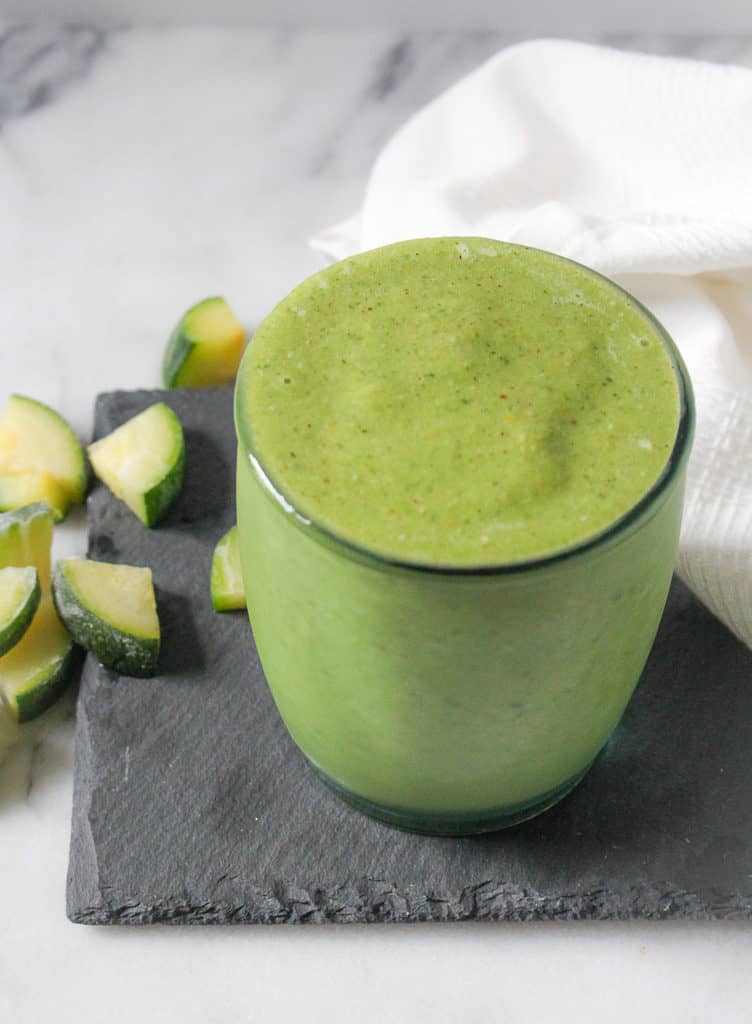
This Zucchini Smoothie tastes exactly like your favorite veggie bread! Only 8 ingredients needed for a full on powerhouse in a glass!

zucchini smoothie in a small glass with straw next to diced zucchini

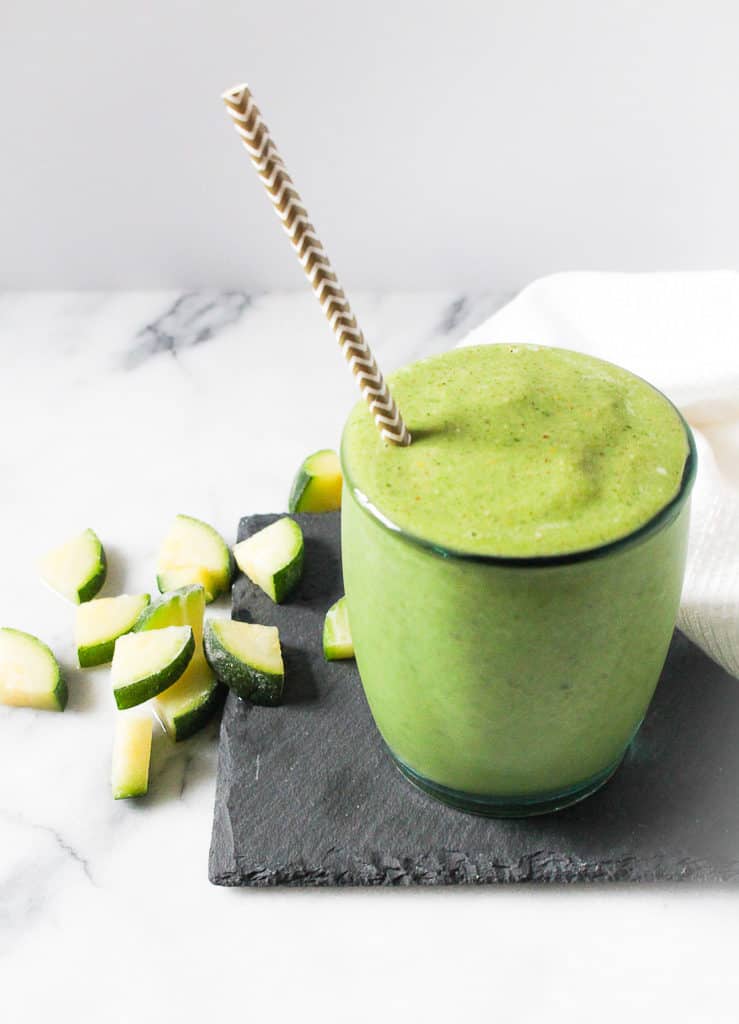
This smoothie literally does taste like zucchini bread. When I took the first sip of this smoothie, my tastebuds could identify every single flavor that was blended together.

We pretty much have all heard of adding leafy greens to smoothies but have you considered veggies like zucchini. I recently started adding this vegetable to my smoothie with the plethora I’ve been picking up from the farmer’s market.

The other recipe that I run to when I have too many zucchini on hand is my chocolate chip zucchini bread, which I’m sure everyone has tried at some point (there’s also a gluten free version). One thing I really love about this smoothie is that it’s healthy, but its taste is absolutely delicious!

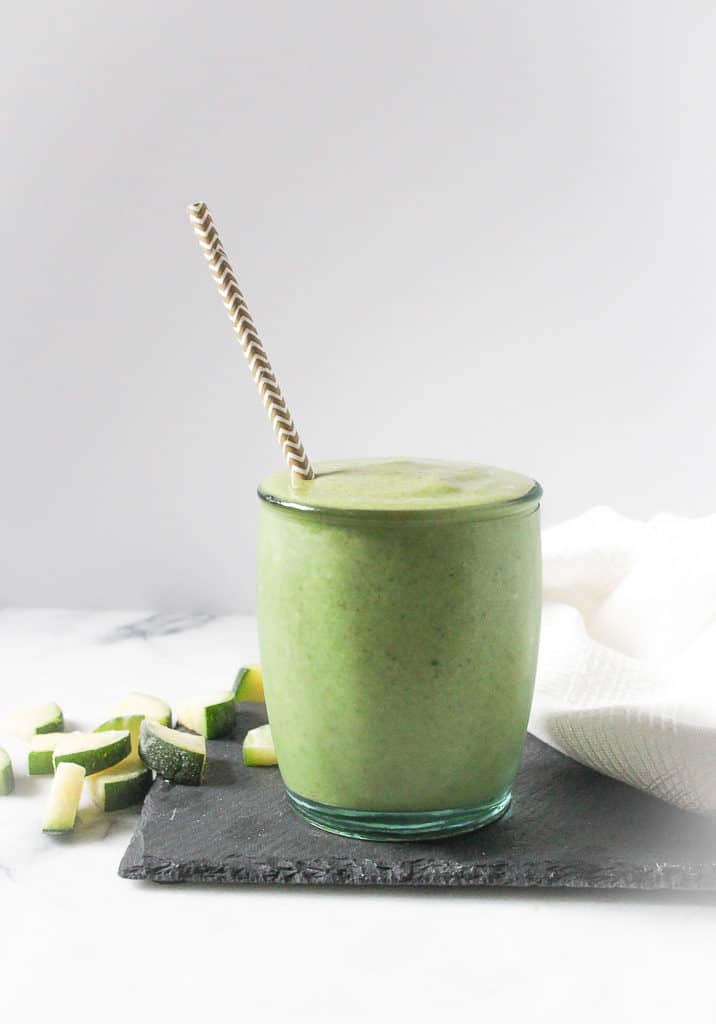
Don’t let the green color be a turn-off. Actually, most green smoothies are the ones with the best nutrition profiles!

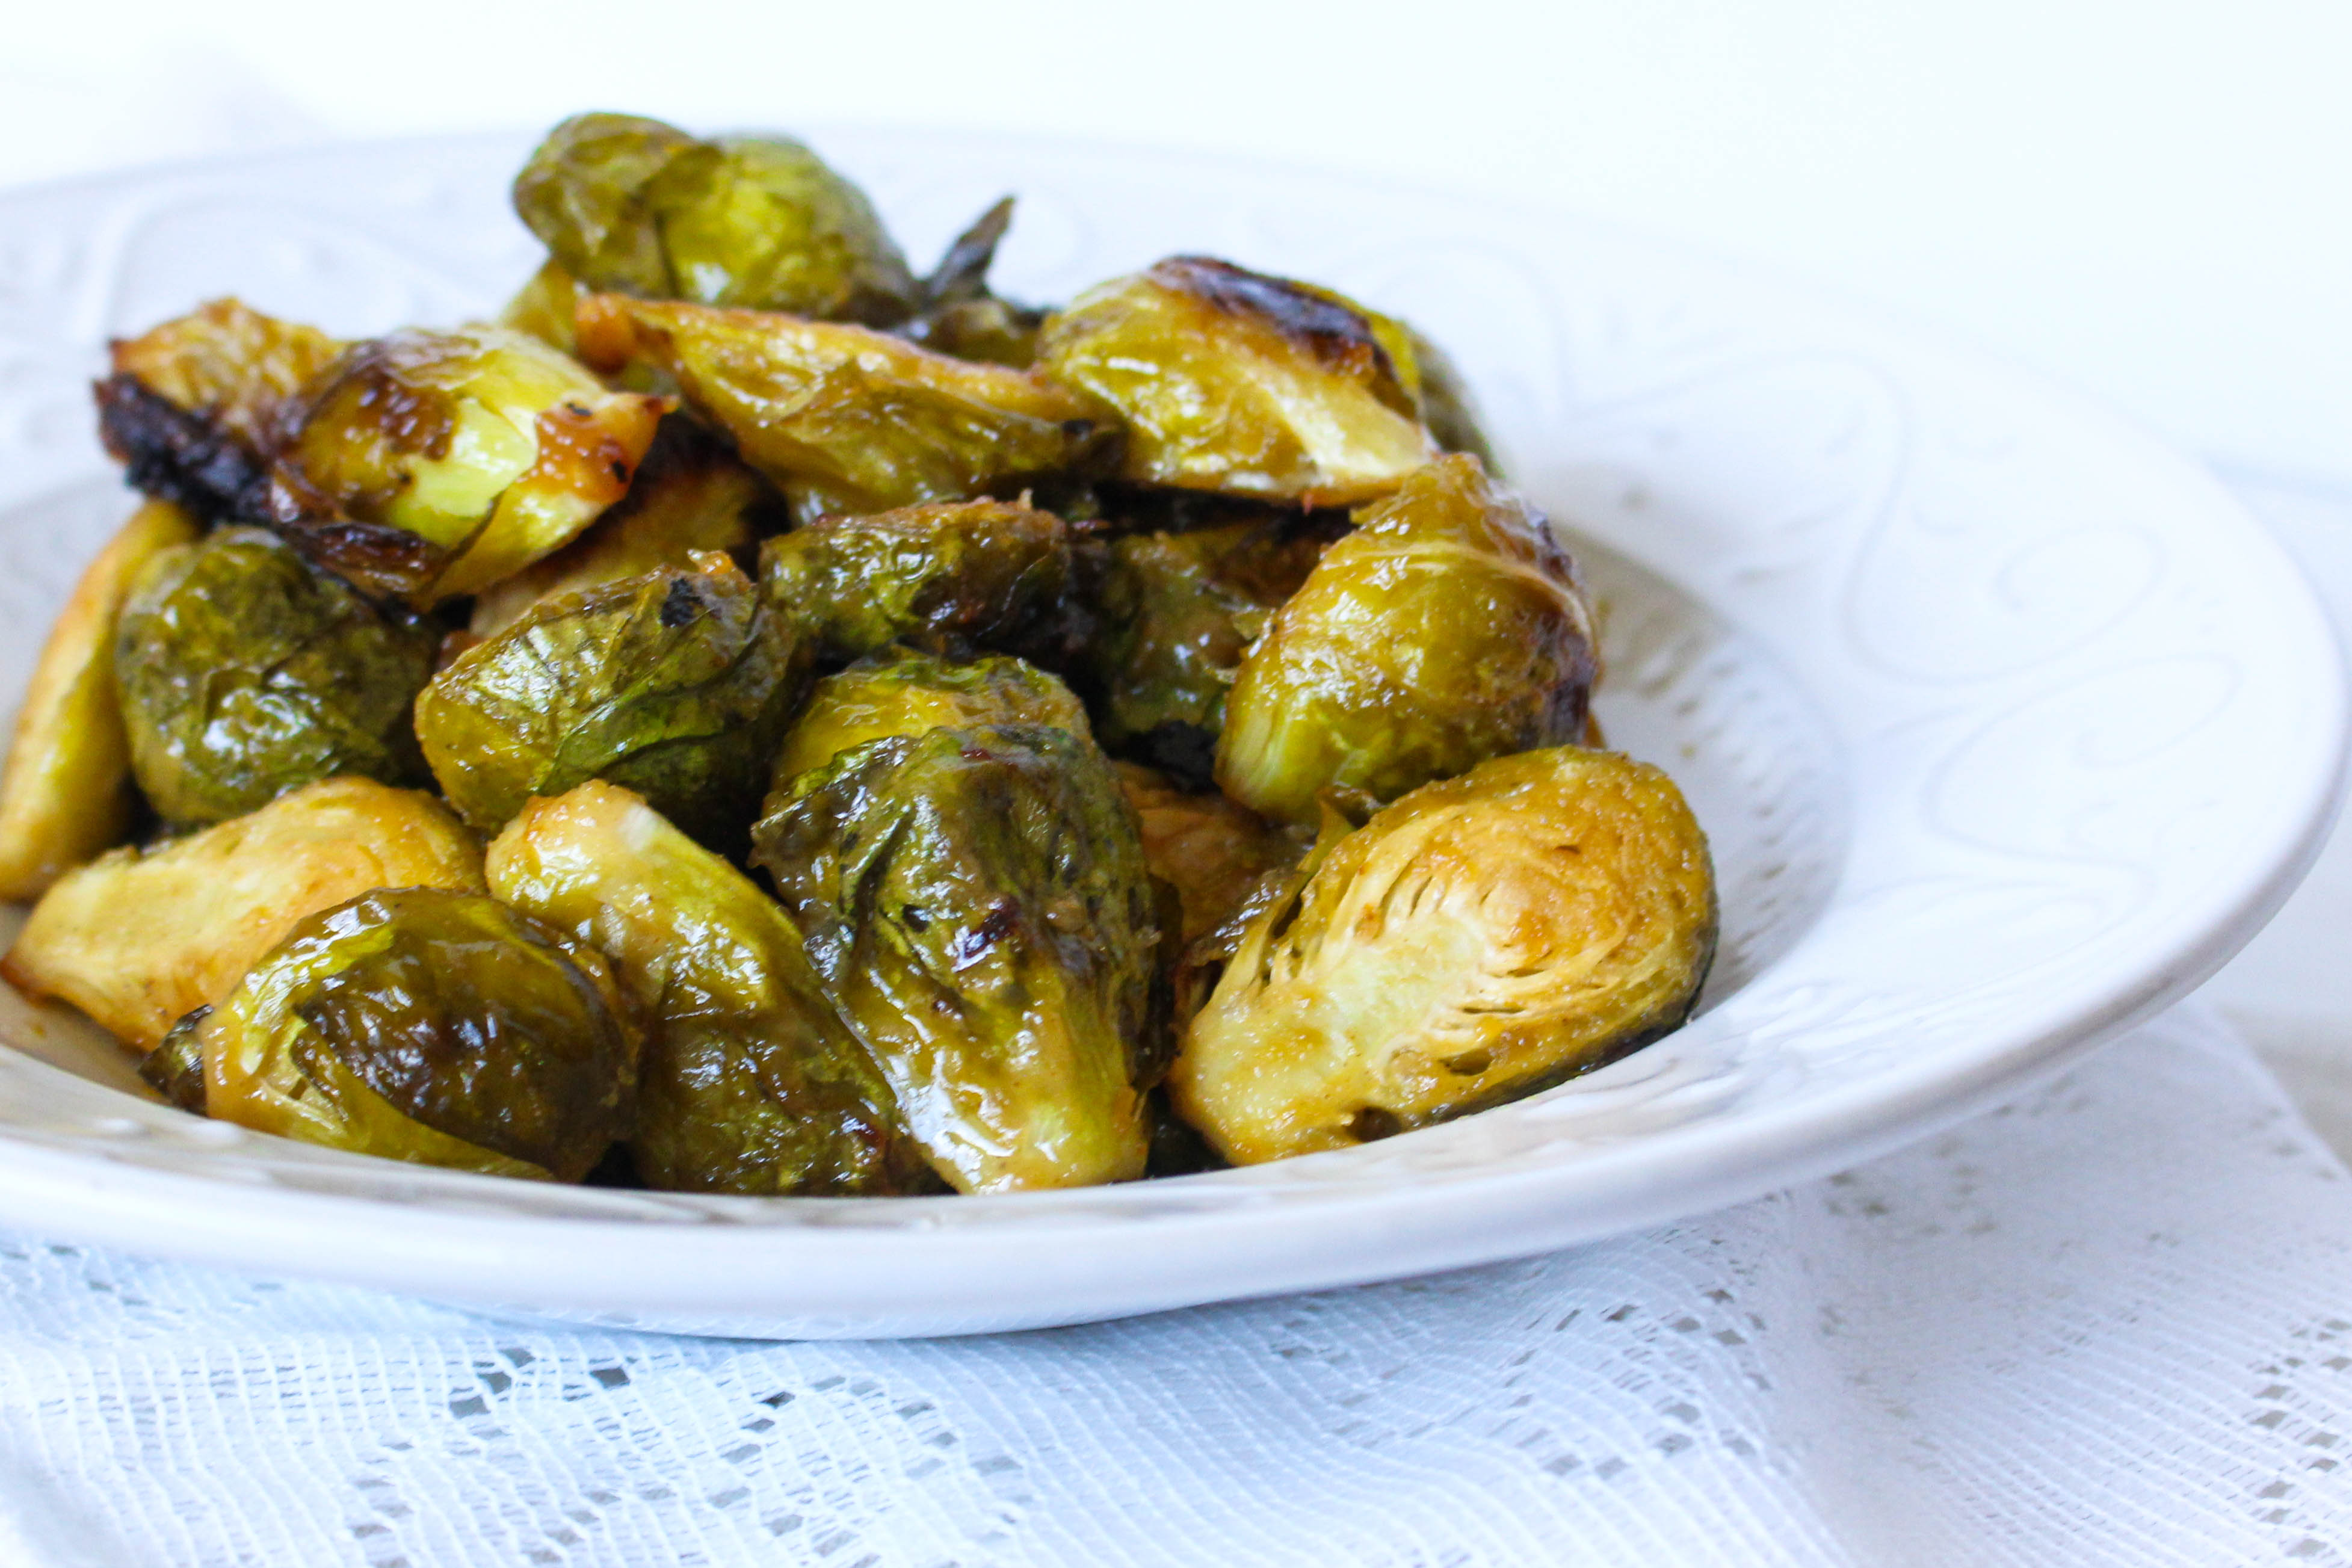
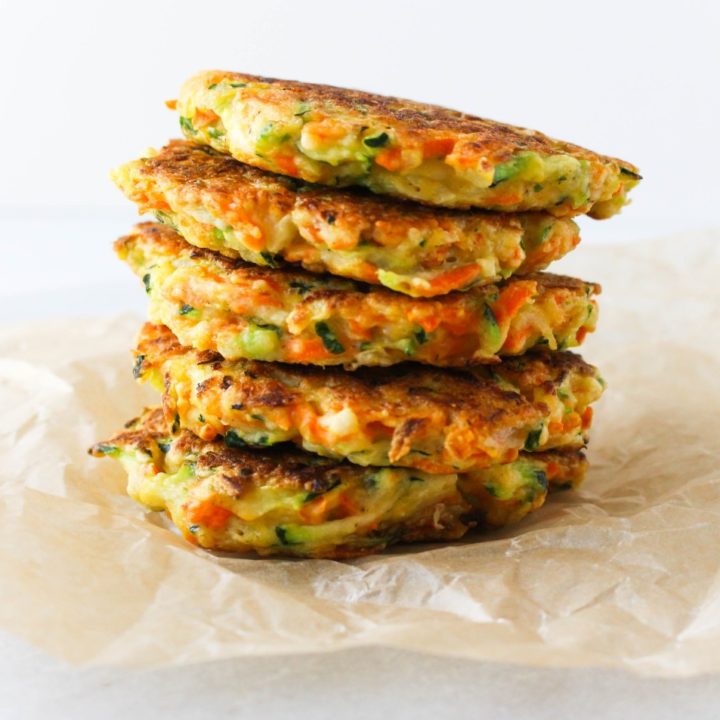
For the future when you need a savory zucchini side dish try these Zucchini Carrot Fritters.

green zucchini smoothie on a board next to white towel and diced zucchini pieces

Healthy Zucchini Smoothie Ingredients

Check out all of the vitamins, minerals, and antioxidants that are packed in every glass you make!

Banana: rich in potassium and fiber
Zucchini: vitamins C and A, potassium, folate, and fiber
Spinach: potassium, magnesium, and vitamins B6, B9, and E, high amounts of carotenoids, vitamin C, vitamin K, folic acid, iron, and calcium
Walnuts: rich in omega-3 fats, protein, copper, manganese
Cinnamon: polyphenol antioxidants
Ginger: anti-inflammatory and antioxidant properties
Orange Zest: fiber, vitamins, and polyphenols

Smoothie Meal Prep Tips

If you are a beginner at making smoothies, I recommend starting with baby spinach. It’s a neutral veggie that blends well. Honestly, if you are using nut butters, protein powder, and/or berries; all of those ingredients overpower the taste of the spinach. You can’t even tell it’s in there!

PRO TIP: After you open your spinach (the kind in the plastic containers from the store) place a paper towel on top. This keeps the condensation from the lid off the greens and makes it stay fresher a little longer.

Chop and steam your zucchini before adding it to your smoothie. Not only does it blend better this way, but your body can absorb more nutrition. When you steam the zucchini, it breaks down the cell wall and opens up the micronutrients, which makes it easier for your body to absorb and digest.

Transfer the steamed zucchini to a parchment-lined baking sheet and place it in the freezer (this is also a good tip for berries too). Once they are frozen, place them in small plastic bags so you can easily toss them in the blender the next time you go to make a smoothie.

You can watch the video for all of the smoothie tips if you want!

healthy zucchini smoothie in a small glass with paper straw next to diced zucchini pieces
Print
clock clock iconcutlery cutlery iconflag flag iconfolder folder iconinstagram instagram iconpinterest pinterest iconfacebook facebook iconprint print iconsquares squares iconheart heart iconheart solid heart solid icon
Zucchini Bread Smoothie via Chef Julie Harrington, RD @ChefJulie_RD #zucchini #zucchinibread #smoothie

Zucchini Bread Smoothie

  • Author: Chef Julie Harrington, RD
  • Prep Time: 10 minutes
  • Total Time: 10 minutes
  • Yield: 1 serving 1x
  • Category: Drinks
  • Cuisine: American

Description

Zucchini bread in smoothie form, while adding in extra veggies!


Ingredients

Scale
  • 1 small banana (frozen)
  • 1/2 cup zucchini (chopped, steamed, and frozen)
  • 1 cup baby spinach
  • 1 tablespoon walnuts, chopped (or 1 tablespoon Pamela’s Nut Flour Blend)
  • 1/4 teaspoon cinnamon
  • 1/4 teaspoon ground ginger
  • 1/2 teaspoon orange zest
  • 1 cup unsweetened vanilla almond milk (or milk of choice)

Instructions

  1. In a blender, combine all ingredients. Blend until smooth and creamy.
  2. For a thicker consistency, add ice. For a thinner consistency, add water.

Keywords: smoothie, drink

Recipe Card powered byTasty Recipes

This post contains affiliate links. Read full disclosure here.

Other recipes you may enjoy

Roasted Maple-Mustard Glazed Brussels Sprouts

Roasted Maple Mustard Brussels Sprouts have just enough tang and the right amount of sweetness! The perfect side dish that pairs well with just about any meal! 

close up of maple mustard glazed brussels sprouts in a white bowl

Some people may turn their nose up at the thought of Brussels sprouts, but honestly, they just need to try cooking them a different way! The maple mustard glaze brings in so much flavor, adding a twist to just regular roasted sprouts. 

With the holiday season just around the corner, these become a staple around our house. Once you try them I promise you will be eating this delicious side dish all year long! 

Because this is a sheet pan recipe, it’s easy to make and almost hands off! So while these are great during the week, you can easily double or triple the recipe to feed a larger crowd without much more prep work.

Why I Love Brussels Sprouts

For starters, brussels sprouts are packed full of nutrients and rich in Vitamin K and Vitamin C. They also contain an antioxidant called kaempferol, that may help to reduce inflammation and promote a healthy heart. 

If you aren’t a seafood lover, double up on your Brussels because they are one of the best plant-based sources of omega-3s! 

So besides all of the amazing health benefits, Brussels sprouts can be cooked in so many ways which makes them really versatile in the kitchen.  Simply changing out the sauce, glaze, or seasoning offers a whole new side dish. Let’s not forget they are great in salads when they are shredded too! 

top shot of roasted maple mustard brussels sprouts in a white bowl

Ingredients for Maple Mustard Brussels Sprouts 

lemon juice

Dijon mustard

maple syrup

olive oil

salt and pepper

Brussels sprouts

How to Make Roasted Maple Mustard Brussels Sprouts 

Prep your baking sheet by spraying it with non-stick spray or using parchment paper and preheat your oven to 400 degrees. 

Whisk together the lemon juice, mustard, maple syrup, oil, salt, and pepper in a large bowl. 

Once you have halved and trimmed the Brussels sprouts, mix those in and stir until they are fully coated. 

brussels sprouts roasted with a maple mustard glaze in a white bowl

Pour the mixture in an even layer onto the baking sheets. You can drizzle the remaining glaze over if there’s any left in the bowl. 

Roast for about 30 minutes or until the brussels are tender and caramelized. Stir them occasionally or flip with a spatula half way through. 

Can You Use Frozen Brussels Sprouts? 

You can if that’s all you have. Allow them to thaw completely before roasting.

Print
clock clock iconcutlery cutlery iconflag flag iconfolder folder iconinstagram instagram iconpinterest pinterest iconfacebook facebook iconprint print iconsquares squares iconheart heart iconheart solid heart solid icon
roasted brussels sprouts in a white dish

Roasted Maple-Mustard Glazed Brussels Sprouts

  • Author: Chef Julie Harrington, RD
  • Prep Time: 5 mins
  • Cook Time: 30 mins
  • Total Time: 35 mins
  • Yield: 4
  • Category: side dish
  • Method: roasting

Ingredients

Scale
  • 1 1/2 tablespoons lemon juice
  • 2 1/2 tablespoons Dijon mustard
  • 1 1/2 tablespoons maple syrup
  • 3 tablespoons olive oil
  • salt and pepper, to taste
  • 2 lbs. Brussels sprouts, halved and trimmed

Instructions

  1. Preheat oven to 400 degrees F. Prepare a large baking sheet with cooking spray and set aside.
  2. In a large bowl, whisk together the lemon juice, Dijon mustard, maple syrup, olive oil, and salt and pepper.
  3. Mix in the Brussels sprouts until they are fully coated. Pour the Brussels sprouts on an even layer on the baking sheet, drizzling any remaining glaze on top.
  4. Roast for 25-30 minutes, stirring occasionally. Brussels sprouts should be tender and caramelized to your desired doneness.

Keywords: Brussels sprouts, roasting, vegetable side dish

Recipe Card powered byTasty Recipes
Chef Julie Harrington, RD - Culinary Nutrition Consultant of chefjulierd.com
close up of roasted brussels sprouts with a maple mustard glaze with text overlay

Strawberry Rhubarb Crisp with Streusel Topping

This ​​Strawberry Rhubarb Crisp is an easy fruit dessert that can be made year-round and what makes it even better is the oat streusel topping! 

strawberry rhubarb crisp on small white plate next to baking dish and whole strawberries

Normally we see fruit desserts throughout the spring and summer seasons, but Strawberry Rhubarb crisp can truly be made any time of the year! 

Both of these fruits are filled with antioxidants and packed full of vitamins and nutrients that have anti-inflammatory properties and have been shown to decrease risks of certain diseases. 

Did you know that frozen fruit is just as healthy as fresh? Fruits are picked and frozen at peak ripeness, and studies show that they retain a comparable vitamin, mineral, and phytochemical content to their fresh counterparts.

If you love recipes that have a crisp topping, don’t leave before you check out my Almond Pear Crisp for Two!

Crisp, Cobbler, Crumble: What’s the Difference?

Sometimes these terms are used interchangeably but there is actually a difference! All of these types of recipes usually contain fruit, but it’s the topping that makes the difference! 

A cobbler typically has a doughy, biscuit-like topping. When you think of cobblers you are probably thinking about your grandma’s traditional recipe that has been passed down for ages! 

Crumbles are more like a streusel topping, but they don’t contain any oats. 

If it’s a true crisp, it will definitely have oats in the topping! 

ingredients for strawberry rhubarb crisp

What You Need to Make Strawberry Rhubarb Crisp with Streusel Topping


For the filling:

fresh strawberries

rhubarb 

granulated sugar – you can also swap this for coconut or maple sugar

cornstarch

lemon juice

salt

For the topping:

light brown sugar

old-fashioned rolled oats – Bob’s Red Mill is a great option! 

whole-wheat pastry flour

unsalted butter – be sure to set it out in time so it can soften up

How to Make a Crisp with Strawberries and Rhubarb 

Go ahead and preheat your oven to 350 degrees and spray your baking dish with non-stick cooking spray. 

diced strawberries and rhubarb in a white mixing bowl

In a large mixing bowl, combine granulated sugar, lemon juice, cornstarch, strawberries, rhubarb, and salt. Stir together then transfer the mixture to your baking dish. 

strawberry rhubarb mixture in baking dish before topping has been added

Now let’s make the streusel topping! 

In a medium bowl, add the oats, flour, brown sugar, and 4 tablespoons of butter. Stir it all together until it’s combined well. Add additional butter ( one to two tablespoons) if it seems too dry. 

top shot of streusel top in glass mixing bowl

Crumble the topping over the mixture into a baking dish. 

Bake until the top of the crisp is golden, which will take about 35 to 50 minutes. 

Once it has finished baking, let it cool on a wire rack before serving. 

You can serve it warm or at room temperature! 

close up of strawberry rhubarb crisp in white baking dish next to bowl of strawberries

What If I Don’t Have Whole Wheat Pastry Flour?

A nice substitute when you don’t have whole wheat pastry flour is a 1:1 ratio of all purpose flour and whole wheat flour. 

strawberry rhubarb crisp on small white plate next to fork and strawberries

Crisp Topping and Serving Suggestions

This strawberry rhubarb crisp is perfect just the way it is, but here are some great ideas for serving and other variations

  • Serve with a scoop of your favorite vanilla ice cream 
  • Add a dollop of my Homemade Coconut Whipped Cream
  • Sprinkle some nuts into the streusel topping for a nice crunch

Can This Recipe Be Made Vegan Friendly? 

Sure! To make this crisp vegan, simply use a plant based butter!

Need a Gluten Free Option?

If you want to make the topping using gluten free ingredients, make sure the oats are gluten free and swap the pastry flour or almond flour instead! 

strawberry rhubarb crisp after baking next to whole strawberries

Can You Use Frozen Strawberries and Rhubarb? 

If you want to make this fruit crisp and you don’t have a chance to grab fresh strawberries and rhubarb, or maybe they are out of season you can use frozen instead. 

Be sure that the fruit is thawed completely and drained so that the crisp does not come out soggy from the excess liquid.

Print
clock clock iconcutlery cutlery iconflag flag iconfolder folder iconinstagram instagram iconpinterest pinterest iconfacebook facebook iconprint print iconsquares squares iconheart heart iconheart solid heart solid icon
strawberry rhubarb crisp on small white plate next to fork and strawberries

Strawberry Rhubarb Crisp with Streusel Topping

  • Author: Chef Julie Harrington, RD
  • Prep Time: 15
  • Cook Time: 40
  • Total Time: 55 minutes
  • Yield: 6
  • Category: dessert
  • Method: bake

Description

This ​​Strawberry Rhubarb Crisp is an easy fruit dessert that can be made year round and what makes it even better is the oat streusel topping! 


Ingredients

For the filling:
3 cups quartered fresh strawberries
3 cups sliced fresh rhubarb or thawed frozen rhubarb*
¼ cup granulated sugar
1 tablespoon cornstarch
1 tablespoon lemon juice
¼ teaspoon salt

For the topping:
½ cup lightly packed light brown sugar
½ cup old-fashioned rolled oats
⅓ cup whole-wheat pastry flour
4–6 tablespoons unsalted butter, softened


Instructions

  1. Preheat the oven to 350 degrees F. Coat an 11-by-7-inch baking dish with cooking spray.
  2. In a large bowl, combine strawberries, rhubarb, granulated sugar, cornstarch, lemon juice, and salt, transfer to the prepared baking dish.
  3. To prepare topping: Combine brown sugar, oats, flour, and butter (starting with 4 tablespoons of butter) in a medium bowl; stir until thoroughly combined. If mixture seems to dry, add additional 1-2 tablespoons of butter. Crumble the topping evenly over the strawberry-rhubarb mixture.
  4. Bake the crisp until the topping is golden, 35 to 40 minutes. Cool on a wire rack for 5 minutes; serve warm or at room temperature.

Notes

  • If using frozen rhubarb or strawberries, thaw then be sure to drain any excess liquid.

Keywords: crisp, strawberry, rhubarb, summer dessert, dessert

Recipe Card powered byTasty Recipes

Edamame Avocado Hummus

Move over chickpea hummus. There’s a new hummus in town – Edamame Avocado Hummus. 

Edamame Avocado Hummus ingredients in a food processor

I recently did a presentation about smart snacking. One thing I like to mention about smart snacking is to opt for real food first. Snacking is an opportunity for nourishment. 

Yes, grabbing a bar is quick (some bars do pack in great nutritional value), but really think about your snacks throughout the day. How many of them are real food vs. processed foods?

Edamame Avocado Hummus in a small white bowl

I’ve been challenging myself to include more veggies into my snacks. I go through snacking phases, and raw veggies have fallen out of my routine a little bit.

Snacking is more fun when you are dunking. I love dunking my veggies into hummus, but I decided to switch it up a bit and use edamame as the base instead of chickpeas. Edamame, a plant-based protein is a young soybean that has been harvested before the beans have had a chance to harden.

Edamame Avocado Hummus in a white bowl with carrots and crackers

Adding avocado to the edamame helps make this dip creamy. Avocados can act as a booster to help your body absorb fat-soluble nutrients from the foods eaten with them, like vitamin A. Vitamin A foods, like carrots, contain carotenoids, which not only promote healthy skin but benefit the heart and immune system as well. This vitamin is a potent antioxidant that protects the skin from free radicals. So, pair carrot sticks with this delicious dip!

carrot being dunked into green dip
Print
clock clock iconcutlery cutlery iconflag flag iconfolder folder iconinstagram instagram iconpinterest pinterest iconfacebook facebook iconprint print iconsquares squares iconheart heart iconheart solid heart solid icon
Edamame Avocado Hummus in a white bowl

Edamame Avocado Hummus

  • Author: Chef Julie Harrington, RD
  • Prep Time: 10 minutes
  • Total Time: 10 minutes
  • Yield: 8
  • Category: dip
  • Method: no-cook

Ingredients

Scale
  • 1 cup frozen shelled edamame, thawed
  • 1/2 large avocado
  • 1 tbsp fresh lemon juice
  • 2 cloves garlic, minced
  • 1 teaspoon tahini
  • 1/2 teaspoon onion powder
  • 1/8 teaspoon ground pepper
  • pinch of salt
  • 2 tbsp avocado oil (can sub olive oil)

Instructions

  1. Add edamame, avocado, lemon juice, garlic, tahini, onion powder, pepper and salt in a food processor. Pulse for 30 seconds and scrape down sides.
  2. Slowly drizzle in oil while motor is running and pulse until reach desired consistency.

Keywords: hummus, avocado, edamame, dip

Recipe Card powered byTasty Recipes

Other recipes you may enjoy

Blueberry Chia Jam

This Blueberry Chia Jam has now become a staple in my refrigerator. With just four simple ingredients you have a delicious and flavorful jam without excess sugar. Mix and match or combine different berries for a variety of flavor combinations.

Blueberry Chia Jam in a small mason jar with a wooden spoon

HOW TO MAKE CHIA JAM

You might see a few variations of chia jam recipes floating around the internet, but after testing this recipe a few times, here are some tips I’ve gathered.

STOVETOP METHOD

Simply heat frozen berries and water over low-medium heat and gently simmer for the berries to defrost and their natural sugars begin to breakdown. Avoid using high heat as the berries will not defrost evenly and the natural sugars of the berries will scorch the bottom of your pan.

Using a potato masher or the back of a fork, mash the blueberries so they burst. The jam may look still very liquidy at this point. Remove from heat and stir in the vanilla extract, chia seeds, and sweetener, if using. The chia seeds thicken the jam as it rests and begins to cool.

MASHED VS. BLENDED

Simply leave the jam as is, mashed and chia seeds fully intact if you enjoy the texture and a chunkier jam. Or opt for a smoother consistency and pulse in a food processor or blender until you reach the desired consistency.

Blueberry Chia Jam on a slice of whole wheat toast with peanut butter

HEALTH BENEFITS OF WILD BLUEBERRIES

All blueberries are not alike! By nature, wild ones have a more intense flavor, deeper blue color, and 2x the antioxidants than their regular cultivated blueberries.

Ever wonder why you can only find wild blueberries in the frozen department? Wild Blueberries are frozen fresh within 24 hours of harvest when their flavor and antioxidant goodness are at their peak. In fact, tiny, potent wild ones contain less water than regular blueberries, so they freeze better than ordinary, larger blueberries.

FLAVOR VARIATIONS

Utilize this recipe as the base and mix and match with other berries or berry combinations. Try a mixed berry combination using blueberries, strawberries, and raspberries or go for a bold combination of a mixture of cherries and blackberries. Thinking about going tropical and using pineapple or mango? I would recommend using white chia seeds vs. black chia seeds.

ADJUST FOR SWEETNESS

This is a much lower sugar jam than those found on the grocery store shelves. Highlighting the fruits natural sugars is the star of this recipe, but an optional sweetener can be added in if desired.

Blueberry Chia Jam in a small mason jar

HOW TO USE CHIA JAM

Use this jam anywhere you would typically use any jam or jelly. Spread on toast, top on oatmeal, or swirl into yogurt.

Print
clock clock iconcutlery cutlery iconflag flag iconfolder folder iconinstagram instagram iconpinterest pinterest iconfacebook facebook iconprint print iconsquares squares iconheart heart iconheart solid heart solid icon
Small mason jar filled with blueberry jam

Blueberry Chia Jam

  • Author: Chef Julie Harrington, RD
  • Prep Time: 2 minutes
  • Cook Time: 10 minutes
  • Total Time: 12 minutes
  • Yield: 10 1x
  • Category: dip/spread
  • Method: stove top

Description

A few simple ingredients and you can whip up this jam in no time. Mix and match with different berries for a variety of flavors.


Ingredients

Scale

1 cup frozen wild blueberries
1/2 cup water
1/4 teaspoon vanilla extract
1 1/2 tablespoons chia seeds
optional sweetener: 1 tablespoon maple syrup or sugar


Instructions

  1. Add frozen blueberries to a small saucepan and heat over low-medium heat, stirring occasionally. Once the berries have thawed and started to break down, use a fork or potato masher to break them down further. 
  2. Stir in vanilla extract, chia seeds, and sweetener of choice, if using. Remove from heat and allow jam to cool and thicken for about 5-10 minutes.
  3. Spoon into a mason jar as is and store in the refrigerator. (Alternative method: Add jam to a food processor or blender and puree until desired consistency is reached. Spoon into a mason jar and store in the refrigerator. 

Notes

Store jam in the refrigerator for up to a week. 

Keywords: blueberry chia jam, jam, chia, blueberries, wild blueberries, low sugar

Recipe Card powered byTasty Recipes

Other recipes you may enjoy

Other recipes you may enjoy

Green Bean Potato Salad

Gearing up for picnics and barbecues this summer? Add this Green Bean Potato Salad to the menu.

Green Bean Potato Salad in a wooden bowl

One of my jobs during summers at college, I was working at this outdoor catering company, where we prepared food on-site at graduation parties, barbecues, picnics, etc. When working in catering, you have to prepare recipes in large quantities to feed the masses. One of my least favorite things to prepare is the potato salad.

Green Bean Potato Salad in a wooden bowl

Traditional potato salad is dressed with mayonnaise. That is one condiment that I just never enjoyed. Now, just imagine preparing potato salad for 100+ people at one time. The amount of mayo I had to scoop daily was unreal.

Since I don’t personally enjoy mayonnaise, I wanted to create a non-mayo based dressing for potato salad with an added twist by adding green beans and corn. Don’t be afraid to switch up a classic and bring something new to the table, like this Green Bean Potato Salad.

Why use red bliss potatoes for this Green Bean Potato Salad

Red potatoes have smooth thin skin. Its skin is edible, so it’s not necessary to peel or remove it after cooking. Like many waxy varieties, red potatoes are low in starch and won’t produce a light, fluffy texture. They are best used for boiling and roasting and work well in dishes that would benefit from a potato that holds its shape, even when sliced and diced, like for this Green Bean Potato Salad.

Health benefits of potatoes

Poor potatoes have a bad reputation in some people’s eyes. “Oh, I can’t eat potatoes because they are too starchy” Yes, potatoes are starchy because they are carbohydrates and carbohydrates give us energy. Also, there are many nutritional benefits that potatoes provide our bodies. They are high in potassium, vitamin B6, and vitamin C. When enjoyed in moderation and prepared in a healthy way, potatoes can be a nutritious addition to your diet.

Culinary term: blanching & shocking

The word blanch refers to a cooking technique in which food is briefly immersed in steam or boiling water, usually followed by shocking, which is rapidly cooling the food in an ice bath or with cold air.

When you blanch food for the right amount of time it helps maintain flavor, color, texture, and nutritional value. No one wants limp and soggy green beans.

Print
clock clock iconcutlery cutlery iconflag flag iconfolder folder iconinstagram instagram iconpinterest pinterest iconfacebook facebook iconprint print iconsquares squares iconheart heart iconheart solid heart solid icon
green bean potato salad in a wooden bowl

Green Bean Potato Salad

  • Author: Chef Julie Harrington, RD
  • Prep Time: 5
  • Cook Time: 40
  • Total Time: 45 minutes
  • Yield: 10 1x
  • Category: side dish
  • Method: stove top
  • Cuisine: American

Ingredients

Scale

1 pound red bliss potatoes
2 ears of corn, shucked
1 pound French green beans, cut in half
1 lemon, juiced (or 2 tablespoons lemon juice)
2 tablespoons Dijon mustard
1/4 cup olive oil
salt and pepper, to taste


Instructions

  1. In a large pot add potatoes. Fill with water and bring to a boil and season with salt. Cook potatoes until fork tender, about 20 minutes (depending on the size of your potatoes).
  2. Using tongs, carefully remove the potatoes and let cool. Add corn to the boiling water. Cook for 10 minutes, or until corn is tender.
  3. Using tongs, carefully remove the corn and let cool. Add the string beans to the boiling water. Cook for about 3-5 minutes, or until green beans are tender. Drain green beans and immediately put them in an ice bath to stop the cooking process. When cooled drain green beans and let dry. 
  4. When potatoes are cooled, dice into cubes. Cut corn off the cob. (see notes below for a tip to do this easily)
  5. In a large bowl, whisk together lemon juice, Dijon mustard, and olive oil. Add potatoes, corn, and green beans. Toss to coat.
  6. Season with salt and pepper, to taste.
  7. Let the potato salad sit in the refrigerator for at least 30 minutes to let all the flavors marinate.

Notes

Tip to cut corn off the cob.

Substitution tip: Don’t have corn on the cob? Swap for sweet canned corn or frozen corn kernels. 

Keywords: potato salad, green beans, corn, potatoes, side dish, recipe

Recipe Card powered byTasty Recipes

This recipe was originally posted in July 2013. The photos and content of the post have been updated.

Other recipes you may enjoy

Tomato Cucumber Salad

With just five simple ingredients, this Tomato Cucumber Salad will become a regular side dish to serve up with any spring or summer recipe.

Tomato Cucumber Salad in a wooden bowl

Why I love this Tomato Cucumber Salad recipe

Who says salads have to start with a bed of lettuce? We’ve chatted before about how salads don’t have to be boring! What I love the most about this recipe is simple its ingredients, taking less than 10 minutes to put together, and can turn into so many new variations. (see below)

Using mini cucumbers is key

While any kind of cucumber can work in this recipe, I urge you to seek our mini cucumbers, because I think it really makes the recipe. No need to peel the skin. The skin of mini cucumbers is tender and delicate. Just simply slice into coins and they are ready to go.

When I develop a recipe, I always think about the perfect bite. When slicing mini cucumbers into a coin, it takes the same shape and size of the cherry tomatoes so you are able to get everything all in one bite. Plus, it’s more time consuming to peel, seed, and quarter a regular cucumber.

Recipe Tip

If you are using a conventional cucumber, I recommend removing the seeds. Why? Because they are bitter and don’t want any bitterness added to the dish. For a conventional cucumber, peel, scoop out the seeds, slice and cut in quarters for this recipe.
For other cooking tips, go here.

Tomato Cucumber Salad in a wooden bowl

How to make this Tomato Cucumber Salad

  1. Chop vegetables.
  2. Whisk together dressing.
  3. Toss together.
  4. Season with salt and pepper.
    It doesn’t get much easier than that!

Storage Tip

Keep this Tomato Cucumber Salad in an airtight container in the fridge for up to 5 days.

Tomato Cucumber Salad in a wooden bowl

Variations

Additions

Chickpeas: Drain and rinse a can or two of chickpeas and add to the mixture. This will add different textures, plus a good source of plant-based proteins

Feta cheese: I love feta cheese. Hold off on seasoning with salt and pepper at the end after tasting with the feta cheese. Feta cheese will add salt to the dish, so maybe a little sprinkle of pepper will be fine. Also, if making this dish in advance, add feta just before serving.

Red onions: The key is to thinly slice red onions, so they don’t overpower the whole dish. If you are looking for something a little sweeter or more tang, try adding my Quick Pickled Onions.

Print
clock clock iconcutlery cutlery iconflag flag iconfolder folder iconinstagram instagram iconpinterest pinterest iconfacebook facebook iconprint print iconsquares squares iconheart heart iconheart solid heart solid icon
baby cucumbers with cherry tomatoes in a wooden bowl

Tomato Cucumber Salad

  • Author: Chef Julie Harrington, RD
  • Prep Time: 10
  • Total Time: 10 minutes
  • Yield: 6
  • Category: salad
  • Method: no cook
  • Cuisine: American

Description

Light and refreshing salad to compliment any spring or summer dish. 


Ingredients

Scale

3 cups cherry tomatoes, halved
8 mini cucumbers, sliced into coins
2 tablespoons olive oil
1 tablespoon red wine vinegar
1/4 cup fresh basil leaves, chopped
salt and ground black pepper, to taste


Instructions

  1. Add cherry tomatoes and cucumbers to a large bowl.
  2. In a small bowl, whisk together the olive oil and red wine vinegar. Drizzle over cucumber and tomatoes. Add basil.
  3. Toss everything to coat. Season with salt and pepper, to taste.

Notes

Variations:
– Add chickpeas
– Add feta cheese

Keywords: cucumber, tomato, salad, no cook, vegetables, low carb, recipe

Recipe Card powered byTasty Recipes

Other recipes you may enjoy

Sesame, Carrot, & Cucumber Salad

Ribbon sliced vegetables in an Asian dressing is light and refreshing. This Sesame, Carrot, & Cucumber Salad is perfect for warmer weather and also a delicious change from a traditional salad.

Sesame, Carrot, & Cucumber Salad via Chef Julie Harrington, RD @ChefJulieRD - refreshing and light Asian inspired salad. #saladsthatdontsuck #carrot #cucumber #salad #Asiandressing #lowcarb #healthy #recipe

Utilize your vegetable peeler a little more than just removing the skin. No need for a fancy spiralizer. Simply continue to peel using your vegetable peeler to create delicate vegetable ribbons.

What are English Cucumbers?

I specifically used English cucumbers in this recipe. Why? Because English cucumbers (also known as burp-less, seedless, or hothouse cucumbers) taste is less bitter than conventional cucumbers, are milder and almost have a hint of sweetness. You can find them in the produce aisle wrapped in plastic. Conventional cucumbers are waxed protecting their skin, whereas English cucumbers are not and have a thinner more delicate skin that is protected by the wrapping.

Switch it up from your traditional lettuce-based salads and try something new! This quick and easy Sesame, Carrot, & Cucumber Salad is perfect to switch up your salad game in the warmer months.

Want to turn it more into a meal? Try adding shrimp on top.

Print
clock clock iconcutlery cutlery iconflag flag iconfolder folder iconinstagram instagram iconpinterest pinterest iconfacebook facebook iconprint print iconsquares squares iconheart heart iconheart solid heart solid icon
Sesame, Carrot, & Cucumber Salad in a white bowl with a vegetable peeler

Sesame, Carrot, & Cucumber Salad

  • Author: Chef Julie Harrington, RD
  • Prep Time: 15
  • Total Time: 15 minutes
  • Yield: 4-6 1x
  • Category: side dish
  • Method: no cook
  • Cuisine: Asian

Ingredients

Scale
  • 2 English cucumbers
  • 2 large carrots, peeled 
  • 1 tablespoon sesame oil
  • 2 tablespoons rice vinegar
  • 1 teaspoon sugar
  • 2 teaspoons low-sodium soy sauce
  • salt and pepper, to taste
  • 1 tablespoon toasted sesame seeds

Instructions

  1. Using a vegetable peeler, peel carrots and cucumbers into ribbons. Combine the cucumbers and carrots in a bowl. Set aside.
  2. In a small bowl, whisk together the sesame oil, rice vinegar, sugar, and soy sauce. Season with salt and pepper, to taste.
  3. Toss the cucumbers and carrots with the dressing. Sprinkle with sesame seeds. Chill for 20 minutes before serving.

Keywords: sesame, cucumber, carrot, salad, no cook, side dish, healthy, low carb

Recipe Card powered byTasty Recipes

other recipes you may enjoy

Roasted Sweet Potato Kale Salad

Salads don’t have to be boring! By adding cooked and raw elements like in this Roasted Sweet Potato Kale Salad can elevate any salad experience.

Roasted Sweet Potato Kale Salad in wooden bowl with wooden serving spoons

There is nothing worse when trying to enjoy a kale salad and your jaw becomes numb with all the chewing. It’s most likely that the kale wasn’t treated properly. Kale is very fibrous, but the simple technique of massaging kale can change your whole kale salad experience. I’ve talked all about this already here.

Salads don’t have to be boring! Mix and match with various food groups, flavors, and textures. I like to add both raw and cooked elements to add different depths of flavor.

Roasted Sweet Potato Kale Salad in a white bowl

Perfectly roasted sweet potatoes provide additional sweetness from their caramelization.

Tips to perfectly roast vegetables:

  • Cut vegetables approximately the same size. This will prevent smaller pieces from overcooking and larger pieces not being cooked through.
  • Don’t overdo it on the oil. One tablespoon of olive oil is enough for a full tray of vegetables. Instead of drizzling the oil when the vegetables are already on the sheet pan, toss in a large bowl then place vegetables on the sheet pan. This will ensure all vegetables are evenly coated.
  • Don’t crowd the pan. Vegetables should be an even layer on the sheet pan. Overcrowding can result in the vegetables steaming rather than roasting.
  • Stop stirring. Simply flip vegetables halfway through the cooking process. Constant stirring won’t allow the vegetables to caramelize evenly on each side.
  • Looking for easy cleanup. Line your baking sheet with parchment paper.
Roasted Sweet Potato Kale Salad in a wooden bowl with wooden serving utensils

With a little meal prep, this salad can come together in minutes. Roast sweet potatoes in advance, wash and chop kale, batch cook quinoa, and make the dressing. By getting the prep process started earlier on can help put meals together in minutes. With kale being very fibrous, it lasts longer in the refrigerator. I wash and chop kale for the week and store it in a breathable produce bag. Then, I can easily prepare a salad; add it to a smoothie, or sauté for a quick side dish.

Fun Fact:

Have you ever notices kale that has been sitting in the refrigerator for a longer period of time, the edges start to turn an orange/yellow color. Yes, the kale is aging, but it’s not going bad. As kale ages, the deep green chlorophyll color begins to fade and the vitamin A & C colors shine through. Kale is an excellent source of Vitamins A & C.

Print
clock clock iconcutlery cutlery iconflag flag iconfolder folder iconinstagram instagram iconpinterest pinterest iconfacebook facebook iconprint print iconsquares squares iconheart heart iconheart solid heart solid icon
Roasted Sweet Potato Kale Salad in a wooden bowl with wooden utensils

Roasted Sweet Potato Kale Salad

  • Author: Chef Julie Harrington, RD
  • Prep Time: 20
  • Cook Time: 30 minutes
  • Total Time: 50 minutes
  • Yield: 8
  • Category: Salad
  • Cuisine: American

Description

Salads don’t have to be boring! By adding cooked and raw elements like in this Roasted Sweet Potato Kale Salad can elevate any salad experience.


Ingredients

For the salad:
1 tablespoon olive oil
2 sweet potatoes, chopped, cut into cubes
8 cups kales, stems removed and chopped
1 cup quinoa, cooked
½ cup chopped walnuts
½ cup dried cranberries

For the dressing:
1/3 cup golden balsamic vinegar
¼ cup olive oil
2 cloves garlic, minced
1 tablespoon maple syrup
salt, to taste


Instructions

  1. Preheat the oven to 425°F and line a baking sheet with cooking spray or parchment paper.
  2. In a large bowl, toss sweet potatoes with olive oil and season with salt and pepper. Add to the baking sheet in an even layer. Roast for 30-40 minutes, flipping halfway through until sweet potatoes have caramelized and are fork tender. Remove from oven and let cool completely. 
  3. In a large bowl, add the kale and massage to become tender. Add the sweet potatoes, quinoa, walnuts, and dried cranberries. Toss to combine.
  4. In a mason jar, combine the balsamic vinegar, olive oil, garlic, and maple syrup. Secure lid and shake to combine. Season with salt and pepper to taste.
  5. Drizzle dressing over salad and toss to combine. 

Notes

The addition of feta cheese to this salad is great if desired. 

Keywords: salad, quinoa, sweet potato, kale, walnuts, cranberries, healthy

Recipe Card powered byTasty Recipes

Play around with this salad combination. For a more filling meal add protein, like beans, grilled chicken, shrimp, etc. Switch up the dressing. Add fresh fruit, like pears, apples, or pomegranate seeds too.

Instant Pot Steel Cut Oats (+ Freezer-Friendly Tip)

Make mornings easier by meal prepping a batch of Instant Pot Steel Cut Oats for the week and follow a simple freezer-friendly tip to enjoy steel cut oats in just minutes.

steel cut oats in a small white bowl with blueberries and sliced almonds

Who has time to make a fresh batch of steel-cut oats in the morning? If you do, more power to you, but like many, I prefer extra sleep vs. waking up earlier to make breakfast from scratch.

What Are Steel Cut Oats?

Steel cut oats are the least processed variety of oats, take the longest to cook, and maintain their texture better than others when it comes to a good bowl of oatmeal. It’s literally the whole oat, including the bran (the outermost layer). I previously talked about the differences between steel-cut, rolled, and quick oats.

Are Steel Cut Oats Healthy?

Yes! They are naturally gluten free for anyone with sensitivities and packed full of fiber. Most don’t know this, but one serving (without added toppings) has 7 grams of protein! Steel cut oats also have a lower glycemic index than others. Even if you don’t take the GI into consideration, know that this is a good concept for everyone, which means your body will digest it slower than other varieties and you will have less of a sugar spike.

steel cut oats in a metal measuring cup

Does Using the Instant Pot Save Time? 

By the time the Instant Pot comes to pressure, the cooking time, and the pressure release time it’s about the same. BUT the greatest thing is that it’s hands-free cooking. So no stirring constantly, wondering if they are ready, and you can do other stuff while you wait on your breakfast!

Instead of spending time each morning making a serving of steel-cut oats meal prep a large batch for the week. Steel-cut oats can easily be made over the stovetop, but I love using the Instant Pot to make steel-cut oats because just add your ingredients, press a few buttons, and done!

steel cut oats in a white bowl with toppings on a marble slab next to the Instant Pot

Ingredients for Instant Pot Steel Cut Oats 

steel cut oats
water
cinnamon sticks – if you don’t have these you can use ground cinnamon instead

How to Cook Steel Cut Oats in a Pressure Cooker

Pour the steel cut oats and water into the Instant Pot and stir. Add in the cinnamon sticks or ground cinnamon and stir once more. 

Place the lid on the Instant Pot and turn the valve to the sealing position. 

Cook for 6 minutes using manual pressure. 

When the timer goes off, allow the pressure cooker to release naturally for 20 minutes, then turn the valve to the venting position. 

Toss out the cinnamon sticks and give it a good stir. 

Serve with your favorite toppings!

Steel Cut Oatmeal Topping Ideas

I prefer to make the batch of steel-cut oats pretty plain because then there is the flexibility to add different toppings to create different flavor combinations. I do enjoy adding a cinnamon stick to the pot and the cinnamon flavor infuses into the oats. (This can easily be done with a few shakes of ground cinnamon too.) Here are some more ideas.

Bananas & Blueberries – a favorite combination! Add these on top just before serving

Syrup & Honey – Need just a touch of sweetness? Drizzle some maple syrup or honey over the oats once they come out of the Instant Pot 

Pumpkin – you could add a couple of spoonfuls of pureed pumpkin before cooking, great for the fall! 

Apples – because that just makes sense with cinnamon! Dice them into small pieces (as even as possible) and stir before you cook or after as a topping. 

  • Other fresh fruit and berries
  • Nuts (almond, walnuts, pecans) 
  • Splash of milk to thin it out if needed.
  • Nut or seed butter
  • Chia seeds or ground flax meal

frozen steel cut oatmeal in a jumbo muffin tin

How Long Do Steel Cut Oats Last After Being Cooked? 

Once you have pressure cooked them, they stay fresh when kept in the refrigerator for up to a week. 

If you want to batch, I recommend freezing them. 

After making a batch of these Instant Pot Steel Cut Oats, spray a jumbo muffin tin with cooking spray and scoop about a cup of oats into each muffin tin well. Then add your favorite topping combinations.

Once hardened, dip the bottom of the muffin tin in warm water to help remove the single-serving steel cut oat portions and freeze in a container or bag for later use.

Then, simply add a single-serving portion of oats to a microwave-safe bowl with a few drops of water, and reheat in the microwave.

Print
clock clock iconcutlery cutlery iconflag flag iconfolder folder iconinstagram instagram iconpinterest pinterest iconfacebook facebook iconprint print iconsquares squares iconheart heart iconheart solid heart solid icon
Instant Pot Steel Cut Oats in a white bowl topped with blueberries and almonds

Instant Pot Steel Cut Oats

  • Author: Chef Julie Harrington, RD
  • Prep Time: 5
  • Cook Time: 6
  • Total Time: 11 minutes
  • Yield: 6
  • Category: Breakfast
  • Method: Instant Pot

Ingredients

Scale

2 1/2 cups steel cut oats
7 cups water
2 cinnamon sticks (or 1 teaspoon ground cinnamon)


Instructions

  1. Add steel cut oats, water, and cinnamon sticks to the Instant Pot and stir to combine.
  2. Secure Instant Pot lid and close the vent. Set Instant Pot on the manual setting for 6 minutes.
  3. When Instant Pot beeps, allow the pressure to naturally release for 20 minutes.
  4. Remove lid, discard cinnamon sticks, and stir oats to incorporate any water that has risen to the top.
  5. Serve with your favorite toppings. (Combination recommendation: blueberries, sliced almonds, and honey)

Notes

Leftover oats can be stored in the fridge for up to a week or utilize the freezer-friendly method.

Freezer-Friendly Method:
Spray a jumbo muffin tin with cooking spray and scoop about a cup of oats into each muffin tin well. Then add your favorite topping combinations. Once hardened, dip the bottom of the muffin tin in warm water to help remove the single-serving steel cut oat portions and freeze in a container or bag for later use.

Keywords: oatmeal, Instant Pot, steel cut oats, breakfast, cooking tip, oats

Recipe Card powered byTasty Recipes

Other recipes you may enjoy