Step up your culinary game with this surprisingly easy Mediterranean Cod En Papillote made with Norweigian cod.
This post is sponsored by the Norwegian Seafood Council. Thank you for supporting brands that make this blog possible!
During this time, we are staying inside and limiting the number of trips to the grocery store. Rethink the protein choices on your grocery list. Add seafood! Build recipes around lean fish with pantry ingredients you have on hand. Just starting out cooking seafood? Simple is best! Only a few ingredients and seasonings are needed to make fish delicious.
Being strategic when grocery shopping and relying on pantry staples is key. Here in New Jersey, there are limits on amounts of certain proteins like chicken and eggs. At the grocery store, there is a whole department dedicated just to seafood. Don’t skip it!
Health benefits of eating more fish
Eating seafood two to three times per week reduces the risk of death from any health-related cause by 17 percent. New to adding seafood into your menu repertoire? Start with a mid-flavored, firm fish like cod. Norwegian cod to be exact!
Tips for buying fish
There are a lot of choices out there when it comes to seafood – both wild and farmed. The origin of the seafood is something you should be looking out for, as every country has completely different practices.
Sustainability has been one of the main objectives of the Norwegian fishing industry, and they are committed to producing seafood in a safe, controlled, and sustainable manner. And I know this because I actually traveled to Norway myself with the Norwegian Seafood Council and saw how seriously Norway takes sustainability and how strict regulations that maintain fish supply are meticulously upheld.
According to the USDA, Country of Origin Labeling (COOL) is a consumer labeling law that requires retailers (grocery stores and supermarkets) to identify the country of origin on certain foods, including wild-caught fish, farm-raised fish, and shellfish.
What does “en papillote” mean?
Don’t be intimidated by this recipe, en papillote is a culinary technique that any home cook can master in their kitchen.
The term en papillote (pronounced: ON pah-pee-YOHT) means “in paper” or “in parchment”. It is a moist-heat cooking method because it is the steam from within the package where the food is enclosed by parchment paper that cooks the food. More delicate proteins, such as fish or chicken, are more commonly cooked en papillote as they can be quickly cooked by this steaming method.
Steaming en papillote requires no special equipment other than parchment paper. The food won’t stick and parchment paper is easy to seal not allowing any liquid to escape. Just make sure to tightly seal the edges. Plus, clean up is easy – just toss the parchment when you’re done!
How to build flavors
The key to creating a flavorful en papillote dish is building flavors. When cooking en papillote, there are usually vegetables as the base with herbs and seasonings, topped off with the protein. The vegetables contain moisture and during the cooking process generate steam, which cooks the protein enclosed in the parchment pouch. Additional herbs and seasonings are used to build flavors. Mediterranean flavors inspired this recipe creation.
Get cooking together
This recipe is the perfect way to get everyone involved in the kitchen.
- Raid the pantry to play around with different spice and herb blends
- Get the family involved – everyone makes their own signature creation
- Little hands (kids) can help make this meal. Have them help stack the ingredients, wrap the parchment paper, etc.
Health Benefits of Cod
Norwegian Cod is a lean fish. It contains only up to 3% fat and almost no carbohydrates. It is an excellent source of:
- Protein
- Vitamins (such as B12)
- Selenium
- Omega-3 Fatty Acids (a meal-sized portion of cod delivers the recommended daily intake)
- Iodine
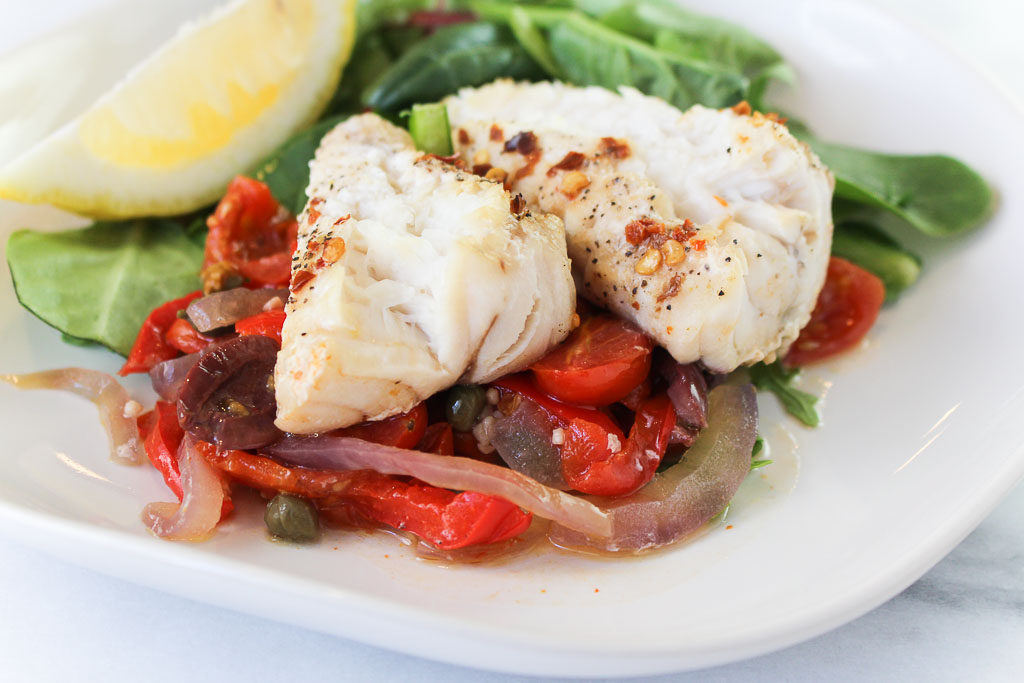
Mediterranean Cod En Papillote
- Prep Time: 10
- Cook Time: 20
- Total Time: 30 minutes
- Yield: 2
- Category: seafood
- Method: En Papillote
- Cuisine: Mediterranean
Description
Step up your culinary game with this surprisingly easy Mediterranean Cod En Papillote made with Norweigian cod.
Ingredients
2 (5-ounce) pieces of Norwegian cod (or other white fish like snapper, grouper, or monkfish)
salt
pepper
1/2 cup grape tomatoes, halved
1/4 cup kalamata olives, pitted and halved
2 tablespoons capers
1/4 cup red onion, thinly sliced
1/4 red bell pepper, thinly sliced
2 cloves garlic, minced
2 tablespoons olive oil
1 lemon, sliced
2 pieces of parchment paper
Instructions
Preheat oven to 400 degrees F. Pat cod dry and sprinkle with salt and pepper. Set aside.
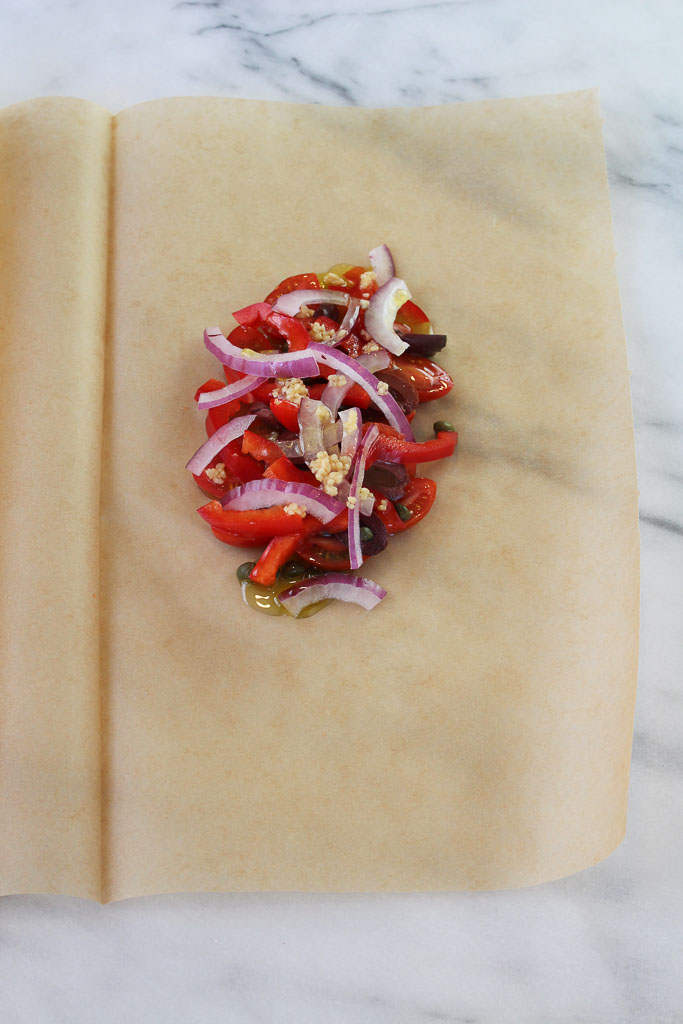
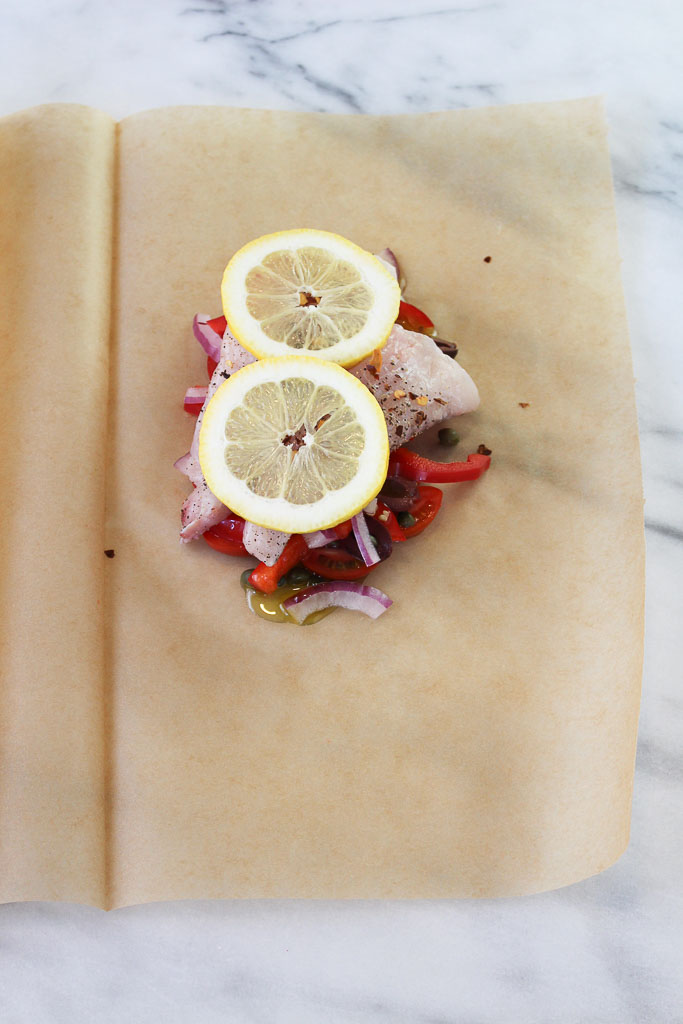
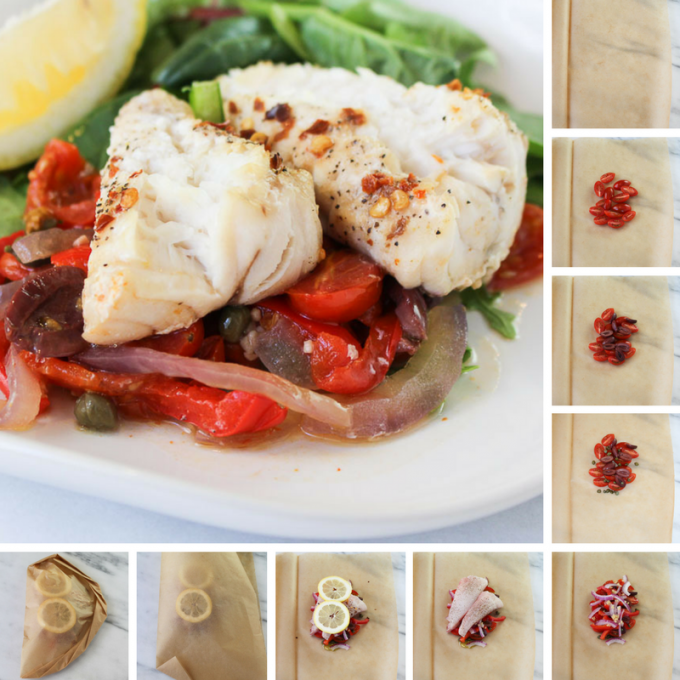
Fold the parchment paper in half. On one side of the parchment paper layer the tomatoes, olives, capers, onion, pepper, and garlic. Top with fillet, drizzle with olive oil, red pepper flakes (if using) and place lemon slices on top.
Fold the other half of the parchment paper on top and seal the edges making a small fold every 1/2-inch all the way around to create a half-moon shape. Repeat with another piece of parchment and remaining ingredients.
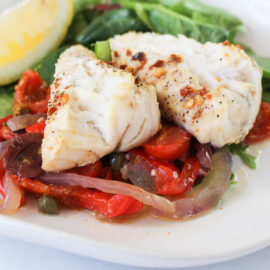
Place both pouches on a baking sheet. Bake for 15-20 minutes, until the parchment paper, has puffed up and fish is cooked through. Transfer to a plate and cut with scissors or unroll, being careful of the hot steam that will escape.
Keywords: cod, seafood from norway, En Papillote, fish, seafood recipe

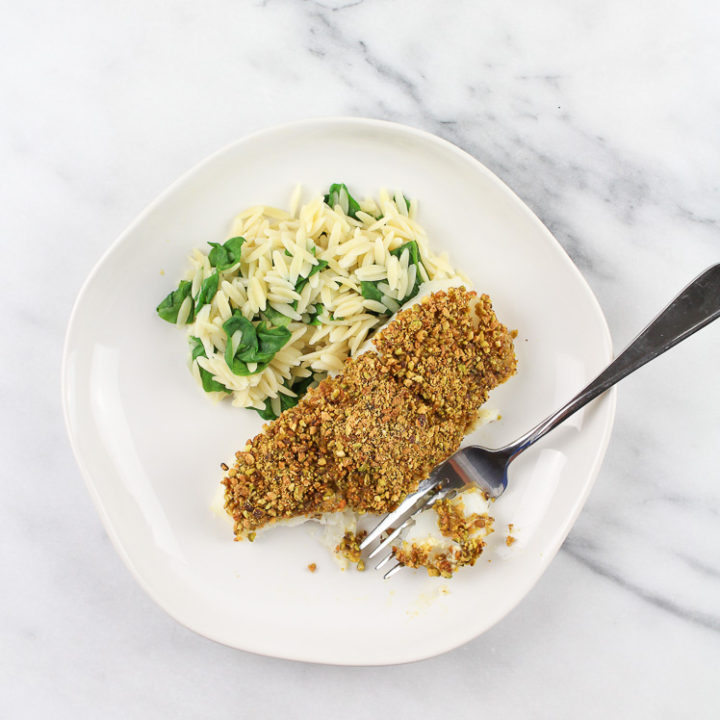
Other ways to prepare cod
- Baked
- Broiled
- Fried
- Sauteed
- Steamed
- Poached